


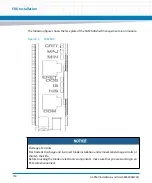


FRU Installation
AXP640 Installation and Use (6806800M24F)
157
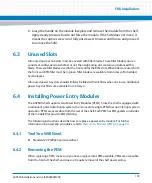
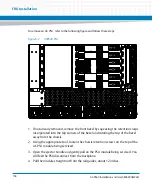
9. Verify that the PEM LED has changed from red to solid green. The PEM is now
operational.
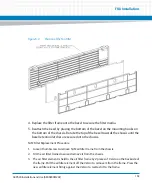
10.
Reattach the bezel. To attach the bezel, place the bottom of the bezel on the
mounting hooks on the bottom of the chassis. Rotate the top of the bezel towards
the chassis until the bezel retention latches are secured into the chassis.
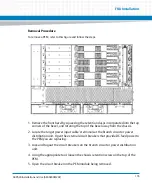
6.5
AC Power Supply Unit (PSU)
The following instructions describe how to remove and install an AC PSU.
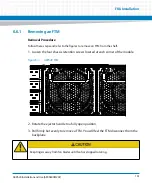
6.5.1
AC PSU Removal Procedure
When replacing an AC PSU, make sure you have a replacement PSU available. AC PSUs are
accessible from the front of the shelf, and do not require removal of the shelf power wiring.
Summary of Contents for AXP640
Page 1: ...AXP640 Installation and Use P N 6806800M24F May 2014 ...
Page 8: ...AXP640 Installation and Use 6806800M24F Contents 8 Contents Contents ...
Page 10: ...AXP640 Installation and Use 6806800M24F 10 List of Tables ...
Page 50: ...Platform Architecture AXP640 Installation and Use 6806800M24F 50 ...
Page 70: ...AXP640 Shelf Description AXP640 Installation and Use 6806800M24F 70 Figure 2 14 AC Inlet 220V ...
Page 101: ...Site Preparation AXP640 Installation and Use 6806800M24F 101 Figure 3 13 Planning Checklist 2 ...
Page 102: ...Site Preparation AXP640 Installation and Use 6806800M24F 102 ...
Page 112: ...AXP640 Operations AXP640 Installation and Use 6806800M24F 112 ...
Page 136: ...AXP640 Shelf Installation AXP640 Installation and Use 6806800M24F 136 ...
Page 164: ...FRU Installation AXP640 Installation and Use 6806800M24F 164 ...
Page 186: ...Shelf Management Alarm Module AXP640 Installation and Use 6806800M24F 186 ...
Page 189: ......