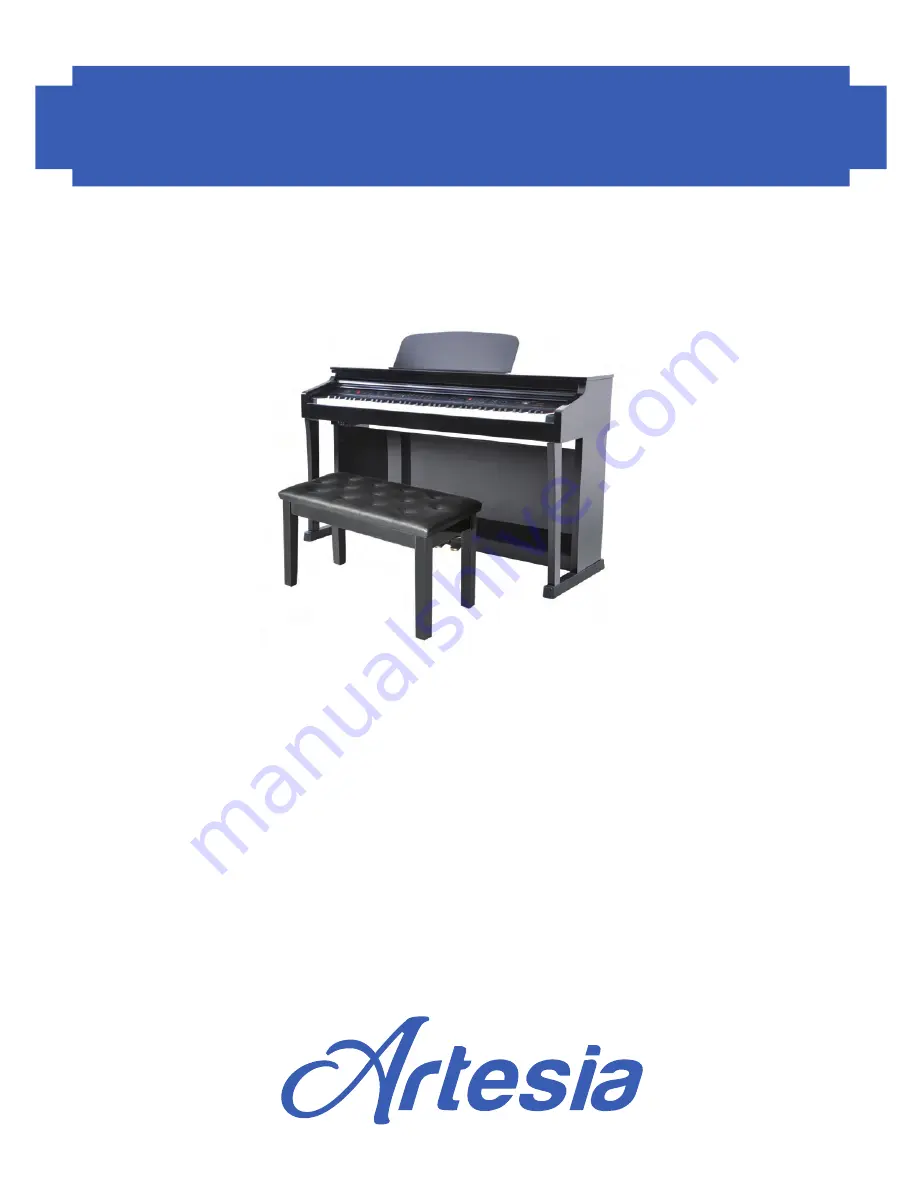
EASY ASSEMBLY GUIDE
IF YOU HAVE ANY QUESTIONS OR PROBLEMS
PLEASE CALL OUR TOLL FREE HELPLINE
ASSEMBLY GUIDE
888-998-9848
DO NOT RETURN TO THE STORE
AP-100 Upright Digital Piano
Page 1: ...EASY ASSEMBLY GUIDE IF YOU HAVE ANY QUESTIONS OR PROBLEMS PLEASE CALL OUR TOLL FREE HELPLINE ASSEMBLY GUIDE 888 998 9848 DO NOT RETURN TO THE STORE AP 100 Upright Digital Piano ...
Page 2: ...he stand as shown A B C D E F G H I J K L M N 1 UNPACKING YOUR NEW DIGITAL PIANO A Piano Body x1 B Left Side Leg x1 C Right Side Leg x1 D Back Panel x1 E Pedal Board x1 F Pedal Board Bolts x4 G Piano Body Bolts x6 H Back Panel Bolts w Washers x2 I Back Panel Screws w Washers x 4 J Mounting Screws x2 K Headphone Holder x1 L Phillips Screwdriver x1 M Power Supply Cable x1 N USB Audio Cable x1 Unboxi...
Page 3: ...ds pushing the guide rods on the bottom of the piano into the slots on the piano legs 5 Attach the AC Power Cord and Pedal Cable into their connectors on the bottom of the piano as shown 6 Turn the Pedal Support Bolt beneath pedals counter clockwise until the bolt firmly rests on the floor Fig 4 Fig 5 Fig 5 Fig 6 Fig 6 Fig 3 Fig 3 Fig 4 Fig 4 Attaching the Piano Body Final Set Up ...
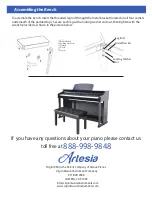
Page 4: ...info virginmusicalinstruments com www virginmusicalinstruments com To assemble the bench insert the threaded leg rod through the metal bracket located on all four corners underneath of the padded top Secure each leg with a locking washer and nut then tighten with the wrench provided as shown in the picture below Padded Bench Locking Washer 4 Wrench Nut 4 Leg 4 Locking Washer Metal Bracket Leg Rod ...