background image


9                         

Connecting the Car Charger

Figure.

Device power input is DC 5V to 12V. 

The car charger supplies power to your device when you are using the device 

in a car.   

CAUTION:

 Car charger output is 12V DC, do not use 

other device. If use with 

1A) together with the 


1. Connect one end of the car charger to the power connector of your 

device.   


2. Connect the other end to the cigarette lighter in the car to power and 

charge your device. The indicator on the car charger lights in 

indicate that power is being supplied to your device. 

Connecting to AC Power and Charging the Battery 

Figure. Connecting

                                                                                        ARISTO VOYAGER X500 User’s Manual


www.aristo.pl

Connecting the Car Charger 


Figure. Connecting the car charger


Device power input is DC 5V to 12V.   

The car charger supplies power to your device when you are using the device 

harger output is 12V DC, do not use this car charger 

with RDS/TMC, need to have another car charger (5V, 

1A) together with the RDS/TMC receiver from GNS. 

1. Connect one end of the car charger to the power connector of your 

2. Connect the other end to the cigarette lighter in the car to power and 

charge your device. The indicator on the car charger lights in 

indicate that power is being supplied to your device.   

Connecting to AC Power and Charging the Battery 


Connecting AC adapter (Optional Accessory)

ARISTO VOYAGER X500 User’s Manual


www.aristo.pl 

The car charger supplies power to your device when you are using the device 

this car charger for 

, need to have another car charger (5V, 

1. Connect one end of the car charger to the power connector of your 

2. Connect the other end to the cigarette lighter in the car to power and 

charge your device. The indicator on the car charger lights in amber to 

Connecting to AC Power and Charging the Battery   

(Optional Accessory)


Summary of Contents for Voyager X500

Page 1: ...1 USER S MANUAL Ver 01 11 2007EN ARISTO VOYAGER X500 User s Manual www aristo pl ARISTO VOYAGER X500 User s Manual www aristo pl ...

Page 2: ...ule ARISTO VOYAGER X500 User s Manual www aristo pl ARISTO VOYAGER X500 User s Manual describes Getting started Setting up Navigating and common Warning screens of your Read this guide in its entirety before attempting to use or Before getting started check that each item listed below in the package contents is accounted for and observe the outward features of the device ARISTO VOYAGER X500 Goosen...

Page 3: ...s solely responsible for the performance of GPS Any change to the GPS system can affect the accuracy of all GPS equipments GPS satellite signals cannot pass through solid materials except glass When you are inside a tunnel or building GPS positioning is not available A minimum of 4 GPS satellite signals is needed to determine current GPS position Signal reception can be affected by situations such...

Page 4: ...y amber when external power is connected and show flashing red when battery voltage is low f battery switch is turned off please fully charge device battery when battery switch is turned on again This will ensure battery to be precisely Do not immediately turn on your device after connecting the AC adapter depleted battery If you need to turn on the device again wait for at least one minute Do not...

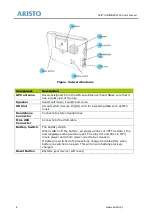
Page 5: ...RISTO VOYAGER X500 Figure Outward features Description Steady amber to indicate that external power is connected Flashing red to indicate battery power is low This connector under rubber dust cover allows use of an optional external antenna with magnetic mount which may be positioned on top of the car for better signal reception in areas with poor reception ARISTO VOYAGER X500 User s Manual www ar...

Page 6: ...e sky Sends out music sounds and voice Accepts a SD Secure Digital card for accessing data such as MP3 Connects to stereo headphones Connects to the USB cable The battery switch When switch off the battery all power will be cut off The date time and language setting will be reset The play list and titles in MP3 movie player and photo viewer need to be reloaded If battery is switched off please ful...

Page 7: ... When in the map screen You could add your favorite destination to bookmark by press this button Use the power button to turn on and off your device When you press the power button to turn off the unit your device actually enters a suspend state and the system stops operating Once you turn on the system again it resumes Adjusts the volume or backlight level of your device Figure Outward features C...

Page 8: ...low to connect the accessories to the device Connecting TMC Module Optional Accessory Place the device in such a way that the external antenna wire is routed conveniently out the driver s side window The magnetized antenna casing will attach firmly to the roof of your car Connecting external GPS active antenna Optional Accessory ARISTO VOYAGER X500 User s Manual www aristo pl diagram below to conn...

Page 9: ...ou are using the device harger output is 12V DC do not use this car charger with RDS TMC need to have another car charger 5V 1A together with the RDS TMC receiver from GNS 1 Connect one end of the car charger to the power connector of your 2 Connect the other end to the cigarette lighter in the car to power and charge your device The indicator on the car charger lights in indicate that power is be...

Page 10: ... AC adapter into a wall outlet Power Indicator shows steady amber to indicate AC adapter is correctly Do not immediately turn on your device after connecting the AC adapter depleted battery If you need to turn on the device again wait for at least one minute For optimal performance of the Li polymer battery take note Do not charge the battery where the temperature is high e g in direct There is no...

Page 11: ... adjust the arm of the car holder for the best viewing angle BEFORE driving Avoid adjusting the device with one hand The car holder consists of a bracket and a stand Use the car holder to fix your device in a vehicle Make sure that the GPS antenna has a clear view of the For initial positioning remain at the same spot with a clear view of The GPS may take a few minutes to find its current location...

Page 12: ...device later if the device controls fail to respond use the Reset button switch to restart the device a series of screens will be displayed First Choose your preferred language and tap OK Figure Setup language Figure Setup language setup screen to view the time zone settings screen Tap the arrow buttons to view the time zone selection For the time zones affected by seasonal daylight saving time us...

Page 13: ...to save changes or setup screen Figure Date Clock Next a calibration screen will appear The calibration screen will only appear on the initial start up and afterward can be accessed via Main menu ress and briefly hold a stylus or any similar non marking instrument on the Repeat as the target moves around the screen n is complete and you are instructed to press enter simply tap once more anywhere o...

Page 14: ...r s Manual www aristo pl Figure Calibration a warning will appear Read the warning carefully and tap Figure Warning displays power information and the main features of the which include touch screen icons for Photo and Movie Figure Main menu ARISTO VOYAGER X500 User s Manual www aristo pl a warning will appear Read the warning carefully and tap OK the main features of the screen icons for Navigati...

Page 15: ...ion and perform a factory reset via the icon To select an item from the setup screen simply tap its icon Tap the icon to go back to the main menu Figure Setup screen y to avoid the unexpected power on user may use the Once the lock switch has been set all buttons will be disabled the H W Reset button The padlock icon appears onscreen device is locked Power button is disabled when lock switch is sw...

Page 16: ... to view the language settings screen To set the default language for the device select your preferred ing the appropriate icon and then tap OK Figure Setup language Figure Setup language Calibration tap Setup Calibration to view the calibration settings screen To calibrate the touch screen icons tap Calibration on the calibration screen To return to the setup screen ARISTO VOYAGER X500 User s Man...

Page 17: ... once more anywhere on the screen Figure Calibration touch screen Backlight Setup Backlight to view the backlight settings screen Set the backlight brightness level for either day mode or night mode with the ing the left arrow will decrease brightness and the right arrow While using the device with the battery you can determine the default backlight display time so power isn t wasted by displaying...

Page 18: ...e plus or on the lower right side of the screen Tap the brightness icon that appears to auto mode and adjust the volume with the plus minus buttons or by tapping directly on the screen The auto backlight mode work senses ambient light conditions and dims the backlight to Figure Backlight volume quick adjustment buttons Figure Auto Backlight Mode ARISTO VOYAGER X500 User s Manual www aristo pl or m...

Page 19: ... zones affected by seasonal daylight saving time use the arrows to select Figure Time zone to view the Date and Clock setting screen set the date and time Tap OK to save changes or setup screen Figure Date Clock About Factory reset menu tap Setup About Factory reset to view the actory reset screen The about screen displays system information in features of the device including the OS music photo a...

Page 20: ... About button to reset the device s default settings When the factory reset screen appears tap Yes to apply the reset and no to return to OK to return to the setup screen Figure Setup Factory reset Navigation to launch the navigation software Figure Main menu ARISTO VOYAGER X500 User s Manual www aristo pl device s default settings When the to apply the reset and no to return to to launch the navi...

Page 21: ...player s controls tap MP3 to view the MP3 player The MP3 pl onscreen music playback control buttons controls for Seek bar play pause stop next previous and volume control layback programming options include playback repeat playback normal sequence and random icon to return to the main menu to access the music Library Figure MP3 player Using the music library icon to open the Music library screen T...

Page 22: ...lect a song and then use the icon to add a song to a Figure My Favorites On the My Favorites list you can select tracks to listen to add or subtract them from the list and update the list with the SD card s music files player When loading movie files to the SD card please put files into My Video folder If there s no such a folder in the SD card please create My Video folder in Using the player s c...

Page 23: ...enu icon to open the Movie library screen library icon to open the Movie library screen Then tap icon to add the contents of the SD card to the library Figure Movie library Supported file types include ASF WMV MPEG and AVI Microsoft MPEG Files of these types on the SD card will be added to library automatically and classified according to file name Figure Movie Playlist you can select files and ad...

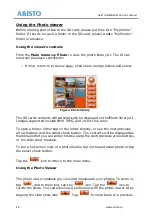
Page 24: ...de show next previous and Figure Photo library The SD card s contents will automatically be displayed on the Photo library UI ed include BMP JPEG and 24 bit true color To open a folder either tap on the folder directly or use the next previous arrow buttons and the select check button The contents will be displayed as thumbnails that you can either browse using the next previous arro or the slide ...

Page 25: ...console ARISTO VOYAGER X500 User s Manual www aristo pl screen and to escape from either full screen mode or slide show mode press the menu button on the console Figure Photo Viewer ARISTO VOYAGER X500 User s Manual www aristo pl screen mode or slide show mode press ...

Page 26: ...ction warning Figure SD card missing warning ARISTO VOYAGER X500 User s Manual www aristo pl Common warning screens Common warning screens include ost external power warning warning removed warning Figure Lost external power warning Figure USB connection warning Figure SD card missing warning ARISTO VOYAGER X500 User s Manual www aristo pl ...

Reviews: