background image


MicroCAM User Manual 

Page 6/82


2.


ACCESSING THE CAMERA 

 
In  order  to  access  the  camera,  power  and  network  connectors  have  to  be  connected 
appropriately. For more information see the Quick Install Guide. Follow the five steps below: 
 
Connect the camera to a computer or a network switch using the Ethernet cable, then power 
the camera on. Soon both status LEDs (at the camera front) turn on and stay lit while the camera 
is booting. When the green status LED flashes two times and the red LED turns off the camera 
is ready for operation. 
 
Note down your computer’s current IP address and settings. 
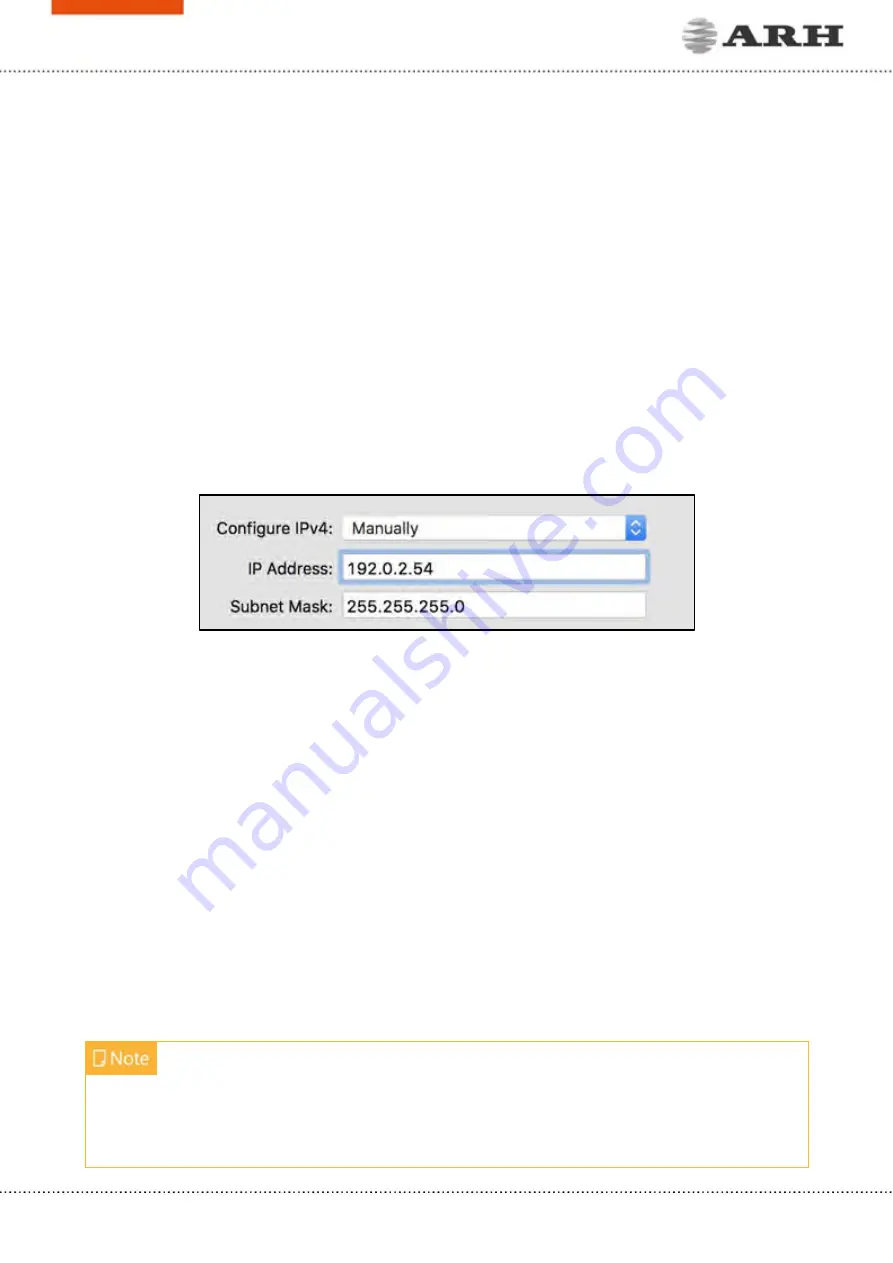
Set your computer’s IP address as 192.0.2.x (with x other than 3 or 255, for example 192.0.2.54), 
with the subnet mask 255.255.255.0 

 
Use the ping command to test network connection to the camera 
Windows: c:

 \

ping -t 192.0.2.3 

Linux

: [username@mylinux ~]$ ping 192.0.2.3


In a couple of second the ping echo package will be received, if not: 


check the Ethernet link LEDs at the computer or network switch for a physical link 


check the IP of the computer by pinging its own address (using the example at step #2: 
ping 192.0.2.54) 

 
Start a browser and enter the default IP of the camera: http://192.0.2.3 into the address bar. The 
camera’s user interface starts up with administrator privileges, ready to be set up and configured. 
If the web interface is not accessible, make sure that neither a proxy nor a firewall is blocking 
access, and that the browser is not in offline mode. 


Under recent versions of Firefox (v. 56.0) it might be necessary to disable the feature "Use 
hardware acceleration when available" to avoid possible browser/machine hangs (Located at: 
Preferences/Performance/Use Recommended Performance Settings). 

Summary of Contents for MICROCAM

Page 1: ......

Page 2: ...ARATION OF CONFORMITY 4 USER MANUAL 5 1 ABOUT THIS MANUAL 5 2 ACCESSING THE CAMERA 6 3 WEB INTERFACE 7 4 FIRST STEPS WIZARD 9 5 SYSTEM SETTINGS 12 5 1 NETWORK 12 5 2 DATE TIME 14 5 3 USERS 16 5 4 IP F...

Page 3: ...CTION TRIGGER 42 7 1 3 MOTION DETECTOR 43 7 1 4 SOFTWARE TRIGGER 45 7 1 5 SCHEDULER TRIGGER 46 7 1 6 CARMEN GO TRIGGER MODULE 47 7 2 ANPR 56 7 2 1 BROWSE 56 7 2 2 ANPR SETTINGS 58 7 2 3 TITLE EDITOR 6...

Page 4: ...MicroCAM User Manual Page 3 82 7 2 11 DIAGNOSTICS 72 8 MAINTENANCE 73 8 1 SYSTEM INFO 73 8 2 SENSORS 74 8 3 CAMERA LOG 75 8 4 BACKUP UPDATE 76 8 5 RESTART RECOVERY MODE 77 CONTACT INFORMATION 81...

Page 5: ...nd can radiate radio frequency energy and if not installed and used in accordance with the instruction manual may cause harmful interference to radio communications Operation of this equipment in a re...

Page 6: ...ternal components need to be installed First system settings are discussed so that the device will be operational Next the user will be guided through the process of setting up the image capturing pro...

Page 7: ...test network connection to the camera Windows c ping t 192 0 2 3 Linux username mylinux ping 192 0 2 3 In a couple of second the ping echo package will be received if not check the Ethernet link LEDs...

Page 8: ...W version ARH logo Version number Camera type menu points Side menu Basic advanced setup ANPR maintenance help menu click to open Access camera settings via the navigator Menu is organized into a tree...

Page 9: ...help Hover the mouse over the button to see the tooltip Use the Save button to save settings All settings will be lost if you leave the page without saving settings A popup window will remind you to s...

Page 10: ...2 4 FIRST STEPS WIZARD WEB INTERFACE BASIC SETUP WIZARD The Wizard will help with the initial configuration of the system settings of the camera It will guide you through It will guide you through set...

Page 11: ...MicroCAM User Manual Page 10 82 Set the current date time Set up network...

Page 12: ...Page 11 82 It will give you feedback if something went wrong line would be red If all settings were proper each line would be green All these settings are also available as separate configuration page...

Page 13: ...TWORK SETUP Hostname The name of the device in the network Title of this site Textual description of the device for example CameraFrontRight that will appear as the title of the browser tab DHCP Check...

Page 14: ...n HTTPs mode It means that you will have an encrypted secure channel between you and the camera Please note that while the communication towards the camera is secured HTTPs requests web interface but...

Page 15: ...sure that your time zone is valid has the correct continent Capital City You can do this by using the Time zone s drop down list For manual time adjustment either enter date and time in the correspond...

Page 16: ...on the default port 123 specify the port in the following format hostname ip port Max I O time Maximal duration of a query answer cycle between the camera and the NTP server before the answer is dropp...

Page 17: ...be granted to all This is also the factory default state In order to create new users a user with Administrator privileges must be created first Users can be added deleted and edited with the correspo...

Page 18: ...Private Zone Event Manager ANPR Browse Maintenance System Information Camera Log Help Power Login Basic Setup All menu Items Advanced Setup All menu Items except IP Filter ANPR All menu items Mainten...

Page 19: ...existing users from the system with the exception of the main admin user This user cannot be deleted and its username and access level cannot be modified Settings will be applied only after restartin...

Page 20: ...this case access is denied to all IPs except those listed Accept All in this case access is granted to all IPs except those listed The exceptions to the default policy can be added and removed in the...

Page 21: ...l just like the address itself e g 255 255 255 0 After clicking the Add button the new exception will appear in the BLOCKED ACCEPTED ADDRESSES table above the edit fields The elements of the table can...

Page 22: ...e 21 82 5 5 PLAIN CONFIG This page is reachable on the following URL http CAM_IP plainconfig All configuration settings are available in this menu organized as a property tree Please note that this is...

Page 23: ...ind Multi mode can be illustrated with the following examples Provide a low quality stream to display and store and simultaneously a high quality stream for ANPR in case of mixed reflective and non re...

Page 24: ...the two pipelines Two different intensities of the built in or external illumination may be defined for the even odd frames Frame Parity Flashing you can find at Live View as well Pipelines are identi...

Page 25: ...te of the stream in question Link of the stream Will display the link of where the stream will be available When authentication is enabled the stream is only accessible if the username and password is...

Page 26: ...e number of P frames For example 1 keyframe 15 predicted frames the group size is 16 o H264 compression Default H264 compression The larger this number the lower the quality but with a higher compress...

Page 27: ...y be reduced This control limits the amount of this reduction JPEG encoder settings for the current image source o EXIF description of JPEG file The description inserted into the header of the file o...

Page 28: ...User Manual Page 27 82 6 2 POST PROCESSING 6 2 1 IMAGE WEB INTERFACE BASIC SETUP LIVE VIEW IMAGE The basic post processing settings are configured here Brightness Increase decrease the brightness of t...

Page 29: ...MicroCAM User Manual Page 28 82 Contrast Increase decrease the luminance contrast of the image Saturation Increase decrease the chrominance contrast of the image...

Page 30: ...IR mode when the only light source is the built in narrowband IR LEDs The spatial resolution will double in both x and y directions because each individual color pixel is used as luminance channel Whe...

Page 31: ...illumination conditions an algorithm tunes sensor and post processing parameters to still be able to capture an adequate image Note this is not strictly a post processing step The level of these sett...

Page 32: ...the JPEG compression rate of the image higher quality setting means lower compression White Level Defines the pixel value above which all pixels will be mapped to white Black level Defines the pixel...

Page 33: ...ld be excluded from processing or when private property is displayed These unwanted parts can be covered with max 3 rectangular patches with the Private zones tool Each time when an area is added a re...

Page 34: ...tter and gain As ambient light level decreases both shutter and gain may be increased but only up to a level Shutter Max and Gain Max because a too long shutter value will result in motion blur and ga...

Page 35: ...ging light conditions o quick auto for fast changing light conditions Target Brightness This control allows the user to correct the exposure of the image Larger numbers will result in a brighter image...

Page 36: ...ted In Outdoor mode both shutter and gain are adjusted by the controller software However their maximum value Shutter Max is adjustable and Gain Max is available in 3 predefined steps or Custom where...

Page 37: ...ntensity of the built in illuminator between 0 and 100 Parity Flashing if set odd frames will be illuminated with reduced intensity For example if this value is set to 50 odd frames will be illuminate...

Page 38: ...INTERFACE BASIC SETUP LIVE VIEW To record the live video stream to a file click on the icon in the top menu To open a 1 1 live video stream click on the icon in the top menu To save a snapshot click o...

Page 39: ...n the live video stream Plate There is an optimal character size for license plate recognition With this visual aid a frame will be shown either for Latin or Arabic license plates if the license plate...

Page 40: ...o detect a vehicle in the given image Motion Detection an image processing algorithm designed to detect motion in a sequence of images Scheduler regular series of triggers for example every 5 seconds...

Page 41: ...plate image as an output Typically 3 8 images are first received by a Normal Quick stage of the pipeline where a very fast system selects the best image for plate recognition A preliminary set of lic...

Page 42: ...remove trigger sources in this menu Clicking the icon you will be presented all available trigger sources The sources will be connected with an OR conjunction the trigger will be asserted while any of...

Page 43: ...vehicles at the Live View menu by clicking the button The detector relies on files containing algorithmic data These descriptors will be shown with their date mode day or night vehicle direction and c...

Page 44: ...MicroCAM User Manual Page 43 82 7 1 3 MOTION DETECTOR First you need to click on Configure button to guide you to Motion Detection menu On this page you can set all parameters...

Page 45: ...hand drawing tool for trigger area 2 The properties of motion detection are also available Speed Specifies the minimal rate of change required in the image to be detected as motion If set too low chan...

Page 46: ...TWARE TRIGGER A software trigger is an external trigger sent as a HTTP request Start Offset trigger start offset added to the time stamp of receiving the request End Offset trigger end offset added to...

Page 47: ...vailable Edge the trigger is asserted at only the start of the specified point in time Level the trigger is asserted during the specified second minute hour In the fields Day s of the Month Hour s Min...

Page 48: ...User Manual Page 47 82 7 1 6 CARMEN GO TRIGGER MODULE SET CARMEN GO AS A TRIGGER SOURCE As a first step add CARMEN GO as a trigger source Add this to Event Manager as follows Click on to add a trigge...

Page 49: ...MicroCAM User Manual Page 48 82 In the drop down menu select the Carmen Go Trigger Module then click Add Do not forget to press the Save button to save the trigger sources...

Page 50: ...MicroCAM User Manual Page 49 82 SET ROI You will see a setting surface below where you can specify roi s for the CARMEN GO module and the ANPR engine...

Page 51: ...the first point and the mouse pointer there is a line that can be fixed by pressing the left mouse button again Repeat this 3x times until you have drawn a rectangle that looks something like this Th...

Page 52: ...clicking the left mouse button next to the squares already added to add a new ROI You can draw the second ROI in the usual way You can delete any of the drawn ROIs by right clicking on it While drawin...

Page 53: ...ith the right mouse button This way the trimmer selector appears You can rotate the lane line by right clicking the button and pressing the left mouse button At this time the lane line starts to rotat...

Page 54: ...then change the separator lane Ctrl Up Down Left Right Changing the center of rotation thus the position of the line in a given direction You can draw this point out and track it with mouse and keybo...

Page 55: ...MicroCAM User Manual Page 54 82 You can save the settings with the save button One possible proper setting...

Page 56: ...SETTING ANPR TO USE ANPR ROI For ANPR to locate a license plate in the appropriate area you must set the Normal Quick engine menu on the ANPR Settings interface to Trigger vehdet frame You can save th...

Page 57: ...WEB INTERFACE ANPR BROWSE Recorded events are listed on the bottom timeline in ANPR BROWSE Use the icons on the top to Select unselect all records List image data Delete record s Reload list of entrie...

Page 58: ...will appear Primary image is showing the full image of the event made by the primary sensor Plate image is showing the image of the detected number plate of the event The last image can be set by enab...

Page 59: ...l from a performance point to limit license plate recognition to the part of the image in which the vehicle is likely to be found Vehicle detection and motion detection can provide such a frame and us...

Page 60: ...bles to set the function of secondary sensor Normal Quick engine the frame used by the Normal Quick stage Select Manual frame to draw a user defined frame The Normal Quick stage will use Full Frame th...

Page 61: ...ped image containing the license plate only Create image strip It makes three images from the vehicle during movement This picture available at the Browser menu Filtering results can be configured wit...

Page 62: ...only When an ADR or EADR plate has been read the data xml will feature a tag with the relevant info o Text in case of emplty ADR plates it will read as EADR otherwise the ADR text o Type numeric o Fr...

Page 63: ...MicroCAM User Manual Page 62 82 7 2 3 TITLE EDITOR WEB INTERFACE ANPR TITLE EDITOR...

Page 64: ...aching vehicle string The string that gets printed in the subtitle when an approaching vehicle is detected only in models with speed measurement Leaving vehicle string The string that gets printed in...

Page 65: ...an be installed on clicking the icon Currently used engines are listed in the Selected Engines tab The Normal Quick stage uses two engines Normal under normal circumstances and Quick under heavy load...

Page 66: ...data to an FTP server If and only if both the time and license condition is satisfied then the event notification will be executed Rules must have unique names A rule can be deactivated so users don t...

Page 67: ...tton all items will be cleared 7 2 5 EVENT NOTIFICATIONS You can add multiple tasks to a rule each will be executed if the conditions are satisfied If a task has any settings those are available click...

Page 68: ...to the tolling backend Now create a second rule named exempt and add the license plates that are exempt from paying tolls ambulance police road works Do not add any Event Notifications consequently t...

Page 69: ...mpts In case of failure this is the number of repeated upload attempts Content The content of the upload image data plate image Timeout of one attempt The maximal duration of an upload attempt Host Up...

Page 70: ...tains all features 1 xml version 1 0 encoding UTF 8 2 result 3 ID value ID 4 text value DB2XML ANPR_TEXT 5 location value location 6 image value normal_img 7 result Lines 1 2 and 7 are text only of co...

Page 71: ...ents of the database can be injected using the following syntax database field id Functions To format the output the following functions are provided with the general syntax function name argument1 ar...

Page 72: ...cense plate image Base64 encoded aux_img the overview image Base64 encoded location the location string as defined in default cfs db location cameraid the camera HW id may be overridden with default c...

Page 73: ...l inform you about current and recent specific tasks like Images in the system the number of captured images waiting for process Trigger count the number of triggers received from the trigger sources...

Page 74: ...vice are listed here Identify tab lists values identifying the system Please refer to these values when reporting a bug Hardware units lists the hardware components of the camera Sensor information an...

Page 75: ...MicroCAM User Manual Page 74 82 8 2 SENSORS WEB INTERFACE MAINTENANCE SENSORS The built in accelerometer may provide help aligning the camera...

Page 76: ...LOG WEB INTERFACE MAINTENANCE CAMERA LOG Camera and ANPR logs provide information about the processes in the camera and the license plate recognition module respectively Log entries can be copied to...

Page 77: ...provides tools to manage camera firmware Use to upload a new firmware The camera will save a backup file upon each restart which can be restored removed or downloaded by clicking the appropriate butto...

Page 78: ...MicroCAM User Manual Page 77 82 8 5 RESTART RECOVERY MODE WEB INTERFACE MAINTENANCE RECOVERY MODE WEB INTERFACE MAINTENANCE RESTART...

Page 79: ...MicroCAM User Manual Page 78 82...

Page 80: ...MicroCAM User Manual Page 79 82...

Page 81: ...e camera will start flashing very fast Remove the magnet Enter the web interface at the 192 0 2 3 default IP Entering Recovery mode to Microcam camera Starting of the Recovery mode can be implemented...

Page 82: ...get back to business Information regarding hardware software manuals and FAQ are easily accessible for customers who previously registered to enter the dedicated ATSS site Besides offering assistance...

Reviews: