9.2 Command Set
73
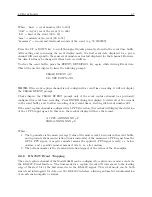
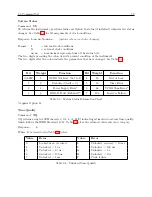
Broadcast Mode – EXT. ASCII
Command:
B5, O5
B5 configures the clock to broadcast from the main RS-232C port, the time-of-day as ASCII data
using an extended format prefaced with a time quality indicator (Q). O5 configures the clock to
broadcast the same data from the option RS-232C port. The start bit of a carriage-return is
transmitted on time.
Response:
C
Q yy ddd hh:mm:ss.000
Format:
Q = Time quality indicator, and may be represented by:
= (a space, ASCII 32) meaning it is locked with maximum accuracy.
?
= (ASCII 63) unlocked, accuracy not guaranteed
Underline graphically represents the location of an ASCII space
and is used for clarity only.
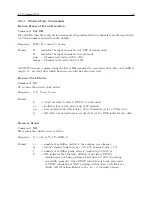
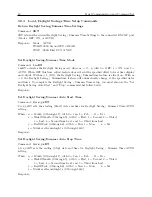
Broadcast Mode – ASCII plus QUAL
Command:
B6, O6
B6 configures the clock to broadcast from the main RS-232C port the time-of-day as ASCII data
appended with a time quality indicator. O6 configures the clock to broadcast the same data from
the option RS-232C port. ASCII plus QUAL means Standard ASCII plus Time Quality Indicator.
Response:
<
soh
>
ddd:hh:mm:ssQ
C
Format:
soh = Hex 01 – the start bit of the soh character is transmitted on time.
Q = Time quality indicator. may be represented by:
= (a space, ASCII 32) locked, maximum accuracy
.
= (ASCII 46) Error
<
1 microsecond
*
= (ASCII 42) Error
<
10 microseconds
# = (ASCII 35) Error
<
100 microseconds
?
= (ASCII 63) Error
>
100 microseconds
Summary of Contents for 1088A
Page 4: ...iv ...
Page 6: ...vi ...
Page 18: ...xviii LIST OF FIGURES ...
Page 23: ...1 4 Attaching Rack Mount Ears to 1088A B Series Clocks 3 Figure 1 2 Attaching Rack Mount Ears ...
Page 24: ...4 Unpacking the Clock ...
Page 32: ...12 Front and Rear Panels ...
Page 38: ...18 Connecting Inlet Power Input and Output Signals ...
Page 46: ...26 GPS Antenna and Cable Information ...
Page 48: ...28 Setting Internal Jumpers Figure 5 1 Model 1088B Main Board ...
Page 76: ...56 The Setup Menus ...
Page 112: ...92 Serial Communication and Command Set ...
Page 127: ...B 4 Physical Dimensions 107 Figure B 1 Suggested Mounting of the AS0094500 Surge Arrester ...
Page 128: ...108 Using Surge Arresters ...
Page 145: ...C 5 Option 04 Parallel BCD Output 125 Figure C 4 Option 04 Output Jumper Settings ...
Page 146: ...126 Options List Figure C 5 Option 04 Board Layout and Jumper Locations ...
Page 166: ...146 Options List Figure C 12 Option 17 Board Layout and Jumper Locations ...
Page 187: ...C 16 Option 20A Four Fiber Optic Outputs 167 Figure C 22 Option 20A Jumper Locations ...
Page 194: ...174 Options List Figure C 24 Option 23 Internal Jumper Setup ...
Page 196: ...176 Options List Figure C 25 Option 27 Jumper Locations ...
Page 214: ...194 Options List Figure C 28 Option 29 Connector Signal Locations ...
Page 270: ...250 Options List ...


