5/14
XEN OWNER'S HANDBOOK
Upgrading the Apricot XEN
Chapter 5
If you are unfamiliar with Apricot’s recommended anti-
static precautions and/or the process of removing the
system unit cover refer to Appendix A.
486
int l
e
DX2-66
i
TM
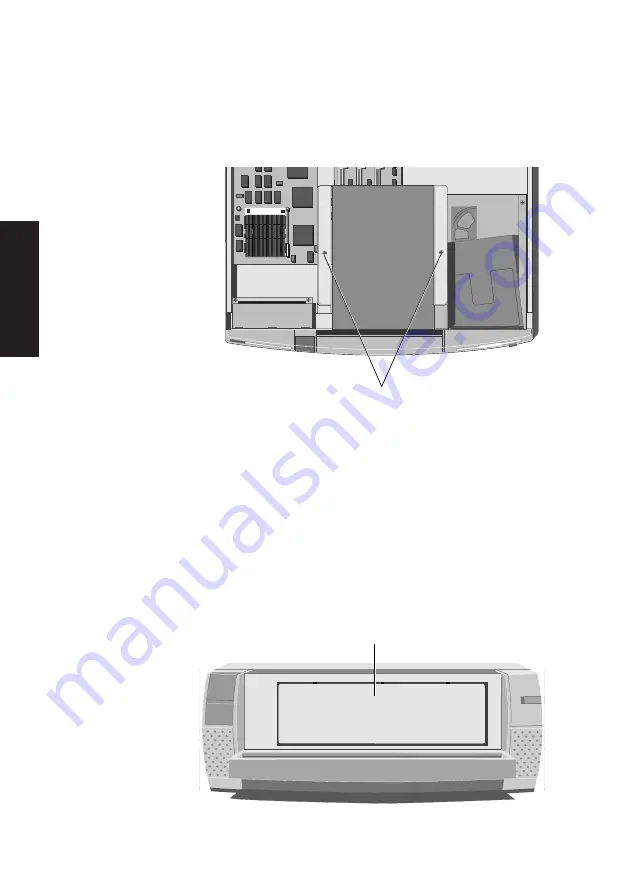
SECURING SCREWS
3.
Loosen the two screws that secure the drive bay and
slide the bay backwards.
4.
Lift the bay out of the system unit.
5.
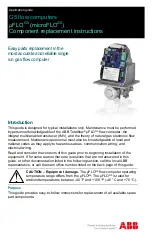
The 5.25" drive aperture in the chassis at the front of
the drive bay is obscured by a blanking plate. The
blanking plate is attached to the top of the chassis and
must be removed in order to install a drive in the 5.25"
drive bay.
Open the drive bay door and identify the blanking plate.
BLANKING PLATE
Summary of Contents for XEN Pentium 60
Page 1: ...apricot XEN Pentium 60 66 OWNER S HANDBOOK MITSUBISHI ELECTRIC ...
Page 2: ...Chapter OWNER S HANDBOOK ...
Page 8: ...Chapter CONTENTS ...
Page 12: ...Chapter INTRODUCING THE APRICOT XEN Chapter1 ...
Page 16: ...1 4 XEN OWNER S HANDBOOK Introducing the Apricot XEN Chapter 1 2 1 3 4 5 ...
Page 21: ...Chapter Chapter2 GETTING STARTED WITH THE APRICOT XEN ...
Page 32: ...Chapter Chapter3 OPERATING THE APRICOT XEN ...
Page 53: ...Chapter Chapter4 CARING FOR THE APRICOT XEN ...
Page 60: ...Chapter Chapter5 UPGRADING THE APRICOT XEN ...
Page 83: ...Chapter Chapter6 USING THE SETUP UTILITY ...
Page 94: ...Chapter Chapter7 TROUBLESHOOTING ...
Page 110: ...Chapter AppendixA INSIDE THE APRICOT XEN ...


