


2 / 5
OEM Chip Reset Operation
Instruction
1.
Feature
Automatically identify models, reset to the exact model without changing the color,
yield, and region.
2.
Operating Procedure
OEM Reset& OEM Check
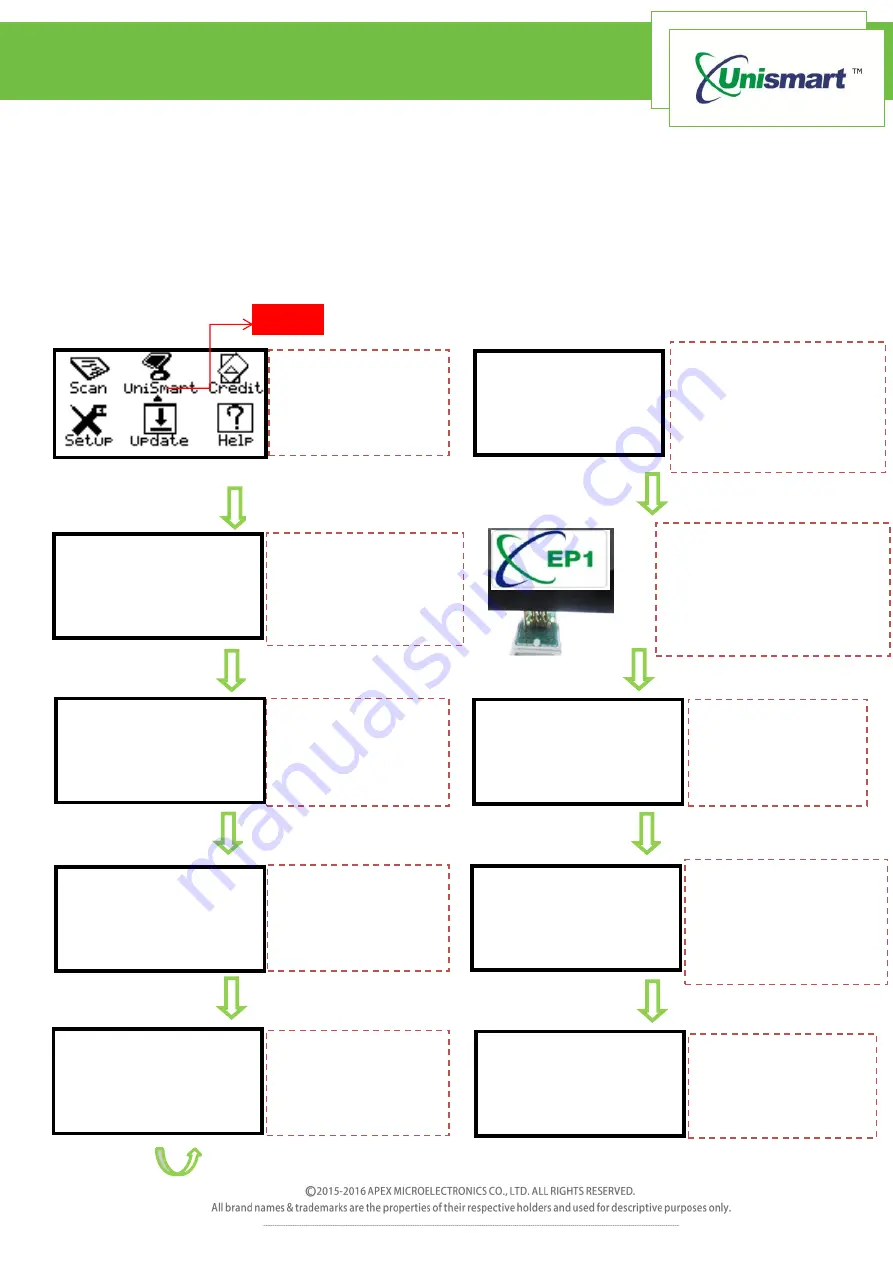
Move the cursor to
“Unismart”, press OK
Cursor
Select Brand
:
DELL
→EPSON
HP
Enter
into
“Select
Brand”, press F1 or F2
to select the “Epson”,
and then press OK
Select PCB:
RST- EPSON2
→RST- EPSON3
Enter into “Select
PCB”, select related
“EPSON3” PCB, press
OK
Select Type:
→RST- EPSON3
Enter into “Select
Type”, select
“EPSON3” and
press OK
RST- EPSON3
PCB
:
OEM JIG: EP1
OK=OEM Check
Enter
into
RST-
EPSON3; select “F1”
to “OEM Reset”
RST- EPSON3
PCB: OEM JIG: EP1
OK=OEM Reset XXX
RST- T X X X X
PCB: OEM JIG: EP1
OK=OEM Reset XXX
Reset OK
RST- T X X X X
PCB: OEM JIG: EP1
OK=OEM Check
Reset OK
RST- T X X X X
PCB: OEM JIG: EP1
OK=OEM Check
Check OK
Press “F1” to turn to
“OEM Check”, make
the JIG align the chip
and press OK on the
JIG or on the device
“Check OK” is shown,
chip verification is
passed
“Reset OK” is shown
and the chip is
successfully reset.
Figure 2
Figure 1
Figure 3
Figure 4
Figure 5
Figure 6
Figure 7
Figure 8
Figure 9
Figure 10
Because of JIG upgrade,
there are 3 JIGs. Based
on time order, they are
EP1, H01, and EP5. EP5 is
OEM resetting JIG.
Connect the Uni device
with the connecting line.
Make sure that the JIG
aligns the chip, press OK on
the JIG or on the device


