background image


94 


A

A

X

X

4

4

T

T


I

I

I

I

-

-

5

5

3

3

3

3


/

/


A

A

X

X

4

4

T

T


I

I

I

I

-

-

5

5

3

3

3

3

N

N


O

O

n

n

l

l

i

i

n

n

e

e


M

M

a

a

n

n

u

u

a

a

l

l


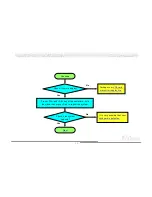
Continue 


During system rebooting, press <Del> to enter 

BIOS 

setup

. Choose “Load Setup Default”. 

Check if the system can 

reboot successfully? 

No

The problem should be 

caused by the IDE 

cable or HDD itself

End


Yes

Turn off the system and re-connect IDE cable.   

Re-install the operating system such as Windows 98.

Summary of Contents for AX4T II-533

Page 1: ... A AX X4 4T T I II I 5 53 33 3N N O On nl li in ne e M Ma an nu ua al l Overview Hardware Installation Drivers Utilities AWARD BIOS Setup Glossary Troubleshooting Technical Support AX4T II 533 AX4T II 533N DOC NO AX4T2533N OL E0204A ...

Page 2: ...ou Must Notice 8 Before You Start 9 Overview 10 Feature Highlight 11 Quick Installation Procedure 14 Motherboard Map 15 Block Diagram 16 Hardware Installation 17 About User Upgrade Optional and Manufacture Upgrade Optional 18 JP14 Clear CMOS Data 19 CPU Installation 20 CPU Jumper less Design 22 CPU and Housing Fan Connector with H W Monitoring 25 RIMM Sockets 27 Front Panel Connector 31 ATX Power ...

Page 3: ...gy 38 CNR Communication and Network Riser Expansion Slot 39 Support Intel PRO 100 Network Connection For AX4T II 533N 40 PC99 Color Coded Back Panel 41 JP28 Keyboard Mouse Wakeup Select Jumper 42 Support 2nd USB Port 43 Chassis Intrusion Sensor 44 CD Audio Connector 45 Modem Audio Connector 46 Front Audio Connector 47 Battery less and Long Life Design 48 Over current Protection 49 Hardware Monitor...

Page 4: ...indows 95 98 58 Installing Intel IAA Driver 59 Installing Onboard LAN Driver For AX4T II 533N 60 Installing Onboard Audio Driver 61 Installing Hardware Monitoring Utility 62 ACPI Suspend to Hard Drive 63 ACPI Suspend to RAM STR 67 Phoenix AWARD BIOS 69 About BIOS Function Description 70 How To Use Award BIOS Setup Program 71 How To Enter BIOS Setup 73 BIOS Upgrade under Windows environment 74 Over...

Page 5: ...ack CD 79 APM Advanced Power Management 79 ATA AT Attachment 79 ATA 66 79 ATA 100 80 BIOS Basic Input Output System 80 Bus Master IDE DMA mode 80 CNR Communication and Networking Riser 80 CODEC Coding and Decoding 81 DDR Double Data Rated SDRAM 81 DIMM Dual In Line Memory Module 81 DMA Direct Memory Access 81 ECC Error Checking and Correction 82 EDO Extended Data Output Memory 82 EEPROM Electronic...

Page 6: ...ormity 83 FC PGA Flip Chip Pin Grid Array 83 Flash ROM 83 FSB Front Side Bus Clock 84 I2 C Bus 84 IEEE 1394 84 Parity Bit 85 PBSRAM Pipelined Burst SRAM 85 PC 100 DIMM 85 PC 133 DIMM 85 PC 1600 or PC 2100 DDR DRAM 86 PCI Peripheral Component Interface Bus 86 PDF Format 86 PnP Plug and Play 86 POST Power On Self Test 87 RDRAM Rambus DRAM 87 RIMM Rambus Inline Memory Module 87 ...

Page 7: ...RAM Synchronous DRAM 87 Shadow E2 PROM 88 SIMM Single In Line Memory Module 88 SMBus System Management Bus 88 SPD Serial Presence Detect 88 Ultra DMA 89 USB Universal Serial Bus 89 VCM Virtual Channel Memory 90 ZIP file 90 Troubleshooting 91 Technical Support 95 Product Registration 98 How to Contact Us 99 ...

Page 8: ...names used on this manual are used for identification purposes only and may be the registered trademarks of their respective owners All of the specifications and information contained in this manual are subject to change without notice AOpen reserves the right to revise this publication and to make reasonable changes AOpen assumes no responsibility for any errors or inaccuracies that may appear in...

Page 9: ...re upgrades or system configuration changes This Online Manual is saved in PDF format we recommend using Adobe Acrobat Reader 4 0 for online viewing it is included in Bonus CD or you can get free download from Adobe web site Although this Online Manual is optimized for screen viewing it is still capable for hardcopy printing you can print it by A4 paper size and set 2 pages per A4 sheet on your pr...

Page 10: ...ndwidth between CPU and chipset In AGP performance it has one AGP slot and supports AGP 4X mode and pipelined spilt transaction long burst transfer up to 1066MB sec The MCH component provides Direct RDRAM interface that has dual Direct RDRAM channels support PC 600 800 1066 RDRAM operation and maximum up to 2GB The on board IDE controller supports Ultra DMA 33 66 100 mode Further flexibility can b...

Page 11: ...nology The enhanced I O Controller Hub ICH2 delivers twice the I O bandwidth over traditional bridge architecture and provides dedicated data paths to fully optimize the additional bandwidth Expansion Slots Including five 32 bit 33MHz PCI one CNR and one AGP slots The PCI local bus throughput can be up to 132MB s The Communication Nectworking Riser CNR slot provided from AX4T II 533 AX4T II 533N s...

Page 12: ...6 100 133 PIO Modes 3 and 4 and Bus Master IDE DMA Mode 4 and supports Enhanced IDE devices On board AC97 Sound AX4T II 533 AX4T II 533N uses AC97 sound chip This on board audio includes a complete audio recording and playback system Four USB Connectors AX4T II 533 AX4T II 533N provides two ports four USB connectors for USB interface devices such as mouse keyboard modem scanner etc Power Managemen...

Page 13: ...ring Management Supports CPU or system fans status temperature and voltage monitoring and alert through the on board hardware monitor module Enhanced ACPI Fully implement the ACPI standard for Windows 98 ME 2000 series compatibility and supports Soft Off STR Suspend to RAM S3 STD Suspend to Disk S4 WOM Wake On Modem WOL Wake On LAN features Super Multi I O AX4T II 533 AX4T II 533N provides two hig...

Page 14: ...uick procedure on how to install your system Follow each step accordingly 1 Installing CPU and Fan 2 Installing System Memory DIMM 3 Connecting Front Panel Cable 4 Connecting IDE and Floppy Cable 5 Connecting ATX Power Cable 6 Connecting Back Panel Cable 7 Power on and Load BIOS Setup Default 8 Setting CPU Frequency 9 Reboot 10 Installing Operating System such as Windows 98 11 Installing Driver an...

Page 15: ...U Fan Connector 184 pin RIMM Socket x4 supports PC 600 800 1066 RDRAM maximum up to 2GB Intel 850E chipset with MCH ICH2 and FWH that supports LAN Ultra ATA 100 RDRAM Solution Low ESR Capacitors ATX Power Connector CD IN Connector Front Audio Connector MODEM CN Connector CNR Expansion Slot IrDA Connector 4Mbit Flash ROM BIOS Front Panel Connector JP14 CMOS Clear Jumper Chassis Intrusion Detector F...

Page 16: ...t PCI Slot x5 Parallel Port IDE Drive x4 ATA 33 66 100 PC 600 800 1066 Direct RDRAM Up to 2GB Primary Channel Secondary Channel 2Mbit Flash EEPROM Audio CODEC Modem CODEC AC 97 Link PCI Bus data transferring rate up to 133MB s Firmware Hub Low Pin Count Super I O Floppy Disk Drive x2 CNR Slot AC97 CODEC RIMM Socket x2 Dual Channel RDRAM data transferring rate up to 3 2GB s E B Bl lo oc ck k D Di i...

Page 17: ... ESD can damage your processor disk drives expansion boards and other components Always observe the following precautions before you install a system component 1 Do not remove a component from its protective packaging until you are ready to install it 2 Wear a wrist ground strap and attach it to a metal part of the system unit before handling a component If a wrist strap is not available maintain ...

Page 18: ... Upgrade Optional Although all of AOpen s motherboards have included many amazing and powerful features sometimes not every user is familiar with these powerful features As a result of this we define features that can be upgraded by users as User Upgrade Optional You can upgrade these functions by purchasing additional devices As for functions that cannot be upgraded by users we define them as Man...

Page 19: ...CMOS follow the procedure below 1 Turn off the system and unplug the AC power 2 Remove ATX power cable from connector PWR2 3 Locate JP14 and short pins 2 3 for a few seconds 4 Return JP14 to its normal setting by shorting pin1 pin2 5 Connect ATX power cable back to connector PWR2 Tip When should I Clear CMOS 1 Boot fail because of overclocking 2 Forget password 3 Troubleshooting Normal Operation D...

Page 20: ...inish CPU installation Be careful of CPU orientation when you plug it into CPU socket Note These pictures are for example only they may not look exactly the same as the motherboard you purchased 2 Locate Pin 1 in the socket and look for a black dot or cut edge on the CPU upper interface Match Pin 1 and cut edge then insert the CPU into the socket 1 Pull up the CPU socket level and up to 90 degree ...

Page 21: ...ay damage the CPU 3 Press down the CPU socket level and finish CPU installation CPU cut edge Note This socket supports Micro FC PGA2 package CPU which is the latest CPU package developed by Intel Other forms of CPU package cannot be fitted in Note P4 CPU tends to produce higher temperature for better heat dissipation we recommend you to install this motherboard with a bigger housing Besides by doi...

Page 22: ...e auto detection and allows the user to set the CPU frequency through the BIOS setup therefore no jumpers or switches are used The disadvantages of the Pentium based jumper less designs are eliminated There will be no worry of wrong CPU voltage detection Intel Socket 478 series Pentium 4 CPU Power Regulator CPU VID signal CPU voltage Automatically generates CPU voltage Clock Generator CPU Freq Rat...

Page 23: ... setup and no jumpers or switches are needed BIOS Setup Frequency Voltage Control CPU Clock Ratio CPU Ratio 8x 9x 10x 11x 22x 23x 24x CPU FSB 100 248MHz by 1MHz stepping Warning Intel 850E chipset supports maximum 400MHz 100MHz 4 533MHz 133MHz 4 system bus and 66MHz AGP clock higher clock setting may cause serious system damage Tip If your system hangs or fails to boot because of overclocking simp...

Page 24: ...Pentium 4 2 2G 2200MHz 100MHz 400MHz 22x Pentium 4 2 4G 2400MHz 100MHz 400MHz 24x Pentium 4 2 4G 2400MHz 133MHz 533MHz 18x Warning Intel 850E chipset supports maximum 400MHz 100MHz 4 533MHz 133MHz 4 system bus and 66MHz AGP clock higher clock setting may cause serious system damage Willamette CPU CPU Core Frequency FSB Clock System Bus Ratio Pentium 4 1 5G 1500MHz 100MHz 400MHz 15x Pentium 4 1 6G ...

Page 25: ...or r w wi it th h H H W W M Mo on ni it to or ri in ng g Plug in the CPU fan cable to the 3 pin CPU FAN connector If you have chassis fan you can also plug it on FAN2 or FAN3 without H W monitoring connector SENSOR 12V GND Note Some CPU fans do not have sensor pin so that they cannot support hardware monitoring function FAN2 Connector FAN3 Connector CPU Fan Connector GND NC 12V ...

Page 26: ...hen shipped we strongly recommend you to install AOpen special designed CPU Fan as shown below on the retention module for better heat dissipation Please install the CPU Fan correctly as the following pictures shown Note The picture above may look different from the product you purchased 1 Gently put the CPU Fan down on the retention module with clips aligning correctly to the four corners 2 Press...

Page 27: ...t the RDRAM speed automatically while system is in POST but it still allows you to select the RDRAM type manually by BIOS setup program RIMM3 RIMM4 Note Based on Intel 850E chipset specification AX4T II 533 AX4T II 533N has dual memory channel Please note that when you insert RIMM modules you have to insert them into RIMM 1 and 4 and have terminators inserted into RIMM 2 and 3 Or you can insert RI...

Page 28: ...n nl li in ne e M Ma an nu ua al l Pictures below are Direct RDRAM memory module and RIMM terminator also called C RIMM Please do not forget to insert the RIMM terminator into the proper RIMM socket otherwise the system cannot be booted DRDRAM RIMM Module RIMM Terminator ...

Page 29: ...ocedure as shown below to finish memory installation 1 Make sure the RIMM module s pin face down and match the socket s size as depicted below 2 Insert the module straight down to the RIMM slot with both hands and press down firmly until the RIMM module is securely in place 60 pins 88 pins Note The tabs of the RIMM slot will close up to hold the RIMM in place when the RIMM touches the slot s botto...

Page 30: ...On nl li in ne e M Ma an nu ua al l 3 Repeat step 2 to finish additional RIMM C RIMM modules installation Note Pictures shown here are for reference only Note Please do not forget to install the C RIMM modules into the proper RIMM slots Direct RDRAM Module C RIMM Module ...

Page 31: ... speaker power and reset switch connectors to the corresponding pins If you enable Suspend Mode item in BIOS Setup the ACPI Power LED will keep flashing while the system is in suspend mode Locate the power switch cable from your ATX housing It is 2 pin female connector from the housing front panel Plug this connector to the soft power switch connector marked SPWR 1 Speaker IDE LED Power Switch ACP...

Page 32: ...with a 20 pin and 4 pin ATX power connector as shown below Make sure you plug in the right direction We strongly recommend you to connect the 4 pin 12V ATX connector before connecting the 20 pin ATX power connector and use standard power supply specially designed for Pentium 4 system Power Connector 5V 5V 5V 5V 3 3V 3 3V 3 3V COM COM COM COM COM COM 5V COM 12V PS ON PW OK 12V 5VSB ...

Page 33: ... P Po ow we er r A Au ut to o R Re ec co ov ve er ry y A traditional ATX system remains at power off stage when AC power resumes from power failure This design is inconvenient for a network server or workstation without an UPS This motherboard implements an AC Power Auto Recovery function to solve this problem ...

Page 34: ...ondary Slave 4th Primary Master 1st I ID DE E a an nd d F Fl lo op pp py y C Co on nn ne ec ct to or r Connect 34 pin floppy cable and 40 pin 80 wire IDE cable to floppy connector FDD and IDE connector Be careful of the pin1 orientation Wrong orientation may cause system damage IDE2 Secondary IDE1 Primary ATA 33 66 100 IDE Connector FDD Connector ...

Page 35: ...O and DMA modes The IDE bus is 16 bit which means every transfer is two bytes Mode Clock Period Clock Count Cycle Time Data Transfer Rate PIO mode 0 30ns 20 600ns 1 600ns x 2byte 3 3MB s PIO mode 1 30ns 13 383ns 1 383ns x 2byte 5 2MB s PIO mode 2 30ns 8 240ns 1 240ns x 2byte 8 3MB s PIO mode 3 30ns 6 180ns 1 180ns x 2byte 11 1MB s PIO mode 4 30ns 4 120ns 1 120ns x 2byte 16 6MB s DMA mode 0 30ns 16...

Page 36: ... software such as Laplink or Windows 95 Direct Cable Connection the user can transfer files to or from laptops notebooks PDA devices and printers This connector supports HPSIR 115 2Kbps 2 meters and ASK IR 56Kbps Install the infrared module onto the IrDA connector and enable the infrared function from BIOS Setup UART2 Mode make sure to have the correct orientation when you plug in the IrDA connect...

Page 37: ... 533N provides an AGP 4x slot AGP 1x2x4x is a bus interface targeted for high performance 3D graphic AGP supports memory read write operation and single master single slave one to one only It uses both rising and falling edge of the 66MHz clock for 2X AGP the data transfer rate is 66MHz x 4bytes x 2 528MB s AGP is now moving to AGP 4x mode 66MHz x 4bytes x 4 1056MB s And this AGP expansion slot su...

Page 38: ... specially developed circuit AX4T II 533 AX4T II 533N implements a blend new technology to protect your motherboard from being damaged by over voltaging of AGP card When AGP Protection Technology is implemented this motherboard will automatically detect the voltage of AGP card and prevent your chipsets from being burnt out Warning It is strongly recommended not to install a 3 3V AGP card which is ...

Page 39: ...supports V 90 analog modem multi channel audio and phone line based networking Owing to CPU computing power getting stronger the digital processing job can be implemented in main chipset and share CPU power The analogy conversion CODEC circuit requires a different and separate circuit design which is put on CNR card This motherboard implements sound CODEC on board can be disabled by BIOS setup pro...

Page 40: ...t te el l P PR RO O 1 10 00 0 N Ne et tw wo or rk k C Co on nn ne ec ct ti io on n F Fo or r A AX X4 4T T I II I 5 53 33 3N N This motherboard has a fast Ethernet controller on chip On the strength of LAN chip onboard it provides 10 100M bps Ethernet for office and home use the Ethernet connector is located on top of USB connectors ...

Page 41: ...ouse which is using a PS 2 plug USB Connector Available for connecting USB devices RJ45 LAN Connector To connect with 10 100Mbps Ethernet Parallel Port To connect with SPP ECP EPP printer COM 1 COM 2 Port To connect with pointing devices modem or others serial devices Speaker Out To External Speaker Earphone or Amplifier Line In Comes from the signal sources such as CD Tape player MIC In From Micr...

Page 42: ...ke eu up p S Se el le ec ct t J Ju um mp pe er r This motherboard provides keyboard mouse wake up function You can use JP28 to enable or disable this function which could resume your system from suspend mode with keyboard or mouse The factory default setting is Enable 1 2 and you may disable this function by setting the jumper to 2 3 Pin 1 Disable Enable Default 1 1 ...

Page 43: ...2n nd d U US SB B P Po or rt t This motherboard provides 4 USB connectors to connect USB devices such as mouse keyboard modem printer etc There are two connectors on the PC99 back panel You can use proper cable to connect others USB connectors to the back plane or front panel of chassis Pin 1 NC GND SBD3 SBD3 KEY GND SBD2 SBD2 1 ...

Page 44: ...Se en ns so or r The CASE OPEN header provides chassis intrusion monitoring function This function will log an event in the system BIOS when this header is connected You can use the 2 pin chassis intrusion sensor to connect with this header and enable the chassis monitoring function of system BIOS 1 GND Sensor I In nt tr ru us si io on n S Se en ns so or r ...

Page 45: ... 3 A AX X4 4T T I II I 5 53 33 3N N O On nl li in ne e M Ma an nu ua al l CD IN C CD D A Au ud di io o C Co on nn ne ec ct to or r This connector is used to connect CD Audio cable from CDROM or DVD drive to onboard sound R GND GND L ...

Page 46: ...or r This connector is used to connect Mono In MIC Out cable from internal modem card to onboard sound circuit The pin 1 2 is Mono In and the pin 3 4 is MIC Out Please note that there is no standard for this kind of connector yet only some internal modem cards implement this connector MONO IN GND GND MIC OUT M MO OD DE EM M C CN N C Co on nn ne ec ct to or r ...

Page 47: ...on nt t A Au ud di io o C Co on nn ne ec ct to or r If the housing has been design with an audio port on the front panel you ll be able to connect onboard audio to front panel through this connector AUDIO Connector AUD_GND AUD_VCC AUD_RET_R HP_ON AUD_FPOUT_ 1 2 9 10 AUD_RET_L KEY AUD_FPOUT_R AUD_MIC_BIAS AUD_MIC ...

Page 48: ...nfigurations without the need of a battery The RTC real time clock can also keep running as long as the power cord is plugged If you lose your CMOS data by accident you can just reload the CMOS configurations from Flash ROM and the system will recover as usual Backup by EEPROM Auto Switch Battery ATX Stand by Power Auto switching to ATX standby power as long as AC power line is plugged This smart ...

Page 49: ...or onboard supports CPU over current protection in conjunction with 3 3V 5V 12V power supply provide the full line over current protection ATX Switching Power Supply 3 3V Protected by power supply 5V Protected by power supply Onboard Power Regulator Over Current Protection Circuit CPU Core Voltage 12V Protected by power supply Note Although we have implemented protection circuit try to prevent any...

Page 50: ...ng system As you turn on your system this smart design will continue to monitor your system s working voltage fan status and CPU temperature If any of these systems status goes wrong there will be an alarm through the chassis external speaker or buzzer of motherboard if existed to warn the user CPU Voltage CPU CPU Temperature System Voltage Power Fan Speed Fan Detection Circuit AOpen H W Monitorin...

Page 51: ...herboard has fuse for Keyboard and USB port to prevent over current or shortage These fuses are soldered onboard that when it is broken did the job to protect motherboard user still cannot replace it and the motherboard is still malfunction With expensive Resettable Fuse the motherboard can back to normal function after fuse did the protection job Resettable Fuse ...

Page 52: ...lled regulation of the voltage They include induction regulators and three phase synchronous motors called synchronous condensers both of which vary the effective amount of inductance and capacitance in the transmission circuit Inductance and capacitance react with a tendency to nullify one another When a load circuit has more inductive than capacitive reactance as almost invariably occurs in larg...

Page 53: ...he new Pentium III or when overclocking A typical CPU core voltage is 2 0V so a good design should control voltage between 1 860V and 2 140V That is the transient must be below 280mV Below is a timing diagram captured by a Digital Storage Scope it shows the voltage transient is only 143mv even when maximum 18A current is applied Note This diagram is for example only it may not be exactly the same ...

Page 54: ...o make sure chipset and CPU working in stable condition The layout of this motherboard implements AOpen s unique design called Frequency Isolation Wall Separating each critical portion of motherboard into regions where each region operates in a same or similar frequency range to avoid cross talk and frequency interference between each region s operations and condition The trace length and route mu...

Page 55: ...3N N O On nl li in ne e M Ma an nu ua al l P Pu ur re e A Al lu um mi in nu um m H He ea at ts si in nk k Cool down CPU and Chipset is important for system reliability Aluminum heat sink provides better heat consumption especially when you are trying to overclock ...

Page 56: ...and utilities included in AOpen Bonus CD You don t need to install all of them in order to boot your system But after you finish the hardware installation you have to install your operation system first before you can install any drivers or utilities Please refer to your operation system s installation guide Note Please follow recommended procedure to install Windows 95 and Windows 98 ...

Page 57: ... T I II I 5 53 33 3N N O On nl li in ne e M Ma an nu ua al l A Au ut to o r ru un n M Me en nu u f fr ro om m B Bo on nu us s C CD D D Di is sc c You can use the auto run menu of Bonus CD disc Choose the utility and driver and select model name ...

Page 58: ...l l E El li im mi in na at te e m ma ar rk k f fr ro om m W Wi in nd do ow ws s 9 95 5 9 98 8 Windows 95 98 cannot recognize this chipset because it was released before the Intel 850E chipset You can install the Intel INF Update Utility from the Bonus Pack CD disc auto run menu to eliminate the marks ...

Page 59: ...O On nl li in ne e M Ma an nu ua al l I In ns st ta al ll li in ng g I In nt te el l I IA AA A D Dr ri iv ve er r You can install Intel IAA Driver to increase the performance of software applications and reduce PC boot times You can find it in the AOpen Bonus Pack CD ...

Page 60: ... nl li in ne e M Ma an nu ua al l I In ns st ta al ll li in ng g O On nb bo oa ar rd d L LA AN N D Dr ri iv ve er r F Fo or r A AX X4 4T T I II I 5 53 33 3N N This motherboard comes with an Intel 10 100Mbps LAN controller You can find the LAN driver from the Bonus Pack CD ...

Page 61: ... 53 33 3N N O On nl li in ne e M Ma an nu ua al l I In ns st ta al ll li in ng g O On nb bo oa ar rd d A Au ud di io o D Dr ri iv ve er r This motherboard comes with a RealTek ALC201A chip You can find the audio driver from the Bonus Pack CD auto run menu ...

Page 62: ...il li it ty y You can install Hardware Monitoring Utility to monitor CPU temperature fans and system voltage The hardware monitoring function is automatically implemented by the BIOS and utility software No hardware installation is needed To install the software double click Setup exe The driver will be copied into Windows directory and an entry of Hardware Monitor in the start menu will be create...

Page 63: ...ry and screen image into hard disk and then the system can be totally power off Next time when power is on you can resume your original work directly from hard disk within few seconds without go through the Windows booting process and run your application again If your memory is 64MB normally you need to reserve at least 64MB HDD space to save your memory image Hard Disk Hard Disk System Image Sta...

Page 64: ... and Shutdown will be shown Select Hibernate and Apply 3 Clean boot into DOS and run AOZVHDD utility a If you assign the whole disk to your Win 98 system FAT 16 or FAT 32 please run aozvhdd c file Please remember sufficient free space has to be reserved in the disk e g if you have 64 MB DRAM and 16 MB VGA card installed the system needs at least 80 MB free space The utility will locate the space a...

Page 65: ...ARE MICROSOFT WINDOWS CURRENT VERSION DETECT b Select ADD Binary and name it as ACPIOPTION c Right click and select Modify add 01 after 0000 to make it 0000 01 d Save changes 2 Select Add New Hardware under Control Panel Allow Windows 98 to detect new hardware It will find ACPI BIOS and remove Plug and Play BIOS 3 Reboot system 4 Clean boot into DOS and run AOZVHDD EXE C File Changing from ACPI to...

Page 66: ... 02 c Save changes 2 Select Add New Hardware under Control Panel Allow Windows 98 to detect new hardware It will find Plug and Play BIOS and remove ACPI BIOS 3 Reboot system 4 Run Add New Hardware again and it will find Advanced Power Management Resource 5 Click OK Tip 02 means Windows 98 is ACPI acknowledged but the ACPI function is disabled Tip Currently we found only ATI 3D Rage Pro AGP card wo...

Page 67: ...RAM without going through the Windows 98 booting process and run your application again Suspend to DRAM saves your current work in the system memory it is faster than Suspend to Hard Drive but requires power supplied to DRAM while Suspend to Hard Drive requires no power When go into Suspend When power on next time Other System Devices System Image Status in the DRAM Power loss Other System Devices...

Page 68: ...PI OS is required Currently Windows 98 is the only choice 2 The VIA 4 in 1 Driver must have been installed properly Procedures 1 Changed the following BIOS settings BIOS Setup Power Management Setup ACPI Function Enabled BIOS Setup Power Management Setup ACPI Suspend Type S3 2 Go to Control Panel Power Management Set Power Buttons to Standby 3 Press power button or standby button to wake up the sy...

Page 69: ...tting of BIOS still can t fine tune the chipset controlling entire system Therefore this chapter aims to guide you through the process of configuring your system using setup Currently there are two kinds of beep sound when system fails booting at POST The first type of beep sound consists of a single long beep and two short beeps indicating a video error has failed BIOS from initializing video scr...

Page 70: ...n always dedicates to give users a more friendly computer system Now we include all function descriptions of BIOS setup program into the BIOS Flash ROM When you select one function of BIOS setup program the function description will appeared at right side of screen Hence you don t need read this manual while you changing the BIOS setting Menu Items Select Window Item Function Description Window ...

Page 71: ...rd in the Award BIOS setup program By the way all products of AOpen also provides a special function in the BIOS setup you can press F3 key selecting preferred menu language to display Key Description Page Up or Changing setting to next value or increase the value Page Down or Changing setting to previous value or decrease value Enter Select the item Esc 1 In main menu Quit and don t save any chan...

Page 72: ...MOS F10 Save changed setting and exit setup program Note AOpen always dedicates to give users a more friendly computer system Now we include all function descriptions of BIOS setup program into the BIOS Flash ROM When you select one function of BIOS setup program the function description will appeared at right side of screen Hence you don t need read this manual while you change the BIOS setting ...

Page 73: ... et tu up p After you finish the setting of jumpers and connect correct cables Power on and enter the BIOS Setup press Del during POST Power On Self Test Choose Load Setup Defaults for recommended optimal performance Warning Please avoid of using Load Turbo Defaults unless you are sure your system components CPU DRAM HDD etc are good enough for turbo setting ...

Page 74: ...Flash With an eye to users convenience EZWinFlash combines the BIOS binary code and flash module together so the only thing you have to do is just clicking on the utility you downloaded from web and let it helps you complete the flash process automatically EZWinFlash detects your motherboard and checks the BIOS version cleverly to prevent your system from any possible failure Moreover EZWinFlash h...

Page 75: ...name and BIOS version of your motherboard If you had got the wrong BIOS you will not be allowed to proceed with the flash steps 5 You may select preferred language in the main menu then click Start Flash to start the BIOS upgrade procedure 6 EZWinFlash will complete all the process automatically and a dialogue box will pop up to ask you to restart Windows You may click YES to reboot Windows 7 Pres...

Page 76: ... for maximum 400MHz CPU bus clock But it comes with clock generator of 248MHz when we design it to accommodate with future CPU bus clock Not only that the CPU clock ratio can be up to 24x that supports almost all of Pentium 4 CPUs in the future and provides flexibility for overclockers But not guaranty Tip Note that overclocking may also cause thermal problem Please make sure that the cooling fan ...

Page 77: ... for overclocking for your reference the following list are what have been successful overclocked in our lab Please note that AOpen can not guaranty they can be successful overclocked again Please check the Available Vendor List AVL by link to our official website VGA http www aopen com tw tech report overclk mb vga oc htm HDD http www aopen com tw tech report overclk mb hdd oc htm ...

Page 78: ...l of power management to operating system and bypass BIOS The chipset or super I O chip needs to provide standard register interface to operating system such as Windows 98 This is a bit similar as the PnP register interface ACPI defines ATX momentary soft power switch to control the power state transition A AG GP P A Ac cc ce el le er ra at te ed d G Gr ra ap ph hi ic c P Po or rt t AGP is a bus i...

Page 79: ...A Ad dv va an nc ce ed d P Po ow we er r M Ma an na ag ge em me en nt t Unlike ACPI BIOS controls most APM power management functions AOpen Suspend to Hard Drive is a good example of APM power management A AT TA A A AT T A At tt ta ac ch hm me en nt t ATA is the specification of diskette interface In 80 s many software and hardware manufacturers instituted the ATA specification together The AT is ...

Page 80: ... Bu us s M Ma as st te er r I ID DE E D DM MA A m mo od de e The traditional PIO Programmable I O IDE requires the CPU to involve in all the activities of the IDE access including waiting for the mechanical events To reduce the workload of the CPU the bus master IDE device transfers data from to memory without interrupting CPU and releases CPU to operate concurrently while data is transferring bet...

Page 81: ...ensive server and workstation applications DDR low cost and low voltage will ultimately make it an ideal solution for all segments of the PC market high performance desktop and mobile PCs Value PCs and even Internet Appliances and mobile devices D DI IM MM M D Du ua al l I In n L Li in ne e M Me em mo or ry y M Mo od du ul le e DIMM socket has total 168 pin and supports 64 bit data It can be singl...

Page 82: ...e Unlike traditional FPM that tri states the memory output data to start the pre charge activity EDO DRAM holds the memory data valid until the next memory access cycle that is similar to pipeline effect and reduces one clock state E EE EP PR RO OM M E El le ec ct tr ro on ni ic c E Er ra as sa ab bl le e P Pr ro og gr ra am mm ma ab bl le e R RO OM M Also known as E2 PROM Both EEPROM and Flash RO...

Page 83: ... label separately without a shielding of housing F FC C P PG GA A F Fl li ip p C Ch hi ip p P Pi in n G Gr ri id d A Ar rr ra ay y FC means Flip Chip FC PGA is a new package of Intel for Pentium III CPU It can plug into SKT370 socket but require motherboard to add some signals on socket 370 That is the motherboard needs to be redesigned Intel is going to ship FC PGA 370 CPU and phase out slot1 CPU...

Page 84: ...s overall configuration control of the serial bus in the form of optimizing arbitration timing guarantee of adequate electrical power for all devices on the bus assignment of isochronous channel ID and notification of errors There are two type of IEEE 1394 data transfer asynchronous and isochronous Asynchronous transport is the traditional computer memory mapped load and store interface Data reque...

Page 85: ...or detection P PB BS SR RA AM M P Pi ip pe el li in ne ed d B Bu ur rs st t S SR RA AM M For Socket 7 CPU one burst data read requires four QWord Quad word 4x16 64 bits PBSRAM only needs one address decoding time and automatically sends the remaining QWords to CPU according to a predefined sequence Normally it is 3 1 1 1 total 6 clocks which is faster than asynchronous SRAM PBSRAM is often used on...

Page 86: ... peripheral devices high speed data channel between the computer and expansion card P PD DF F F Fo or rm ma at t A file format for electronic document PDF format is independent from platform you can read PDF file under Windows Unix Linux Mac with different PDF reader You can also read PDF file by web browser such as IE and Netscape note that you need to install PDF plug in first Included in Acroba...

Page 87: ...annel is supported 16 bit data per channel and this channel may have maximum 32 RDRAM devices no matter how many RIMM sockets R RI IM MM M R Ra am mb bu us s I In nl li in ne e M Me em mo or ry y M Mo od du ul le e 184 pin memory module that supports RDRAM memory technology A RIMM memory module may contain up to maximum of 16 RDRAM devices S SD DR RA AM M S Sy yn nc ch hr ro on no ou us s D DR RA ...

Page 88: ...orts 32 bit data SIMM had been phased out on current motherboard design S SM MB Bu us s S Sy ys st te em m M Ma an na ag ge em me en nt t B Bu us s SMBus is also called I2C bus It is a two wire bus developed for component communication especially for semiconductor IC For example set clock of clock generator for jumper less motherboard The data transfer rate of SMBus is only 100Kbit s it allows one...

Page 89: ...at support computer bus technology Ultra DMA support in your computer means that it will boot start and open new applications more quickly It will help users of graphic intensive and applications that require large amounts of access to data on the hard disk drive Ultra DMA uses Cyclical Redundancy Checking CRC offering a new level of data protection Ultra DMA uses the same 40 pin IDE interface cab...

Page 90: ...ty to service multimedia requirements VCM increases memory bus efficiency and performance of any DRAM technology by providing a set of fast static registers between the memory core and I O pins Using VCM technology results in reduced data access latency and reduced power consumption Z ZI IP P f fi il le e A compressed file format to reduce file size To unzip file run shareware PKUNZIP http www pkw...

Page 91: ...lug the AC power cable then remove all of the add on cards and cables including VGA IDE FDD COM1 COM2 and printer T Tr ro ou ub bl le es sh ho oo ot ti in ng g If you encounter any trouble to boot you system follow the procedures accordingly to resolve the problem Start Make sure if all jumper settings are correct Clear CMOS Next ...

Page 92: ... ua al l Install the VGA card Then connect your monitor and keyboard Continue Turn on the power and check if the power supply and CPU fan work properly The problem is probably caused by power supply or motherboard failure Please contact your reseller or local distributor for repairing Next No Yes ...

Page 93: ... Ma an nu ua al l Continue Press Ctrl and Alt key at the same time hold them and then press Del to reboot the system Check if there is display No Yes Perhaps your VGA card or monitor is defective Check if the system reboots No It is very possible that your keyboard is defective Next Yes ...

Page 94: ... l Continue During system rebooting press Del to enter BIOS setup Choose Load Setup Default Check if the system can reboot successfully No The problem should be caused by the IDE cable or HDD itself End Yes Turn off the system and re connect IDE cable Re install the operating system such as Windows 98 ...

Page 95: ...vice to more customers Thanks very much for your understanding AOpen Technical Supporting Team Online Manual Please check the manual carefully and make sure the jumper settings and installation procedure are correct http www aopen com tech download manual default htm 1 1 1 1 1 1 1 1 Test Report We recommend choosing board card device from the compatibility test reports for assembling your PC http ...

Page 96: ...s posted by computer experts you are welcome to join any discussion here http www aopen com tech newsgrp default htm Contact Distributors Resellers We sell our products through resellers and integrators They should know your system configuration very well and should be able to solve your problem more efficiently than us After all their attitude of service is an important reference for you if next ...

Page 97: ...e a an nd d B BI IO OS S v ve er rs si io on n Model name and BIOS version can be found on upper left corner of first boot screen POST screen For example AX4T II 533N is model name of motherboard R1 00 is BIOS version AX4T II 533N R1 00 Mar 15 2002 AOpen Inc Award Plug and Play BIOS Extension v1 0A Copyright 2002 Award Software Inc ...

Page 98: ...cts contain technical issues Receive email notification about latest product s announcements Be able to personalize your AOpen web pages Receive e mail notification about latest BIOS Driver Software release information Have opportunities to participate special product promotional programs Enjoy higher service priority to receive technical assistance provided by AOpen specialists worldwide Be able ...

Page 99: ...apanese http www aopen co jp tech contact techjp htm Chinese http www aopen com tw tech contact techtw htm German http www aopencom de tech contact techde htm Simplified Chinese http www aopen com cn tech contact techcn htm Pacific Rim AOpen Inc Tel 886 2 3789 5888 Fax 886 2 3789 5399 America AOpen America Inc Tel 1 408 922 2100 Fax 1 408 922 2935 Europe AOpen Computer b v Tel 31 73 645 9516 Fax 3...

Reviews: