Installing Acendo Vibe
13
Acendo Vibe Conferencing Soundbars - User Guide
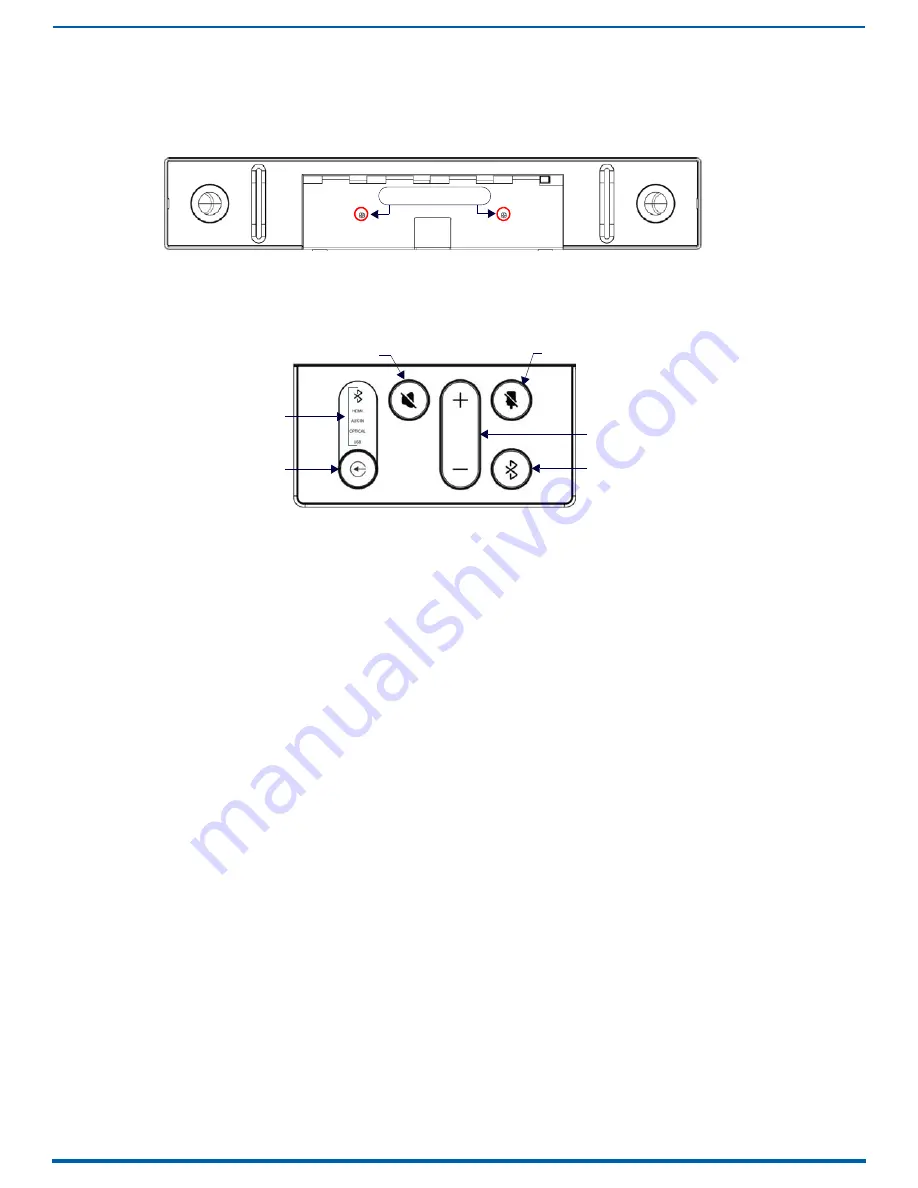
Installing Lock-Down Screws
The Acendo Vibe comes with two (flat-head) Lock-Down Screws that can be added after the Acendo Vibe has been
installed and connected. The Lock-Down Screws prevent the Bracket from being opened accidentally. With the Bracket/
connector bay door closed, install the Lock-Down Screws in the bottom panel (FIG. 14):
NOTE:
The Lock Down screws are not to be used to mount the Acendo Vibe unit to the wall.
Side Panel Keypad
All controls and LEDs are on the left side panel of the Acendo Vibe (FIG. 15):
Volume and Mute Controls
The Acendo Vibe features Sound by JBL, including a 10W/channel stereo amplifier, speakers, microphones, and DSP
algorithms with AEC
Use the Volume Up/Down buttons on either the Acendo Vibe side panel or on the remote control to adjust speaker
volume.
Mute Speaker and Mute Microphone enable/disable the speakers and microphone. Note that these buttons are lit
on the Acendo Vibe (and flash on the remote control) to indicate that the sound functions are muted.
Camera (ACV-5100 only)
The ACV-5100 is equipped with a wide-angle camera for videoconferencing and supports a wide range of web
conferencing applications via USB. To configure your USB device, such as a laptop, to work with the Acendo Vibe:
1.
Connect the Acendo Vibe to a laptop/PC via USB.
2.
Use Source Select button on the the Acendo Vibe (FIG. 15) to select USB (if necessary).
3.
Select AMX Acendo Vibe as the camera.
4.
Select AMX Acendo Vibe as the microphone.
5.
Select USB AUDIO CODEC as the speakers.
NOTE:
To adjust the camera’s view, simply grasp the camera and rotate to the desired position.
FIG. 14
Acendo Vibe Bottom View - Lock Down Screw Locations
FIG. 15
Acendo Vibe LEFT SIDE PANEL Keypad
Lock-Down Screws
Active Audio Source
Audio Source Select
(press to cycle through
the source options)
Mute speaker
Mute Microphone
Volume
Up/Down
Bluetooth
Pairing
(indicates the
current selection


