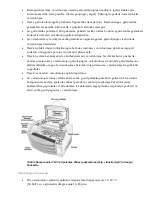
The intended use of the Horizon Series Imagers is high-resolution hardcopy imaging of digital
image source material and through the conversion of electronic signals from a wide variety of
direct/indirect medical imaging modality outputs. The hardcopy output includes, however is not
limited to, digital radiography, nuclear medicine, ultrasound, CT, MRI, CR, and Radiation Therapy
planning. Images are suitable for medical image diagnosis use and referral. The system is intended
for use by medical radiologists, imaging modality specialists, and communications to referring
physicians.
The Horizon Series Imagers are dry, thermal, grayscale (G, GS,GSs,GS-Rad, G1, and G2 models)
and grayscale/color (Ci, Ci-s, CiRAD, and SF models) direct thermal printer/imagers.
Th
e Horizon XL is a special model adding 14 x 36in. and 14 x 51in. true size “long” media that
permits digital direct orthopedic application hardcopy, including diagnosis and analysis of
scoliosis, weight bearing spine/hip/knee, and long bone/hip prosthetic and orthopedic appliances
work-up and surgical planning. Horizon XL is applicable to true-size hardcopy of whole body CT,
MRI, and Angiographic and Venous flow imaging procedures.
Horizon Imagers are 510(k) cleared to market as FDA Class 2 devices, Regulation number 892.2040,
Classification Product Code LMC: Horizon Series Medical Multimedia Dry Imagers K021054 and
Horizon XL Medical Long Film Imager Hardcopy Multimedia K060440.
User Manual Warnings and Cautions
CAUTION
Approved FDA Class 2 device - Federal law restricts this device to be sold for use by or on
the order of a physician.
CAUTION
Make sure that the table can support the weight of the imager [approximately 66.7 kg
(147 lbs) with receive trays and three full supply cassettes installed].
WARNING
The imager is heavy. To avoid injury, use two people to unpack and position the imager.
CAUTION
Do not scratch or nick the sheet metal. Scratches and nicks in the basement will damage the
printed side of ChromaVista sheets.
CAUTION
Make sure that the imager is powered off before connecting the Ethernet cable. For
information about powering the imager on and off, refer to “Powering the Imager On and Off”.
CAUTION
Do not touch any of the connector pins.
CAUTION
If the thermal print head is not parked, power on the imager, then repeat steps 2 and 3 to
properly power off the imager so that it does park.
CAUTION
Push the ribbon carriage down slowly. Forcing it down too quickly may damage the
carriage.
CAUTION
If the imager is powered off using the POWER key, unprinted queued jobs are saved and
will finish printing once the imager is powered on again (you can purge all jobs). However, if the
imager is powered off using the rocker switch in the back or power is interrupted (for example, an
unexpected power failure), queued jobs may be lost.
WARNING
When servicing the imager, always power it off using the POWER key, turn the rocker
switch in the back to the 0 (off) position, then unplug the imager.
CAUTION
Use only Codonics media. Do not use plain paper, office transparencies, or other
unapproved media as damage, improper operation, or malfunction may result. For information about
the approved Codonics media types and sizes, and how to order cassettes, refer to “Ordering Media”.
CAUTION
Do not refill a cassette.
Do not tamper with or remove the barcode label. The cassette’s
barcode information is essential for ensuring diagnostic image quality. Compromising the cassette in
any way jeopardizes the quality and reliability of the imager.

