IOAK-3265 / 8061360
(09.2015./1)
10143.4ETsDpHaQaXSp
10143.4ETsDpHaJVQaW
10143.4ETsDpHaQaS
C
O
MENU
(ES) MANUAL DE INSTRUCCIONES.............................2
(EN) INSTRUCTION MANUAL.......................................29
Page 1: ...IOAK 3265 8061360 09 2015 1 10143 4ETsDpHaQaXSp 10143 4ETsDpHaJVQaW 10143 4ETsDpHaQaS C O MENU ES MANUAL DE INSTRUCCIONES 2 EN INSTRUCTION MANUAL 29 ...
Page 2: ...spués de leer el manual el uso del horno será muy sencillo Antes de abandonar la fábrica y ser embalado el horno fue minuciosamente comprobado para que funcione siguiendo los más estrictos controles de calidad Les rogamos lean con atención este manual de uso antes de encender el aparato Seguir las instrucciones incluidas en el presente manual les protegerá de un uso inadecuado Guarde el manual de ...
Page 3: ... 2 Seguridad 4 Descripción del producto 8 Características del producto 9 Instalación 10 Funcionamiento 12 Cocinado en el horno consejos prácticos 19 Limpieza y mantenimiento de horno 21 Situaciones de emergencia 26 Datos técnicos 27 ...
Page 4: ...pervisión de la persona responsable de su seguridad Evite que los niños jueguen con el aparato y realice la limpieza y las tareas de mantenimiento cuando los niños estén bajo tutela Durante el uso el equipo se calienta Por favor tenga pre caución y no toque los elementos calientes dentro del horno Las partes exteriores visibles pueden calentarse durante el uso por lo que se recomienda cuidar que l...
Page 5: ...ento del cable podría no resistir las altas tempe raturas l No se debe dejar el horno sin vigilancia a la hora de la cocción Los aceites y grasas podrían provocar fuego a consecuencia del sobrecalentamiento l En la puerta del horno no se deben colocar recipientes cuyo peso supere los 15 kg l No use el horno si observa que no funciona correctamente Todas las incidencias deben ser reparadas por los ...
Page 6: ...tidades Una carne con peso inferior a 1 Kg se pre para de forma más económica en una placa lEmpleo de calor sobrante del horno En caso de preparar un plato durante más de 40 minutos es aconsejable desconectar el hor no 10 minutos antes de finalizar la cocción Nota En caso de usar el programa dor hay que introducir los tiempos más cortos en la preparación del plato lApertura y cierre de la puerta d...
Page 7: ...para desechos tachado de acu erdo con la Directiva Euro pea 2012 19 UE y la ley española sobre equipos eléctricos y elec trónicos usados R D 208 2005 Este símbolo informa que este aparato una vez finalizado su uso no debe ser desechado junto con otros desechos procedentes de casa El usuario está obligado a devolverlo a un lugar destinado para recoger equipos eléc tricos y electrónicos usados La de...
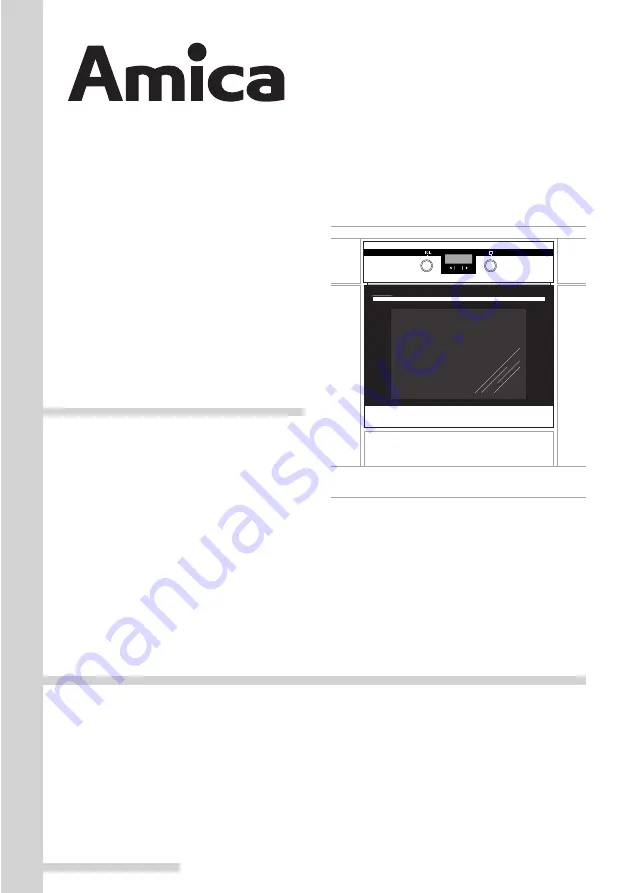
Page 8: ...8 C O MENU DESCRIPCIÓN DEL PRODUCTO Funciones de horno Programador elec trónico Regulador de tem peratura Indicador luminoso de termorregulador ...
Page 9: ...9 Guías metálicas CARACTERÍSTICAS DEL PRODUCTO Accesorios Bandeja estándar Parilla estándar rejilla para escurrir Bandeja profunda Tenedor y marco de asador ...
Page 10: ... 100 C En caso contrario la superficie de la cha pa de madera podrá sufrir deformaciones o podrá despegarse l Prepare un orificio en el mueble según las dimensiones de las figuras A horno empotrado por debajo de encimera B horno empotrado alto en columna En el caso que el estante tenga pared trasera prepare orificios para la conexión eléctrica l Introducir el horno completamente en el hueco y fija...
Page 11: ...alación eléctrica lea la información in cluida en la placa de datos y en el esquema de conexión Advertencia El instalador está obligado a entregarle al usuario el certificado de cone xión del horno a la instalación eléctrica el cual se encuentra en la garantía Cualquier otra forma de conexión del horno distinta a la mostrada en el esquema pue de provocar una avería Esquema de conexiones posibles A...
Page 12: ...recha a la posición ó ver el capítulo Funcionamiento de pro gramador y control del horno l Caliente el horno a la temperatura de 250 C durante 30 minutos aproximada mente elimine los restos de suciedad y limpie el interior FUNCIONAMENTO Los mandos están ocultos en el panel de control Para seleccionar una función es necesario 1 Apretar el mando con cuidado y soltar 2 Poner la función seleccionada L...
Page 13: ...ntalla empezarán a parpadear y se puede corregir la hora actual Nota Se puede activar el horno cuando aparezca el símbolo en la pantalla Timer El timer puede ser activado en cualquier momento sin tener en cuenta el estado de actividad de otras funciones del programador El alcance de tiempo medido es de 1 minuto a 23 horas y 59 minutos Para fijar el timer es necesario lApriete el sensor 1 en la pan...
Page 14: ...ol el mando del horno está unido al regulador de temperatura Trabajo automático Cuando queremos que el horno se encienda a una hora determinada y se apague a una hora concreta es necesario fijar la hora de inicio y de terminación del trabajo lApriete el sensor 1 hasta el momento en el que las indicaciones de pantalla empiecen a parpadear lFije el tiempo deseado de trabajo con los sensores 3 y 2 co...
Page 15: ...figuración En cualquier momento se puede borrar la configuración de timer o de la función de trabajo automático Borrado de configuración de trabajo auto mático lApriete al mismo tiempo los sensores 2 y 3 Borrado de configuración de timer lCon el sensor 1 seleccione la función de timer vuelva a apretar los sensores 2 y 3 12 35 2 1 3 Cambio de tono de la señal sonora El tono de la señal sonora puede...
Page 16: ...mover el mando en esta posición conseguiremos la iluminación de la cámara de horno Ventilador tostador y calefactor superior encendidos El uso de esta función permite acele rar el proceso de tostado y aumentar el sabor de la comida Descongelación Encendido el ventilador solamente calefactores apagados Calentamiento rápido Calefactor superior inferior y ventila dor encendidos Calentamiento previo d...
Page 17: ...tura dentro de la cámara del horno Calefactor inferior encendido En esta posición del mando el horno realiza calentamiento solamente con el uso del calefactor inferior Asado de productos por debajo por ejemplo pasteles húmedos y rellenos con frutas Calefactor superior e inferior en cendidos Poner el mando en esta posición permite realizar el calentamiento del horno de forma convencional Sirve perf...
Page 18: ...ajo de la parilla la bandeja para la grasa l Cerrar la puerta del horno Uso del grill El proceso de tostado se produce como con secuencia de la acción de los rayos infrarro jos emitidos por el grill calentado al rojo vivo Nota El tostado debe ser realizado con la puerta del horno cerrada En caso de usar el grill las partes visibles exteriores del horno pueden estar muy calientes Se recomienda vigi...
Page 19: ...mienda dejar el pastel en el horno después de apagarlo durante unos 5 minutos l Las temperaturas utilizadas para la repostería horneada con el uso de la fun ción aire caliente suelen ser unos 20 30o centígrados inferiores en relación a los pasteles horneados de manera convencional con el empleo del calefactor superior e inferior l Los parámetros de la tabla son aproximados y deben ser corregidos e...
Page 20: ...5 60 160 180 2 3 45 60 190 2 3 60 70 230 250 4 14 18 225 250 2 120 150 160 180 2 120 160 160 230 2 90 120 160 190 2 90 120 190 2 3 70 90 160 180 2 45 60 175 190 2 60 70 190 210 2 40 50 170 190 3 40 50 Importante Los parámetros de la tabla son aproximados y deben ser corregidos en función de sus propias experiencias y gustos culinarios los tiempos indicados se refieren al asado en moldes de cocina ...
Page 21: ... y un poco de jabón para lavavajillas l Limpieza con vapor Aqualytic vierta 0 5 l de agua sobre el fondo de la cámara del horno cerrar la puerta del horno fijar el regulador de temperatura en la posición 900 C y el mando de función en la posición calefactor superior e inferior encendidos calentar la cámara de horno durante unos 30 minutos después de terminar la limpieza abrir la puerta del horno l...
Page 22: ...a lám para recordando secarla bien 3 Desenroscar la bombilla del alojamiento y de ser necesario reemplazarla con una nueva bombilla de alta temperatura 3000C de parámetros Voltaje 230 V Potencia 25 W Rosca E14 1 Desconectar la alimentación del horno 2 Retirar los accesorios del horno 3 Si el horno está equipado con guías tele scópicas correrlas hacia adelante 4 Utilizando un destornillador plano l...
Page 23: ...y que sacar las guías tirando del borde posterior de los elementos salientes en la parte delantera de las guías y luego empujar las guías junto con la bandeja l Las cocinas marcadas con la letra D están dotadas de guías metálicas que se sacan fácilmente rejillas de las bandejas de horno Para sacar para lavar hay que tirar del enganche que se encuentra en la parte delantera Z1 y luego apartar la gu...
Page 24: ...delante Para montar la puerta en el horno hacer lo contrario A la hora de introducir hay que fijarse de situar co rrectamente el corte de bisagra en la ranura de bisagra Después de meter la puerta en el horno hay que bajar el elemento protector y apretarlo con cuidado Si situamos mal el elemento protector podemos dañar la bisagra en el momento de cerrar la puerta Desmontaje del cristal interno 1 C...
Page 25: ...o adherir el extremo izquierdo a la puerta y apretar el extremo derecho hasta oír clic Luego apretar a la izquierda hasta oír clic D 1 2 3 1 2 3 1 2 3 Revisiones periódicas Además de las actividades que tengan como fin mantener limpia la cocina es necesario l Realizar revisiones periódicas de funcio namiento de los elementos de control y de trabajo de la cocina Después del periodo de garantía al m...
Page 26: ... Fije la hora actual véase Funcionamiento de programador Apriete o reemplace la bombilla fundida véase el capítulo Limpiezay mantenimiento SITUACIONES DE EMERGENCIA En cada situación de emergencia es necesario l Desconectar los equipos de la cocina Desconectar la alimentación eléctrica Avisar del problema Algunas incidencias pueden repararse sencillamente por su cuenta siguiendo las instruc ciones...
Page 27: ...aración del fabricante El fabricante declara con la presente que el producto cumple los requisitos esenciales de las siguientes directivas europeas l Directiva de baja tensión 2006 95 CE l Directiva de compatibilidad electromagnética 2004 108 CE l Directiva de diseño ecológico 2009 125 CE y por lo tanto el producto fue marcado y tiene declaración de conformidad compartida a las entidades superviso...
Page 28: ...y following these instructions carefully you will be able to avoid any problems in using the appliance It is important to keep the instruction manual and store it in a safe place so that it can be consulted at any time It is necessary to follow the instructions in the manual carefully in order to avoid possible accidents Caution Do not use the oven until you have read this instruction manual The o...
Page 29: ...29 Safety instructions 30 Description of the appliance 34 Installation 36 Operation 38 Baking in the oven practical hints 45 Cleaning and maintenance 47 Technical data 53 TABLE OF CONTENTS ...
Page 30: ...nderstand the ha zards involved Children shall not play with the appliance Cleaning and user maintenance shall not be made by chil dren without supervision During use the appliance becomes hot Care should be taken to avoid touching heating elements inside the oven Accessible parts may become hot during use Young children should be kept away Warning Do not use harsh abrasive cleaners or sharp metal...
Page 31: ... faults must be fixed by an appropriately qualified and authorised person In the event of any incident caused by a technical fault disconnect the power and report the fault to the service centre to be repaired The rules and provisions contained in this instruction manual should be strictly observed Do not allow anybody who is not familiar with the contents of this instruc tion manual to operate th...
Page 32: ...more economically in a pan on the cooker hob Make use of residual heat from the oven If the cooking time is greater than 40 minutes switch off the oven 10 minutes before the end time Important When using the timer set appropriately shorter cooking times according to the dish being prepared Make sure the oven door is properly closed Heat can leak through spillages on the door seals Clean up any spi...
Page 33: ...ach of children UNPACKING DISPOSAL OF THE APPLIANCE Old appliances should not sim ply be disposed of with normal household waste but should be delivered to a collection and recycling centre for electric and electronic equipment A symbol shown on the product the in struction manual or the packaging shows that it is suitable for recycling Materials used inside the appliance are recyclable and are la...
Page 34: ...34 C O MENU DESCRIPTION OF THE APPLIANCE 1 Temperature control knob 2 Oven function selection knob 3 Temperatureregulatorsignal light 4 Oven door handle 5 Electronic programmer 1 3 2 4 5 ...
Page 35: ... optional 35 Side racks SPECIFICATIONS OF THE APPLIANCE Cooker fittings Baking tray Grill grate drying rack Roasting tray Turnspit ...
Page 36: ...r a wall Coating or veneer used on fitted furniture must be applied with a heat resistant adhesive 100 C This prevents surface deforma tion or detachment of the coating Hoods should be installed according to the manufacturer s instructions Make an opening with the dimensions given in the diagram for the oven to be fitted Make sure the mains plug is disconnected and then connect the oven to the mai...
Page 37: ...re connecting the oven to the power sup ply it is important to read the information on the data plate and the connection diagram Caution The installer is obliged to provide the user with appliance electrical connection certificate enclosed with the warranty card Live L BN brown Neutral N BU blue Earth PE GNYE green yellow Power circuit should be protected with a 16A fuse Recommended type of connec...
Page 38: ...first time The oven is equipped with a retractable knobs In order to select a function do the following 1 Gently press and release a knob which will pop out 2 Turn the oven functions selection knob to the desired function Symbols printed around the knob indicate available oven functions 1 2 Remove packaging clean the interior of the oven and the hob Take out and wash the oven fittings with warm wa...
Page 39: ... has been set the new data will be saved Caution If the correct time is not set then proper opera tion of the oven is not possible set the timer using sensors 3 and 2 The time set is shown on the display and the signal function is on Press sensor 1 2 or 3 in order to switch off the signal the signal function will go out and the display will show the current time Caution If the alarm signal is not ...
Page 40: ... sensor 1 2 or 3 in order to switch off the signal the signal function will go out and the display will show the current time Caution In ovens equipped with one control knob the oven function knob is integrated with the temperature regulator knob Automatic operation If the oven is to be switched on for a specified period of time and switched off at a fixed hour then you should set the operation ti...
Page 41: ...gulator knob to the switched off position Press sensor 1 2 or 3 in order to switch off the alarm the function AUTO will go out and the display will show the current time Cancel settings Timer and automatic function settings may be cancelled at any time Cancel automatic function settings press sensors 2 and 3 simultaneously Cancel timer settings press sensor 1 to select timer settings press sensors...
Page 42: ...on When the knob is turned to this posi tion the oven activates the combined grill and fan function In practice this function allows the grilling process to be speeded up and an improvement in the taste of the dish You should only use the grill with the oven door shut Enhanced roaster super roaster In this setting both roaster and top heater are on This increases tem perature in the top part of th...
Page 43: ...his position allows the oven to be heated up by a heating element with air circulation forced by a rotating fan fitted in the central part of the back wall of the of and chamber Lower baking temperatures than in the conventional oven can be used Heating the oven up in this manner en sures uniform heat circulation around the dish being cooked in the oven Convection with ring heating ele ment and bo...
Page 44: ...le parts can become hot It is best to keep children away from the oven Use of the rotisserie The rotisserie enables rotating grilling in the oven It is intended for grilling poultry kebabs sausages and similar dishes Switching the rotisserie motor on and off is done at the same time as switching the grilling function with rotisserie When using these funtions during grilling the rotisserie motor ca...
Page 45: ...ke after switching off the oven it is advisable to leave the cake inside for about 5 min temperatures for baking with the ultra fan function are usually around 20 30 degrees lower than in normal baking using top and bottom heaters the baking parameters given in Table are approximate and can be corrected based on your own experience and cooking preferences if information given in recipe books is si...
Page 46: ...re Level Time in minutes 160 200 2 3 30 50 160 180 2 20 40 140 160 2 10 40 200 230 1 3 10 20 210 220 2 45 60 160 180 2 3 45 60 190 2 3 60 70 230 250 4 14 18 225 250 2 120 150 160 180 2 120 160 160 230 2 90 120 160 190 2 90 120 190 2 3 50 60 160 180 2 45 60 175 190 2 60 70 190 210 2 40 50 170 190 3 40 50 Baking smaller items Oven with automatic air circulation including a fan and an ultra fan heate...
Page 47: ...imately 30 minutes open the oven door wipe the chamber inside with a cloth or sponge and wash using warm water with washing up liqu id After cleaning the oven chamber wipe it dry By ensuring proper cleaning and mainte nance of your cooker you can have a sig nificant influence on the continuing fault free operation of your appliance Before you start cleaning the cooker must be switched off and you ...
Page 48: ...the oven and press the catches Z1 and Z2 CLEANING AND MAINTENANCE Z2 Z1 48 Ovens marked with the letters Dp have stain less steel sliding telescopic shelf supports attached to the wire shelf supports The telescopic shelf supports should be removed and cleaned with the wire shelf supports Before you put the baking tray on them they should be pulled out if the oven is hot pull out the telescopic she...
Page 49: ...inserted into the ceramic socket Screw in the lamp cover Oven light bulb Replacing halogen lighting in the oven Before replacing the halogen bulb make sure the appliance is disconnected from electric mains to avoid possible electric shock 1 Disconnect power from oven 2 Remove shelves and trays from the oven 3 If the oven has telescopic shelf supports remove them also 4 Use a flat screwdriver to pr...
Page 50: ... cooker do the inverse When fitting ensure that the notch of the hinge is correctly placed on the protrusion of the hinge holder After the door is fitted to the oven the safety catch should be carefully lowered down again If the safety catch is not set it may cause damage to the hinge when closing the door Removing the inner panel 1 Using a flat screwdriver unhook the up per door slat prying it ge...
Page 51: ...re or by an appropriately authorised fitter CLEANING AND MAINTENANCE 3 Pull the inner glass panel from its seat in the lower section of the door Re move the inner panel fig D 4 Clean the panel with warm water with some cleaning agent added Carry out the same in reverse order to reassemble the inner glass panel Its smooth surface shall be pointed up wards Important Do not force the upper strip in o...
Page 52: ...centre check the following points that are presented in the table PROBLEM REASON ACTION 1 The appliance does not work Break in power supply Check the household fuse box if there is a blown fuse replace it with a new one 2 The programmer display shows 0 00 The appliance was discon nected from the mains or there was a temporary power cut Set the current time see Use of the programmer 3 The oven ligh...
Page 53: ...hereby declares that this product complies with the general requirements pursuant to the following European Directives l The Low Voltage Directive 2006 95 EC l Electromagnetic Compatibility Directive 2004 108 EC ErP Directive 2009 125 EC and therefore the product has been marked with the symbol and the Declaration of Conformity has been issued to the manufacturer and is available to the competent ...
Page 54: ...54 ...
Page 55: ...55 ...
Page 56: ......