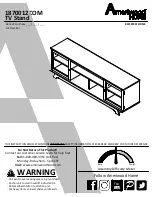
Ameriwood 1870012COM Assembly Instructions Manual Download Page 1

1870012COM

TV Stand

- Unit can tip over causing severe injury or death.

- Anchor unit to stud in wall (if instructed to).

- Do Not allow children to climb on unit.

- Put heavy items on lower shelves or drawers.

B341870012COM0

THIS INSTRUCTION BOOKLET CONTAINS 

IMPORTANT

 SAFETY INFORMATION. PLEASE READ AND KEEP FOR FUTURE REFERENCE.

WARNING

Follow Ameriwood Home

Tube

You

Date of Purchase ___ / ___ / ___

Lot Number:

Do Not Return This Product!


Contact our customer service team for help first.

Call:

 1-800-489-3351 (toll free)  

Monday-Friday 9am - 5pm CST

Visit:

 www.ameriwoodhome.com

Assembly Difficulty Meter

Easy

Tough

Summary of Contents for 1870012COM

Page 1: ...s B341870012COM0 THIS INSTRUCTION BOOKLET CONTAINS IMPORTANT SAFETY INFORMATION PLEASE READ AND KEEP FOR FUTURE REFERENCE WARNING Follow Ameriwood Home Tube You Date of Purchase ___ ___ ___ Lot Number Do Not Return This Product Contact our customer service team for help first Call 1 800 489 3351 toll free Monday Friday 9am 5pm CST Visit www ameriwoodhome com Assembly Difficulty Meter Easy Tough ...

Page 2: ...rt and count the parts before attempting assembly Compression dowels are lightly tapped in with a hammer Slides are labeled with a R right and L left for proper placement Make sure to always face the point on the top of the Cam Lock towards the outer edge Use all the nails provided for the back panel and spread them out equally Back panel must be used to make sure your unit is sturdy Do NOT use ha...

Page 3: ...step carefully and follow the proper order Separate and count all your parts and hardware Give yourself enough room for the assembly process Have the following tools Flat Head Screwdriver 2 Phillips Head Screwdriver and Hammer Caution If using a power drill or power screwdriver for screwing please be aware to slow down and stop when screw is tight Failure to do so may result in stripping the screw...

Page 4: ...on 31870012070 G 2 Adjustable shelves 31222012080 2 Door Assembly 31222012140 Fixed Shelf 31870012090 H I Kick 31870012100 Left Side Kick 31870012110 Right Side Kick 31870012120 L J K M Rear Support 31870000130 N Divider 31870012150 Support 31870012160 Solid Back Panel 31870012170 O P Q Back Panel K187001200 R This piece is paperboard construction It is not made from wood but is required for the a...

Page 5: ...iwoodhome com Board Identification Not actual size Tube You A B C D E F G I J K L M O Q R P H H N N This piece is paperboard construction It is not made from wood but is required for the assembly of your unit ...

Page 6: ... A53510 angle bracket x56 A12210 1 2 screw x12 A23030 confirmat x8 A80250 shelf support x2 A17400 7 8 bolt x36 A21110 nail x14 A21660 wood dowel x3 A22920 connector x3 A22910 connector bolt x2 A30030 catch strike x4 A60010 hinge x2 A52440 knob x1 B64396 warning label 1 2 3 4 5 6 7 8 9 10 11 12 13 14 15 12a 12b ...

Page 7: ...7 ameriwoodhome com STEP1 Proper orientation of CAM LOCK Tip Assembly Quick Tube You x4 A22620 1 8 x2 A21660 1 1 8 8 A B 1 1 ...

Page 8: ...8 ameriwoodhome com STEP2 Tube You 2 x6 A22610 2 C 2 2 2 2 2 Finished Edge ...

Page 9: ...9 ameriwoodhome com STEP3 Proper orientation of CAM LOCK Tip Assembly Quick Tube You 1 8 4 x1 A22620 x2 A21660 x2 A12210 x1 A30030 2 x2 A22610 E E 12b 8 8 2 2 12b 4 4 1 Finished Edge SIDE A SIDE B ...

Page 10: ...10 ameriwoodhome com STEP4 Proper orientation of CAM LOCK Tip Assembly Quick Tube You 1 2 4 8 12b x1 A22620 x2 A22610 x2 A12210 x2 A21660 x1 A30030 2 8 1 8 2 12b 4 4 F F SIDE B SIDE A Finished Edge ...

Page 11: ...11 ameriwoodhome com STEP5 Proper orientation of CAM LOCK Tip Assembly Quick Tube You 1 2 8 x6 A22620 x2 A22610 x3 A21660 2 1 1 8 8 2 1 1 8 I O 1 1 Finished Edge ...

Page 12: ...12 ameriwoodhome com STEP6 Tube You O I UNLOCK LOCK Finished Edge ...

Page 13: ...13 ameriwoodhome com STEP7 Tube You O I Q Q 8 x2 A21660 8 8 Finished Surface Larger End Holes ...

Page 14: ...14 ameriwoodhome com STEP8 Tube You 3 4 8 x4 A53510 x4 A12210 x2 A21660 8 8 3 4 G G End View ...

Page 15: ...15 ameriwoodhome com STEP9 Tube You UNLOCK LOCK I O E F Q I F Finished Edge Finished Edge G Angle Brackets 3 are along top edge You will need the help of another person for this step ...

Page 16: ...16 ameriwoodhome com STEP10 Tube You 2 11 x6 A22610 x12 A23030 2 11 11 11 11 11 11 11 11 11 11 11 11 2 2 2 2 2 A E F B O Finished Edge Finished Edge Finished Edge D ...

Page 17: ...17 ameriwoodhome com STEP11 Tube You UNLOCK LOCK 4 x4 A12210 After attaching the Top C to the unit and locking the cam locks 1 attach the Apron G to the Top C with screws 4 4 4 4 4 A E F G B C ...

Page 18: ...18 ameriwoodhome com STEP12 Proper orientation of CAM LOCK Tip Assembly Quick Tube You K L 1 x4 A22620 1 1 1 1 ...

Page 19: ...19 ameriwoodhome com STEP13 Tube You K L D UNLOCK LOCK raw edges are shaded Note Small end hole to front L ...

Page 20: ...20 ameriwoodhome com STEP14 Tube You 6 3 4 6 x6 A53510 x6 A12210 x1 A22910 3 4 J ...

Page 21: ...orientation of CAM LOCK Tip Assembly Quick Tube You 5 1 8 x2 A22620 x3 A22920 x1 A21660 5 5 1 8 P You will need to tap the connector 5 with a hammer to fully insert Be sure the connector is positioned as shown before pushing into holes 1 ...

Page 22: ...22 ameriwoodhome com STEP16 Tube You 3 4 6 x6 A53510 x6 A12210 x2 A22910 6 6 3 4 M ...

Page 23: ...23 ameriwoodhome com STEP17 Tube You M P J 5 Turn screw clockwise to lock ...

Page 24: ...24 ameriwoodhome com STEP18 Tube You D J P M M D 4 x8 A12210 4 Carefully place the Kick J Rear Support M and Support P onto the Bottom D and attached the angle brackets 3 to the Bottom D with screws 4 3 ...

Page 25: ...25 ameriwoodhome com STEP19 Tube You 4 x4 A12210 4 K J L D M ...

Page 26: ...the unit on its front as shown Attached the back panel as shown nailing straight into the raw edges Assure that the unit is square Distance from corner to corner must be equal as shown 9 9 Flush the edge of the back panel with the bottom edge of bottom Assure that the unit is square Distance from corner to corner must be equal as shown Raw Surface ...

Page 27: ...27 ameriwoodhome com STEP21 Tube You 4 13 10 14 x12 A12210 x2 A17400 x2 A30030 x4 A60010 x2 A52440 N N 12a 4 4 12a 10 10 14 14 4 4 13 4 4 13 ...

Page 28: ...28 ameriwoodhome com STEP22 Tube You 4 x8 A12210 4 4 4 4 Hinges are slotted for door adjustments Loosen screws 4 make adjustments and re tighten screws 4 ...

Page 29: ...29 ameriwoodhome com STEP23 Tube You 7 x8 A80250 7 7 H H ...

Page 30: ...he CPSC Ban on Lead Containing Paint 16 CFR 1303 3 This product is distributed by Dorel Home Furnishings Inc 410 East First Street South Wright City MO 63390 636 745 3351 4 Site of Manufacture Tiffin OH 5 See front page of instruction manual for date of manufacture This unit has been designed to support the maximum loads shown Exceeding these load limits could cause sagging instability product col...

Page 31: ...eals and discount codes Quick and easy replacement part service To register your product visit ameriwoodhome com Visit your local retailer s website rate your purchased product and leave us some feedback We would like to extend a big Thank You to all of our customers for taking the time to assemble this Ameriwood Home product and to give us your valuable feedback ...

Page 32: ...zquierda para la colocación correcta Asegúrese de que siempre este el punto locaizado en la parte superior de bloqueador de leva este volteadohacia borde exterior Utilizar todos los clavos para el panel de atras y distribuirlos por igual El panel de atras debe utilizarse para asegurarse de que la unidad quede fija y firme No use quimicas fuertes ni limpiadores abrasivos en este articulo Nunca empu...

Page 33: ...ructural de la unidad y debe ser instalado correctamente Coloque la unidad en el frente como se muestra AdJuntar el panel posterior como se muestra clavado directamente en los bordes crudos Asegúrese de que la unidad esté cuadrada La distancia entre la esquina y la esquina debe ser igual a la indicada Enjuague el borde del panel posterior con el borde inferior de la parte inferior Asegúrese de que...

Page 34: ...os exclusivos Fácil y rápido servicio de partes de remplace Para registrar su producto visite ameriwoodhome com Clasificasión de 5 estrellas Visite el sitio web de su tienda local califique su comprado y denos sus comentarios Nos gustaría enviar un gran Agradecimiento a todos nuestros clientes por tomarse el tiempo de ensamblar este producto de Ameriwood Home y por darnos sus valiosos comentarios ...

Page 35: ... sont marquées d un R droit et d un L gauche pour un bon placement Assurez vous toujours de faire face la pointe situé sur le haut de la Serrure de Came vers le bord extérieur Utiliser tous les clous fournis pour le panneau arrière et les répartir également Le panneau arrière doit être utilisé pour vous assurer que votre appareil est robuste N utilisez pas de produits chimiques agressifs ou de net...

Page 36: ...elle de cet appreil et doit être installé correctement Positionnez l appareil sur son devant comme indiqué Attachez le panneau arrière comme montré clouant directement dans les bords crus Assurez vous que l unité est carrée La distance entre le coin et le coin doit être égale comme indiqué Rincer le bord du panneau arrière avec le bord inférieur du fond Assurez vous que l unité est carrée La dista...

Page 37: ...es exclusives et codes promo Service de pièces de rechange rapide et facile Pour enregistrer votre produit visitez ameriwoodhome com 5 Étoiles Visitez le site Web de votre détaillant local évaluez votre produit acheté et laissez nous quelques commentaires Nous tenons à offrir un grand Merci à tous nos clients pour avoir pris le temps d assembler ce produit Ameriwood Home et de nous donner vos comm...

Reviews: