


97
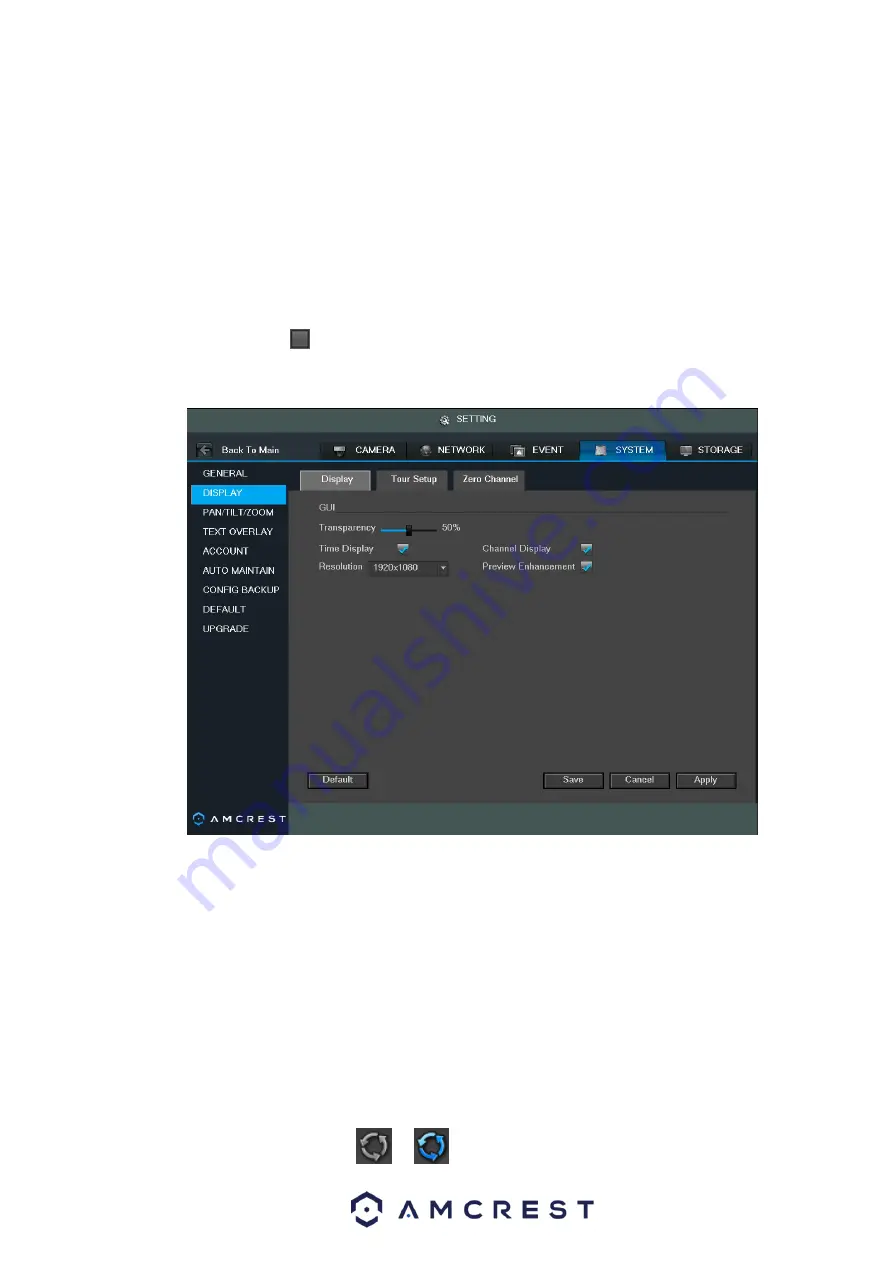
Transparency: Here is for you to adjust transparency. The value ranges from 0-100%.
Channel name: Here is where you modify the channel name. The system supports a max of 25-
digits (The value may vary due to different series). Please note all your modifications here only
apply to the DVR local end. You need to open web interface or client end to refresh the channel
name.
Time display: You can select to display the time or not when system is in playback.
Channel display: You can select to display the channel name or not when system is in playback.
Resolution:
There are four options: 1920×1080, 1280×1024(default), 1280×720, and 1024×768.
Please note the system needs to reboot to activate the current setup.
Enhance image: Check this box and you can optimize the margin of the preview video.
Please highlight the icon
to select the corresponding function.
After completing all of the settings please click the save button and the system goes back to the
previous menu.
Figure 4-80
4.10.6.2.2 Tour
Here you can activate the tour function. You can see an interface shown as in Figure 4-81
Enable tour: Highlight this box here to enable this function.
Interval: System supports 1/8-window tour. Input the desired interval value here. The value ranges
from 5-120 seconds. This is used for scheduled tour/alarm/motion detect tour.
Click each camera that you want to be viewed in the tour. Each listed view corresponds to split view
of the cameras. To remove a camera from the tour, simply the camera again.
All: Check this box to enable a tour of all cameras.
Default: Click it to restore default setup.
Tips:
On the navigation bar, click
or
to enable/disable tour function.
Summary of Contents for General 1080P(V2) Mini 1U Series
Page 1: ...Amcrest Series DVR User s Manual Version 1 0 0...
Page 2: ...2...
Page 88: ...79 Figure 4 531 Figure 4 54 Figure 4 55...
Page 92: ...83 Figure 4 60 Figure 4 79...
Page 143: ...134 Figure 5 44 Figure 5 45...
Page 183: ...174 Maxtor DiamondMax 20 STM3320820AS 320G SATA Maxtor DiamondMax 20 STM3250820AS 250G SATA...