


8
Capture the DUT image
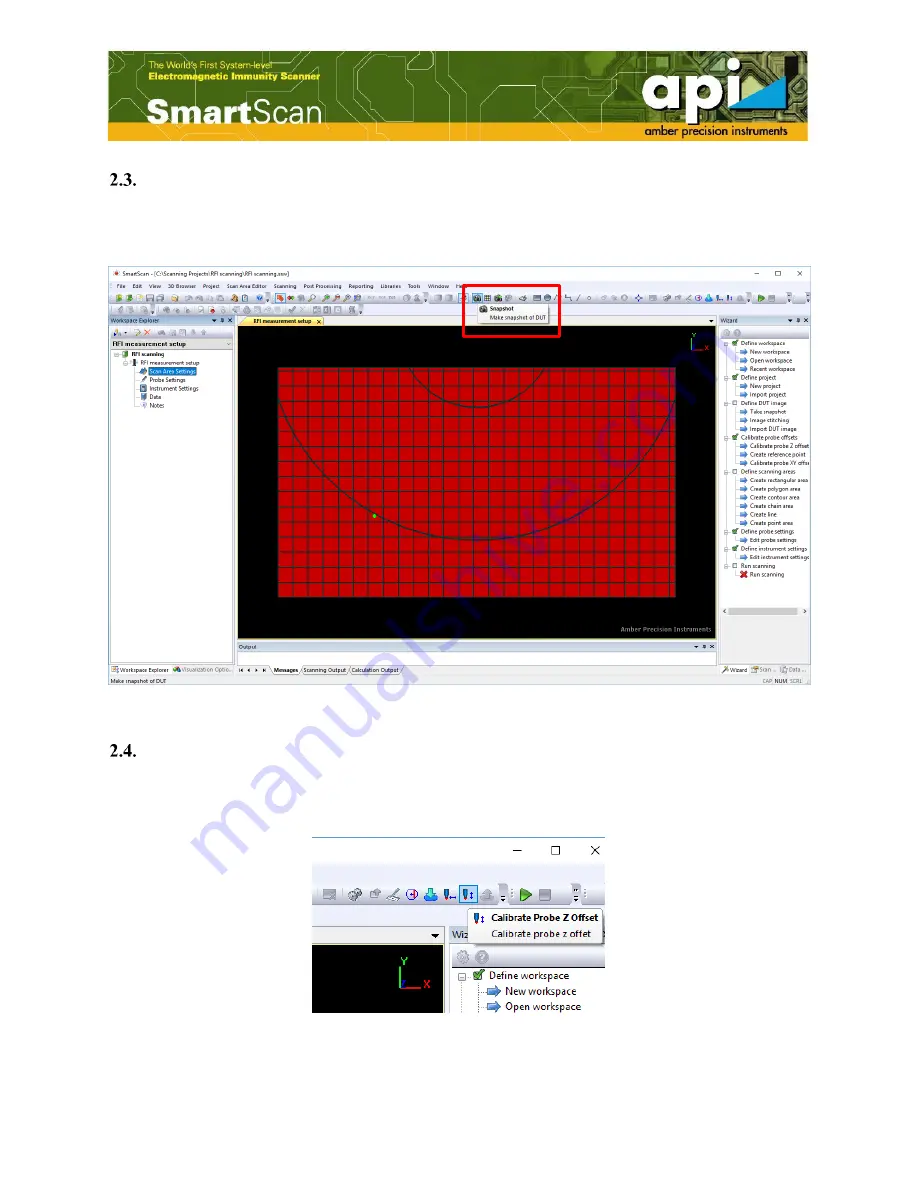
Double click on “Scan Area Settings”. Click on the “Snapshot” icon. Move the robot to where
the camera is on top of DUT, then click on “Take Picture” to capture a DUT image.
Figure 7: Capture DUT image.
Define probe Z offset
Click on “Calibrate Probe Z offset” icon to define probe Z offset. Follow the instruction in
“Probe Tip Offset Calibration” to complete Z offset calibration.
Figure 8: Probe Z offset icon.
Summary of Contents for api SmartScan V5.0
Page 1: ...1 Radio Frequency Immunity Measurement Setup V 5 0 Amber Precision Instruments Inc Dec 2017 ...
Page 6: ...6 Figure 3 Create a new workspace Figure 4 Name the workspace and save in a directory ...
Page 7: ...7 Figure 5 Create a new RFI project Figure 6 Name the RFI project ...
Page 13: ...13 Run measurement Click the Run button to run scanning Figure 18 Run measurement ...


