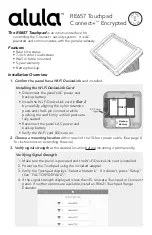
Alula RE657 Manual Download Page 1

RE657 Touchpad 

 Encrypted

IN

STALL

G

U I D E

I

Features

•  Real time status

•  7-inch color touchscreen

•  Wall or table mounted

•  5-year warranty
•  Battery backup

Installation Overview

1. 

Confirm the panel has a Wi-Fi DeviceLink

 card installed.

Installing the Wi-Fi DeviceLink Card

•  Disconnect the panel’s AC power and 

backup battery.

•  Install the Wi-Fi DeviceLink card in 

Slot 2 

by carefully aligning the nylon retention 

posts and the 8-pin connector while 

pushing the card firmly until all posts are 

fully seated.

•  Reconnect the panel’s AC power and 

backup battery.

•  Verify the Wi-Fi card LEDs are on.

Slot 2

Backup

Battery

AC Power

Input

2.  Choose a mounting location 

within reach of the 10-foot power cable. (See page 8 

for instructions on extending the wire).

3. 

Verify signal strength

 at the desired location before mounting it permanently.

Verifying Signal Strength

1.  Make sure the panel is powered and the Wi-Fi DeviceLink card is installed.
2.  Power up the Touchpad using the included adapter.
3.  Verify the Touchpad displays "Select a Network."  If it doesn’t, press "Setup" 

then "FACTORY DEFAULT."

4.  If the signal strength displayed is less than 35, relocate Touchpad or  

panel. If neither options are available, install an RE621 Touchpad Range 

Extender.


The RE657 Touchpad 

is an intuitive interface for 

controlling the security system.  It is AC 

powered and communicates with the panel wirelessly.

Summary of Contents for RE657

Page 1: ...Slot 2 Backup Battery AC Power Input 2 Choose a mounting location within reach of the 10 foot power cable See page 8 for instructions on extending the wire 3 Verify signal strength at the desired loca...

Page 2: ...e wrong panel was selected then press the Restart button in the side menu Troubleshooting Steps if Enrollment Fails Confirm the panel is in wireless enrollment mode A red light will flash on the panel...

Page 3: ...2 Put the screws in the wall but leave a gap roughly 1 8 for the Touchpad plastic 3 Position the Touchpad over the top screw head and then tilt the Touchpad to allow the lower screw head to slip throu...

Page 4: ...r and set it aside 3 Mount the enclosure to the wall using the screw holes in the enclosure 4 Pull the power cable into the enclosure through the rectangular hole at the bottom of the enclosure It can...

Page 5: ...scenes with the toggle button Devices Lock and unlock Z Wave door locks Turn Z Wave lights on and off Set dimmer level for Z Wave dimmer switches Open and close Z Wave garage door openers System Pane...

Page 6: ...hboard Return to dashboard specifies time of inactivity before Touchpad will automatically return to dashboard Dock specify the items to be displayed in the bottom dock Panel must enter code to access...

Page 7: ...g buttons to arm the panel The headline indicates panel status such as Disarmed or Armed Stay The time zone is configured online Tap to turn the Touchpad s display off Tap to view selected favorite Zo...

Page 8: ...d in the Settings screen The physical volume rocker switch on the top left side of the Touchpad is not enabled The Touchpad can be rebooted by holding the power button on the top left side of the Touc...

Page 9: ...THIS PAGE IS INTENTIONALLY LEFT BLANK...

Page 10: ...THIS PAGE IS INTENTIONALLY LEFT BLANK...

Page 11: ...THIS PAGE IS INTENTIONALLY LEFT BLANK...

Page 12: ...terference 2 This device must accept any interference that may be received including interference that may cause undesired operation Changes or modifications not expressly approved by the Alula could...

Reviews: