background image

17 
 

Printing One STL 
 
1.


Navigate to the Bioprint Window and log in.  


2.


Navigate to the Bioprint window and Upload the G-code file.  


NOTE: You can sort your gcode files by name, date, or size by clicking the wrench. 

Summary of Contents for 2

Page 1: ...1 Allevi 1 User Guide Allevi 2 User Guide 1 6 0 ...

Page 2: ...2 BUILD W ITH LIF E ...

Page 3: ...ED 6 WHAT S IN THE BOX 7 ALLEVI 2 DIAGRAM 8 SETTING UP YOUR PRINTER 9 SETTING UP YOUR SOFTWARE 10 YOUR FIRST BIOPRINTS 13 PRINTING SINGLE MATERIAL STRUCTURES 14 PRINTING DUAL MATERIAL STRUCTURES 24 MAINTENANCE TROUBLESHOOTING 30 RESETTING PASSWORDS 30 TROUBLESHOOTING AND CONTACT US 32 ...

Page 4: ...inks The second section of this guide will provide you with instructions on using the Allevi software to print a single material structure The third section will teach you how to print a dual material structure Finally the fourth section will teach you how to bioprint for your desired application Following this guide will help ensure that you are getting the most out of your machine We can t wait ...

Page 5: ...anical Dimensions 12 x 12 x 12 in 30 5 x 30 5 x 30 5 cm Construction Aluminum Frame Build Structure Tissue Culture Plates XYZ Position Precision 5 microns Electrical Power Voltage Requirements 6Amp AC Desktop Adaptor Connectivity USB Software Bundle Modified Repetier Host Supported File Types gcode Operating System Windows Mac OSX Linux Printing Print Technology Fused Deposition Manufacturing Buil...

Page 6: ...6 Let s Get Started ...

Page 7: ...7 WHAT S IN THE BOX Allevi 2 Printer Safety Goggles USB Cable Power Adapter Starter Bioink Kit Compressor Hose Air Compressor Air compressor arrives separately ...

Page 8: ...8 ALLEVI 2 DIAGRAM A Air Compressor Lines B Dual Extruder Left Extruder 1 Right Extruder 2 C Build Plate D Power On Off ...

Page 9: ...er by connecting the compressor hose to nozzle on the left side of the printer labelled Step 4 This can be a tricky maneuver so for more in depth directions on connecting the air compressor watch this quick video The air compressor must remain turned on for the entirety of the print We recommend keeping the air compressor set to a pressure significantly higher than your print pressure This is so t...

Page 10: ...re page 3 Double click desktop application to run Bioprint 4 In the setup window create a username and password to use with Bioprint and then proceed to register your printer For the Serial Number field put the name of your institution or lab Finally select Keep Access Control Enabled 5 Login using the login menu in the top right corner of the screen 6 To close the software quit from the taskbar N...

Page 11: ...Repetier Host Server opens in your browser and continue 8 Open Repetier Host Go to Config Printer Settings and assign the following values 9 Download the Slic3r Config Bundle file 10 In Repetier Host go to the Slicer tab and click Configuration ...

Page 12: ...t Sometimes when you type in bioprint or bioprint 9999 on the web browser nothing appears When this happens open command prompt in the start menu In command prompt type ipconfig Find the IPv4 number Navigate back to your browser and type this number followed by 9999 into your navigation bar to access Bioprint ...

Page 13: ...13 Let s Start Printing ...

Page 14: ...e a predesigned STL file 1 Load the Pediatric Bronchi STL file into Repetier Host a Move the object on the bedplate using the arrows highlighted on the left b Save copy or scale object with the items on the right c Assign the STL to an extruder by using with the extruder drop down menu 2 Enter your print settings a Select the Slicer tab to assign preconfigured Slic3r settings to slice the file b S...

Page 15: ...are This is a property typically determined by the material type b Speed Determines how fast the extruder will move during the print Remember to change all the speeds in the column to the desired number Recommendation 2 6 mm s is good for a small accurate design example lattice 8 16 mm s is good for a large design example ear Speed is a print parameter that is very dependent on material and pressu...

Page 16: ...e the file 5 You can view the printer movement by viewing the g code created by your slicer file Note If no g code is generated check that your nozzle diameter is thin enough a Save your g code file NOTE Your layer height must be less than your nozzle diameter to correctly slice NOTE Once the changes have been made remember to save and label your settings ...

Page 17: ...7 Printing One STL 1 Navigate to the Bioprint Window and log in 2 Navigate to the Bioprint window and Upload the G code file NOTE You can sort your gcode files by name date or size by clicking the wrench ...

Page 18: ...18 3 Connect your printer to your computer 4 First home the Z axis 5 Second home the E axis ...

Page 19: ...dropdown menu to select Petri Dish Click the button Select Well Plate NOTE If you want to print in multiple wells all you need to do is select that option Our software will automatically replicate your single gcode file across all the wells ...

Page 20: ...ling your syringe with about 3 ml of material for your first print Calibrating Extruder 1 Attach a 30 gauge 0 25 pink needle to the syringe load syringe into the extruder 1 canister and tighten knob 2 Now set and test pressure for extrusion a Set pressure by manually increasing the settings using the buttons Test the pressure by pressing extrude NOTE Bioinks will be loaded differently depending on...

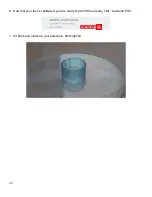
Page 21: ... down buttons to move the bed plate Z closer to the extruder Extruder 1 to the point where the dish is almost touching the needle Do not leave a big gap between the needle and dish as the gcode automatically adds the appropriate layer height Finer 0 1mm movement can be used when approaching the dish NOTE Make sure you are only modifying the Z axis The E axis should not be used to calibrate ...

Page 22: ...te right NOTE Sometimes the syringe moves slightly when you hit extrude If it is too low it will not create a good dot and no material will come out If it is too high then a dangling line will be created NOTE You must always calibrate Extruder 1 first and then Extruder 2 If you only plan to use Extruder 1 you can skip calibrating Extruder 2 However if you only want to use Extruder 2 you can calibr...

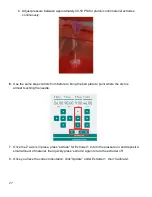
Page 23: ...23 6 Now that your tool is calibrated you are ready to print When ready click Load and Print 7 Sit back and marvel at your awesome first bioprint ...

Page 24: ...rt two STL designs and click Center Object to align them both 2 Find the two downloads here Ring Support Ring Infill 3 Import the STLs into Repetier Host and assign each STL to an extruder using the Extruder drop down menu 4 Select each STL and click Center Object to align them ...

Page 25: ...ibrate the first extruder and then the second one If you only plan to use one you can calibrate the other at any position However you must still press Calibrate NOTE The Mac OSX version of Repetier Host does not currently support dual STL slicing We recommend doing the slicing on a Windows computer and transferring the file to your Mac ...

Page 26: ...eedles pink 2 Connect your Allevi 2 to your computer 3 Home Z Home E Home X Y 4 Select Petri Dish from the Select Plate Type menu Then click Select well plate 5 Calibrate pressures of each extruder a Set pressure by manually increasing the settings using the buttons Test the pressure by pressing extrude ...

Page 27: ...e to bring the bed plate to point where the dish is almost touching the needle 7 Once the Z axis is in place press extrude for Extruder 1 to turn the pressure on and deposit a small amount of material then quickly press extrude again to turn the extruder off 8 Once you have the correct orientation click Update under Extruder 1 then Calibrate ...

Page 28: ...so the needle is almost touching the dish Next use X Y controls as well to line up the right extruder directly on top of the dot you created with the left extruder 10 Once you have the correct orientation click Update under Extruder 2 then Calibrate 11 Load your dual print G Code file ...

Page 29: ...29 12 Click Load and Print on the dual gcode file 13 Pat yourself on the back You re on your way to becoming a 3D bioprinting master ...

Page 30: ... you for any application that you want to bioprint These are challenges that are based on replicating landmark papers published in the field of bioprinting We want to show you that bioprinting with Allevi gets you further faster To learn more visit our website at allevi3d com applications 1Organ on a chip Soft Tissue Hard Tissue Vascularity Organ on a chip Conductive ...

Page 31: ... Go to Folder from the Go menu in the menubar 2 Enter Users your computer username Library Application Support as the folder to go to If your computer username is Allevi you will enter Users Allevi Library Application Support here 3 Delete the BioPrint folder 4 Restart BioPrint ...

Page 32: ...g trouble with reconnecting your printer on a MAC You need to make sure to 1 Disconnect the printer in the software 2 Unplug the printer from your computer 3 Turn the printer off NOTE What is most important here is to make sure that you follow these instructions in this order because there is actually a known bug in the way that MacOSX handles when serial ports are disconnected incorrectly This ca...

Page 33: ...the experience and expertise Allevi has to offer One very useful resource is Allevi s Build With Life repository We upload protocols experiments and guides to help you be more successful with bioprinting You can also visit the Allevi YouTube channel for video instructions Have more questions or need help Visit us at allevi3d com support or email us at support allevi3d com ...

Page 34: ...34 Allevi Inc 3401 Grays Ferry Ave Building 176 Philadelphia PA 19146 Copyright Allevi Inc 2018 ...

Page 35: ...35 ...

Reviews: