ALIEN616 User’s Manual V2.0.5
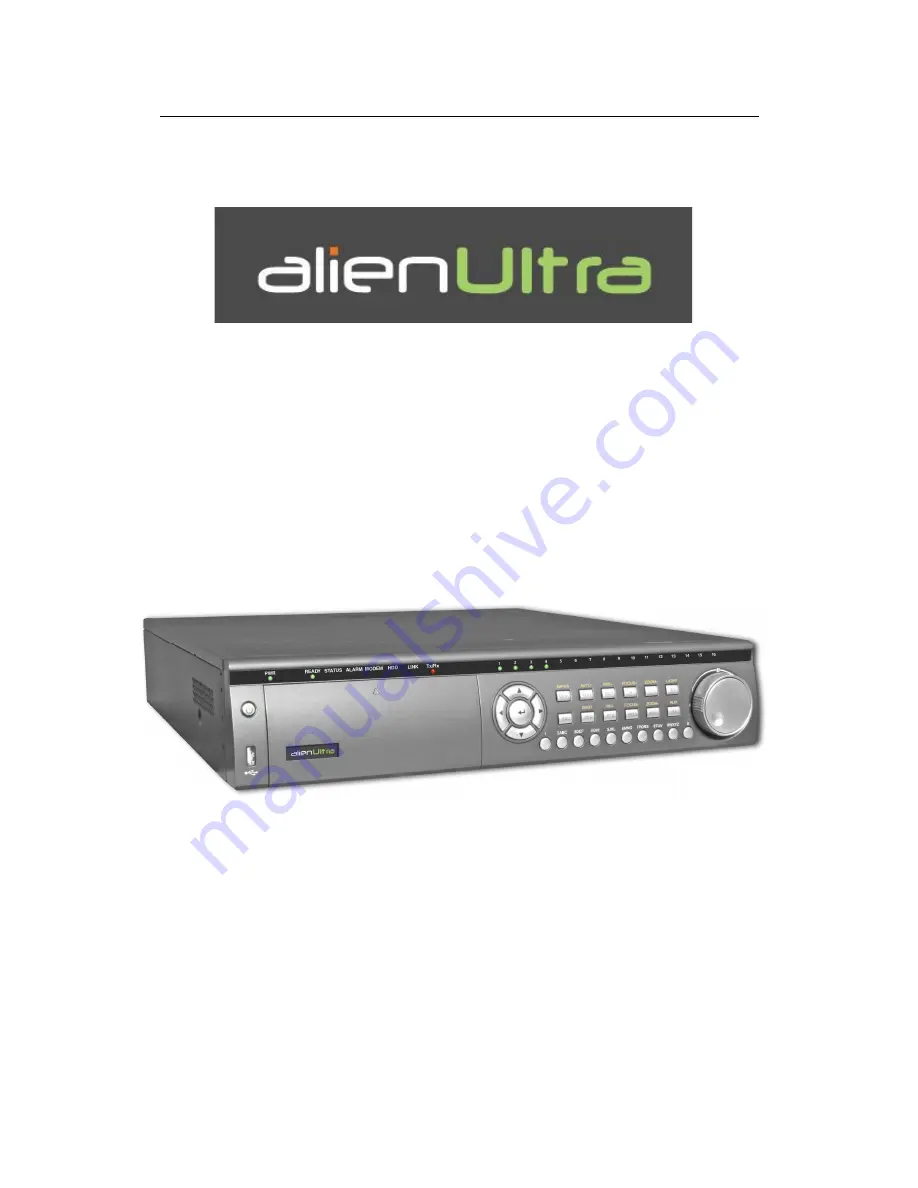
The Alien Ultra Digital Video Recorder
Operations Manual
Models: ALIEN604 ALIEN608 ALIEN616
Version 2.0.5
Intelligent Security and Fire Ltd
Page 1: ...ALIEN616 User s Manual V2 0 5 The Alien Ultra Digital Video Recorder Operations Manual Models ALIEN604 ALIEN608 ALIEN616 Version 2 0 5 I n t e l l i g e n t S e c u r i t y a n d F i r e L t d...
Page 2: ...rom the DVR Ensure environmental conditions meet factory specifications Ensure that unit is properly secured to a rack or shelf Major shocks or jolts to the unit as a result of dropping it may cause d...
Page 3: ...ys 25 3 5 Setting Camera Order and Switching Off camera display 27 4 Record Settings 28 4 1 Initialising Record Settings 28 4 2 Scheduling a Recording 30 4 3 Starting a Manual Recording 31 4 4 Protect...
Page 4: ...3 11 3 1 Setting HDD to Read Only 73 11 3 2 Setting HDD to Redundancy 74 11 4 Checking HDD Status 74 11 5 Configuring HDD Alarms 76 12 DVR Management 77 12 1 Configuring General Settings 77 12 2 Confi...
Page 5: ...o and video only stream Monitoring High definition VGA display supports 1024 768 resolution Supports 1 4 9 16 screen live view and channel sequencing is adjustable Support live view group switch manua...
Page 6: ...file or by time Supports backup device maintenance and management Supports video clips backup when in playback Alarm Exceptions Supports alarm in out arming schedule setting Supports various alarm inp...
Page 7: ...rer ActiveX component Other Supports front panel mouse IR control Supports multi level user management each user can have individual DVR access rights Powerful DVR log including operation alarm and ex...
Page 8: ...functioning properly Status Status indicator turns blue when DVR is controlled by an IR remote Indicator turns red when controlled by a keyboard and purple when IR remote and keyboard is used at the s...
Page 9: ...S button opens up the iris of the camera In Playback mode it can be used to generate video clips for backup MENU WIPER Button Pressing the MENU WIPER button will return the user to the Main menu after...
Page 10: ...e the selection up and down the inner ring will move it left and right In the Playback mode the inner ring is used to jump 30 seconds forward backward in a video The inner ring can be used to speed up...
Page 11: ...n front panel 15 RESERVED Reserved 16 F1 Button Same as F1 LIGHT button on front panel 17 PTZ CONTROL Buttons Buttons to adjust the iris focus and zoom of a PTZ camera 18 F2 Button It is also used to...
Page 12: ...ngle screen and multi screen mode in Preview mode Click and Drag Clicking and dragging the Left mouse button can be used to control the pan tilt of a PTZ camera as well as to vary the position of digi...
Page 13: ...ing used Switch to Lowercase Switch to lowercase input Switch to Uppercase Switch to uppercase input Number Designates number input is being used Symbols Switch to symbols input Backspace Delete the c...
Page 14: ...synchronized with VIDEO OUT 4 LINE IN BNC connector for audio input 5 VGA VGA output Display local video output and menu 6 RS232 DB9 connector for RS232 7 LAN Interface Connector for LAN Local Area N...
Page 15: ...OUT 4 LINE IN BNC connector for audio input 5 VGA VGA output Display local video output and menu 6 RS232 DB9 connector for RS232 7 LAN Interface Connection for LAN Local Area Network 8 USB Interface C...
Page 16: ...O OUT 4 LINE IN BNC connector for audio input 5 VGA VGA output Display local video output and menu 6 RS232 DB9 connector for RS232 7 LAN Interface Connector for LAN Local Area Network 8 USB Interface...
Page 17: ...ws the DSP status If an X is shown on top of an icon it means that the DSP initialisation has failed The second row of icons at the bottom of the screen will show the HDD status If an X is shown it me...
Page 18: ...1 Enter the Shutdown menu by clicking Menu Shutdown 2 Select the Lock button to lock the DVR or the Reboot button to reboot the DVR 2 3 Using the Setup Wizard By default the Setup Wizard will start on...
Page 19: ...n Password input field 3 Enter the admin password into the Admin Password input field The default password is 12345 4 To change the admin password check the New Admin Password checkbox Enter the new p...
Page 20: ...w 9 Click the Next button This will take you to the Record Settings window as shown in Figure 5 Figure 5 Record Settings 10 To enter the Record Settings window click the Enter button 11 Select the Sch...
Page 21: ...window shown in Figure 8 Figure 8 Network Settings 16 To configure network settings click the Enter button 17 Enter the IP Address Subnet Mask and Default Gateway 18 Click the OK button to return to...
Page 22: ...ton on the remote or front panel You can also go to the Menu window by right clicking with the mouse and clicking the Menu button 2 Click the Setting icon 3 Click the General icon You will be taken to...
Page 23: ...Single Camera Using Front Panel Remote Use Alphanumeric buttons Using Mouse Select Single Camera in right click menu 2 Preview Layout Switch Using Front Panel Remote Click PREV button Using Mouse Sele...
Page 24: ...licking this feature will switch to the next set of displays Playback Enter into Playback mode PTZ Enter PTZ Control mode Digital Zoom Enter Digital Zoom interface Menu Enter Main menu Start Auto swit...
Page 25: ...isplays can be customised to your own needs These settings can be accessed by entering the Display Settings menu Figure 4 Display Settings To access the Display Settings menu 1 Click the MENU button 2...
Page 26: ...r of the cameras to be used in the selected display mode See Setting Camera Order Enable Audio Output Enable disable audio output for the selected video output Event Output Port Designates the output...
Page 27: ...mera Order Setting To set the camera order switching off camera display 1 Enter the Display Settings menu shown in Figure 5 Menu Setting Display 2 Click the Set button 3 Select the display mode you wo...
Page 28: ...to the Record Settings menu shown in Figure 1 Figure 1 General Record Settings 3 Select the camera you would to configure the settings for 4 Configure settings for Encoding Parameters Select the encod...
Page 29: ...be deleted If set to 0 the option is disabled Redundantly Record Select to enable or disable redundant recording on the particular channel This requires a duplicate hard drive Record Audio Select to r...
Page 30: ...All Day or at different time periods Up to 8 time periods can be scheduled It is important to note that time periods cannot be overlapped 8 Select recording Type Recording type can be based on time an...
Page 31: ...ecause they use high resolution settings and will therefore use large amounts of hard drive space 4 4 Protecting Recorded Files There are two methods to prevent recorded files from being deleted off t...
Page 32: ...ar to Figure 7 matching the search parameters will be displayed 4 Select the file you would like to lock unlock 5 Click on the Lock button to lock file If the file is already locked click on the Unloc...
Page 33: ...nagement Menu 2 Select the General tab 3 Select the HDD to set to read only 4 Click the Property button This will take you to the Property Settings menu shown in Figure 9 Figure 9 HDD Property Setting...
Page 34: ...duplicated data It is important to note that in order to set up HDD redundancy you ll need more than one HDD in your DVR To set up HDD redundancy 1 Navigate to the HDD Management menu by clicking Menu...
Page 35: ...be used for redundancy 10 Next to More Settings click on the Set button This will bring up additional settings for the selected camera shown in Figure 12 Figure 12 Additional Record Settings 1 Set Red...
Page 36: ...Playback interface that makes viewing recordings more efficient A screenshot of the Playback interface is shown below in Figure 1 Figure 1 Playback Interface The Playback Control Panel shown in Figure...
Page 37: ...as shown in Figure 3 Figure 3 Video Search Menu 3 Click the Play button to start playback of all the files found with the specified search criteria or click the Search button to bring up the list of...
Page 38: ...the day s recording for the selected channel 3 You may also select additional channels up to 16 ch for playback from the channel list on the right hand side of the Playback interface as shown in Figur...
Page 39: ...button on the Playback Control Panel until the speed changes to Single frame 2 Click the Pause button to advance the video frame by frame Using the Front Panel Remote 1 Rotate the inner control on Jo...
Page 40: ...ALIEN616 User s Manual V2 0 5 40 Figure 7 Digital Zoom Area Selection I n t e l l i g e n t S e c u r i t y a n d F i r e L t d...
Page 41: ...1 by clicking Menu Video Export Figure 1 Export Video Menu 2 Select desired parameters to search for files to export 3 Press the Export button This will take you to the Video Search menu 4 Select the...
Page 42: ...list USB Flash Drive USB HDD DVD Writer If backup device is not recognised Click the Refresh button Reconnect device Check for compatibility from vendor 7 Click Start to begin backup process shown in...
Page 43: ...he Playback interface See Playing Back a Recording 2 Using the Clip Start Stop button in the Playback Control Panel select the start and end of the video clip during playback 3 Repeat for additional c...
Page 44: ...ayback interface 7 At the Backup interface select the Start button to begin the Backup process 6 3 Managing Backup Devices To manage backup devices you must first be in the Export menu shown in Figure...
Page 45: ...avigating to Menu Setting Camera Select channel to configure motion detection 2 Select the Advanced tab to open up the Advanced Camera Settings menu shown in Figure 1 Figure 1 Advanced Camera Settings...
Page 46: ...e 3 The higher the sensitivity value the higher the sensitivity Figure 3 Motion Sensitivity Setting 7 Click OK to return to the Camera Settings menu 8 Click the Handle button to open the Exception Han...
Page 47: ...or the selected camera You may now add a schedule to start recording when motion is detected See Scheduling a Recording 7 2 Setting up Sensor Alarms Recordings can also be triggered from an external s...
Page 48: ...he options available are Normally Open N O and Normally Closed N C 4 Check the checkbox next to Setting and click the Handle button to enter the Alarm Input Handle menu 5 Select the Triggered Camera t...
Page 49: ...menu To set up Alarm Output 1 Select the Alarm Output tab This will bring up the Alarm Output interface shown in Figure 8 Figure 8 Alarm Output Interface 2 Select the output you would like to configu...
Page 50: ...g Menu Manual Alarm Figure 10 Manual Alarm Menu 2 In the Manual Alarm menu you may Trigger Select an alarm from the list and click Trigger to trigger its output Trigger All Trigger all alarm outputs a...
Page 51: ...tab to configure exceptions handling Exception trigger options are further explained in the next section See Understanding Exception Trigger Options Figure 12 Exception Handle Menu 7 Select the Schedu...
Page 52: ...tion and click the Set button 3 Select the Advanced tab 4 Check the Tamper Detection checkbox as shown in Figure 13 Figure 13 Camera Settings Menu 5 Click the Area Settings button to enter the area se...
Page 53: ...exceptions allow the DVR to alert you when irregular events occur These events include HDD Full All installed HDD are full HDD Errors Errors occurred during writing of the HDD or HDD had failed to in...
Page 54: ...m Image handle method For alarms that are triggered simultaneously images will be displayed one at a time every 10 seconds default dwell time A different dwell time can be set by going to Menu Setting...
Page 55: ...shown in Figure 1 by clicking Menu Setting Network Figure 1 Network Settings Menu 2 Select the General tab 3 If you have a DHCP server running and would like your DVR to automatically obtain an IP add...
Page 56: ...the manual settings on the General page will be greyed out and apply to the last manual settings applied If DHCP is ticked always use the IP settings on the Network Status page 8 2 Configuring PPPoE...
Page 57: ...ord for PPPoE access PPPoE credentials can be obtained from your network administrator Once the setup is completed your DVR will automatically dial up into your network after rebooting 8 Click OK butt...
Page 58: ...gure 6 DDNS Settings Menu 4 Check the DDNS checkbox to enable feature 5 Select DDNS Type There are three different DDNS type to choose from IpServer PeanutHull and DynDNS IpServer Enter Server Address...
Page 59: ...an NTP server 1 Enter the Network Settings menu by clicking Menu Setting Network 2 Select the Advanced tab 3 Select the Set button next to NTP to enter the NTP settings menu as shown in Figure 8 Figu...
Page 60: ...quire the hour difference in Summer UK DST changes on the last Sunday in March and October 8 5 Configuring a Remote Alarm Host With a remote alarm host set the DVR will send a signal to the host when...
Page 61: ...et button next to Host Others to enter the Host Others menu 4 Set Multicast IP as shown in Figure 10 When adding a device to the CCTV Window software the multicast address must be the same as the DVR...
Page 62: ...ost Others menu 4 Enter new Server Port and HTTP Port as shown in Figure 11 Figure 11 Host Others Menu Note The Server Port has a port range of 2000 65535 and is used for remote client software access...
Page 63: ...ect a PTZ camera Call Preset Call a PTZ preset Call Patrol Call a PTZ sequence Call Pattern Call a PTZ pattern Patrol Setting Enter PTZ sequence configuration menu Pattern Setting Enter PTZ pattern co...
Page 64: ...resets patrols and patterns for a connected PTZ camera Before setting presets patrols and patterns it s important to understand some of the features of the PTZ control panel shown in Figure 3 Figure 3...
Page 65: ...Enter the PTZ Control interface shown in Figure 3 by clicking PTZ in the mouse menu or the PTZ button on the front panel 2 Select the Preset button to enter the Preset Management menu 3 In the Preset...
Page 66: ...Patrol Management menu shown in Figure 5 Figure 5 Patrol Management Menu 3 In the Patrol Management menu you may Configure Patrol 1 Select a Patrol Number to set 2 Select valid presets See Customisin...
Page 67: ...oints have been configured click OK to save and exit menu Clear Patrol 1 Select a valid Patrol Number 2 Click the Clear button to delete patrol Call Patrol 1 Select a valid Patrol Number 2 Click the S...
Page 68: ...in Figure 8 Figure 8 Pattern Management Menu 3 Select a Pattern Number 4 To record a new pattern select the Run Record button to start recording of the movements of the PTZ Use the PTZ control panel...
Page 69: ...to setup OSD settings under Channel number Click the Set button 3 Configure desired OSD settings as shown in Figure 1 Figure 1 OSD Settings Menu 10 2 Setting up Privacy Mask You may setup privacy mas...
Page 70: ...Mask checkbox to enable feature 5 Click the Area Settings button to enter Area Settings menu 6 Setup mask area as shown in Figure 3 Up to 4 areas can be set Figure 3 Setting Mask Area 7 Select OK to...
Page 71: ...o adjust display settings under Channel number Click the Set button 3 Select the Advanced tab to enter the Advanced Camera Settings menu shown in Figure 4 4 Click the Set button next to the Color Sett...
Page 72: ...ick the Init button 4 Select OK button to begin initialisation After the HDD has been initialised the status of the HDD will change from Abnormal to Normal 11 2 Setting HDD Groups Your DVR can separat...
Page 73: ...edundancy read only or read write R W 11 3 1 Setting HDD to Read Only A HDD can be set to read only to avoid important recorded files from being overwritten when the HDD becomes full To set a HDD to r...
Page 74: ...HDD Status to Redundancy 5 Select OK to save and exit menu Note The HDD that is set to redundancy is used to store an extra copy of the recording If an HDD is set to redundancy at least one HDD should...
Page 75: ...ormation 3 Set Minor Type to HDD SMART 4 Enter Start Time and End Time 5 Click the Search button to begin log search A result list similar to that of Figure 5 will be returned Figure 5 Log Search Resu...
Page 76: ...alised or in an abnormal state To set HDD alarms 1 Enter Exception menu shown in Figure 7 by clicking Menu Exception Figure 7 Exception Menu 2 Select HDD Error under Exception Type 3 Select trigger ac...
Page 77: ...Configure general settings These settings include Language Default language used in DVR menus CVBS Output Standard Video output standard NTSC or PAL VGA Resolution VGA output resolution Time Zone Time...
Page 78: ...ightness Transparency Menu transparency Operation Timeout Set timeout time for menu inactivity For example if timeout time was set to 5 minutes after 5 minutes of inactivity in the General Settings me...
Page 79: ...ult your DVR comes with one user account the Administrator account The Administrator user name is admin and the password is 12345 The default password for Administrator should be changed right away SE...
Page 80: ...User Settings menu shown in Figure 4 by clicking Menu Setting User Figure 4 User Settings Menu 1 Select the Add button to enter the Add User menu shown in Figure 5 Figure 5 Add User Menu 2 Enter infor...
Page 81: ...Settings menu shown in Figure 6 Figure 6 Privilege Settings Menu 6 Configure privileges for local settings under Local Permission tab The local settings include Local Log Search Search and view logs...
Page 82: ...two way radio between the remote client and the DVR Remote Alarm Control Remote alert or control the relay output of the DVR Alarm and exception settings must be configured properly to upload to host...
Page 83: ...e PTZ Control Remotely control PTZ cameras Local Video Export Locally backup recorded files from any of the channels 9 Click the OK button to save and exit menu 12 4 2 Deleting a User To delete a user...
Page 84: ...setup the same configuration on numerous DVRs To import or export DVR configuration 1 Enter the Import Export Configuration menu shown in Figure 10 by clicking Menu Maintenance Configuration Figure 10...
Page 85: ...directory of your USB device 2 Enter the Firmware Update menu shown in Figure 11 by clicking Menu Maintenance Upgrade Figure 11 Firmware Update Menu 3 Select the Local Upgrade tab 4 Select the firmwa...
Page 86: ...update reboot the DVR Note If the DVR fails to update please contact your system supplier for further assistance 12 7 Restoring Default Settings To restore default factory settings to your DVR 1 Enter...
Page 87: ...ick on Exception menu 5 Click on Exception Type drop down arrow and select ALL followed by OK This will now cancel the alarm 6 Click on General menu 7 Change CVBS Output Standard from NTSC to PAL 8 Se...
Page 88: ...h for these events 1 Enter the Log Search menu shown in Figure 15 by clicking Menu Maintenance Log Search Figure 15 Log Search Menu 2 Set search parameters 3 Click the Search button to begin search If...
Page 89: ...rted onto a USB device To export a log file connect a USB device to the DVR select the log file to export and click the Export button This will take you to the Log Search Export menu shown below in Fi...
Page 90: ...is detected to revert to 25fps recording 1 Enter System Settings 2 Select camera number required 3 Ensure Encoding Parameters set to Normal 4 Reduce frame rate to low rate 5 Select OK and re enter Re...
Page 91: ...Handle option you can tick the Pop up image on Monitor to display a single screen display of the triggered camera 15 Click on OK and confirm in each menu to save 16 Repeat for other camera channels 1...
Page 92: ...ility for a networked device such as a router or computer system using the Internet Protocol Suite to notify a domain name server to change in real time ad hoc the active DNS configuration of its conf...
Page 93: ...unresponsive If the PTZ seem unresponsive please check 1 Check that the RS485 cable is properly connected to T and T 2 Check that the dome protocol corresponds with that in DVR PTZ menu 3 Check that...
Page 94: ...D 2 0Tb 25 1dy 15hr 3dy 7hr 3dy 20hr 5dy 3hr 7dy 17hr 10dy 7hr 12 3dy 7hr 6dy 14hr 7dy 17hr 10dy 7hr 15dy 11hr 20dy 14hr 6 6dy 14hr 13dy 4hr 15dy 11hr 20dy 14hr 30dy 22hr 41dy 5hr 4 8dy 19hr 7dy 14hr...
Page 95: ...hr 6dy 14hr 7dy 17hr 10dy 7hr 15dy 11hr 20dy 14hr 12 6dys 14hr 13dy 4hr 15dy 11hr 20dy 14hr 30dy 22hr 41dy 5hr 6 13dy 4hr 26dy 9hr 30dy 22hr 41dy 5hr 61dy 20hr 82dy 10hr 4 17dy 14hr 35dy 4hr 41dy 5hr...
Page 96: ...3dy 4hr 15dy 11hr 20dy 14hr 30dy 22hr 41dy 5hr 12 13dy 4hr 26dy 9hr 30dy 22hr 41dy 5hr 61dy 20hr 82dy 10hr 6 26dy 9hr 52dy 18hr 61dy 20hr 82dy 10hr 123dy 16hr 164dy 21hr 4 35dy 4hr 70dy 8hr 82dy 10hr...