


ALF-25X-4KCAM
- 35 -
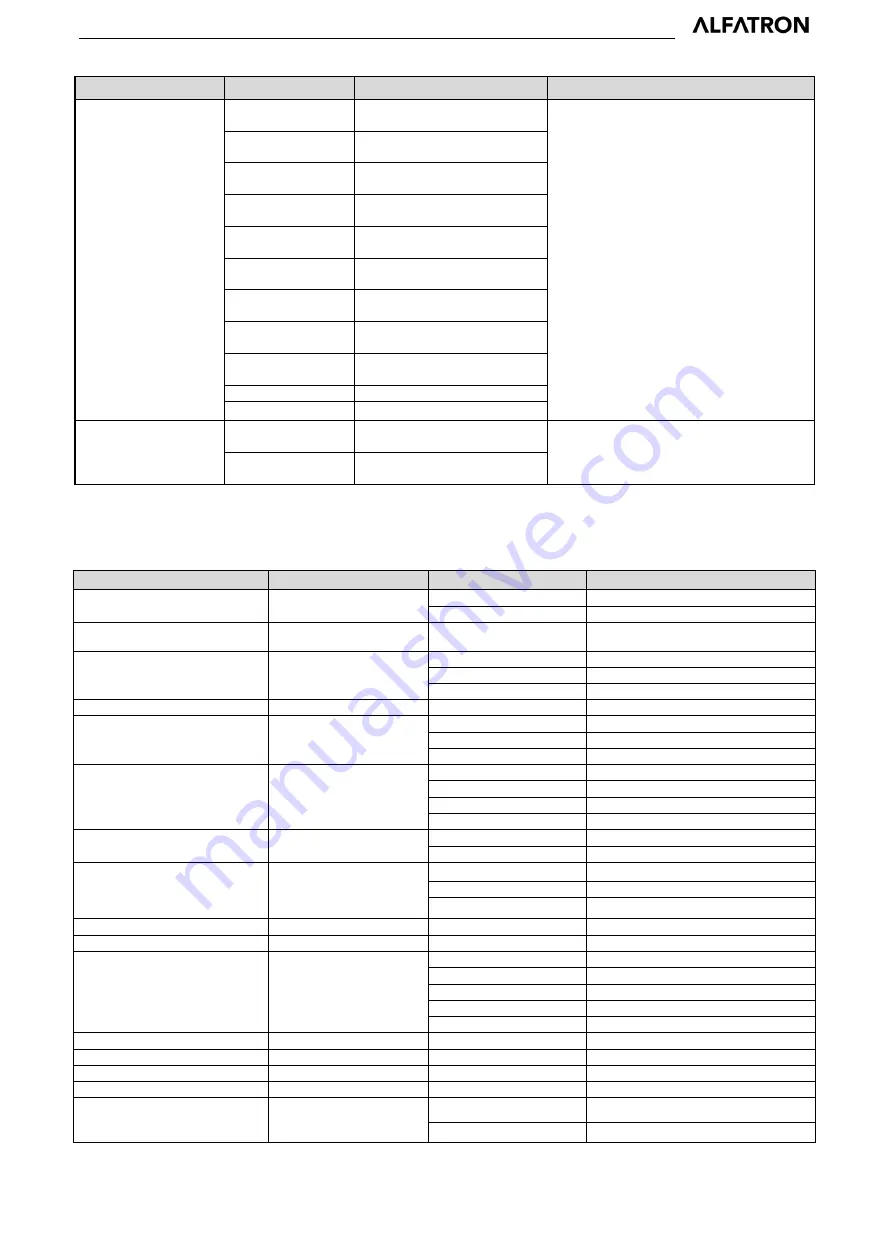
Command
Function
Command packet
Note
Left
8x 01 06 01 VV WW 01 03
FF
YYYY: Pan Position
ZZZZ: Tilt Position
Right
8x 01 06 01 VV WW 02 03
FF
Upleft
8x 01 06 01 VV WW 01 01
FF
Upright
8x 01 06 01 VV WW 02 01
FF
DownLeft
8x 01 06 01 VV WW 01 02
FF
DownRight
8x 01 06 01 VV WW 02 02
FF
Stop
8x 01 06 01 VV WW 03 03
FF
AbsolutePosition
8x 01 06 02 VV WW
0Y 0Y 0Y 0Y 0Z 0Z 0Z 0Z FF
RelativePosition
8x 01 06 03 VV WW
0Y 0Y 0Y 0Y 0Z 0Z 0Z 0Z FF
Home
8x 01 06 04 FF
Reset
8x 01 06 05 FF
Pan-tiltLimitSet
Set
8x 01 06 07 00 0W
0Y 0Y 0Y 0Y 0Z 0Z 0Z 0Z FF W:1 UpRight 0:DownLeft
YYYY: Pan Limit Position(TBD)
ZZZZ: Tilt Limit Position(TBD)
Clear
8x 01 06 07 01 0W
07 0F 0F 0F 07 0F 0F 0F FF
5.3 VISCA Protocol Inquiry Command
Command
Command Packet
Return Packet
Note
CAM_PowerInq
8x 09 04 00 FF
y0 50 02 FF
On
y0 50 03 FF
Off(Standby)
CAM_ZoomPosInq
8x 09 04 47 FF
y0 50 0p 0q 0r 0s FF
pqrs: Zoom Position
CAM_FocusAFModeInq
8x 09 04 38 FF
y0 50 02 FF
Auto Focus
y0 50 03 FF
Manual Focus
y0 50 04 FF
One Push mode
CAM_FocusPosInq
8x 09 04 48 FF
y0 50 0p 0q 0r 0s FF
pqrs: Focus Position
CAM_AFSensitivityInq
8x 09 04 58 FF
y0 50 01 FF
High
y0 50 02 FF
Normal
y0 50 03 FF
Low
CAM_AFZoneInq
8x 09 04 AA FF
y0 01 04 AA 00 FF
Top
y0 01 04 AA 01 FF
Center
y0 01 04 AA 02 FF
Bottom
y0 01 04 AA 03 FF
All
CAM_WBModeInq
8x 09 04 35 FF
y0 50 pq FF
Auto
pq =WBMode
CAM_AWBSensitivityInq
8x 09 04 A9 FF
y0 50 00 FF
Low
y0 50 01 FF
Normal
y0 50 02 FF
High
CAM_RGainInq
8x 09 04 43 FF
y0 50 0B FF
7000K
CAM_BGainInq
8x 09 04 44 FF
y0 50 00 00 0p 0q FF
pq: B Gain
CAM_AEModeInq
8x 09 04 39 FF
y0 50 00 FF
Full Auto
y0 50 03 FF
Manual
y0 50 0A FF
Shutter priority
y0 50 0B FF
Iris priority
y0 50 0D FF
Bright
CAM_ShutterPosInq
8x 09 04 4A FF
y0 50 00 00 0p 0q FF
pq: Shutter Position
CAM_IrisPosInq
8x 09 04 4B FF
y0 50 00 00 0p 0q FF
pq: Iris Position
CAM_Gain LimitInq
8x 09 04 2C FF
y0 50 0p FF
p: Gain Positon
CAM_ BrightPosiInq
8x 09 04 4D FF
y0 50 00 00 0p 0q FF
pq: Bright Position
CAM_ExpCompModeInq
8x 09 04 3E FF
y0 50 02 FF
On
y0 50 03 FF
Off


