AFTER SALES SUPPORT
1300 886 649
[email protected]
AUS
MODEL: STR-TLW70 PRODUCT CODE: 700586
04/2020
Model Number STR-TLW70
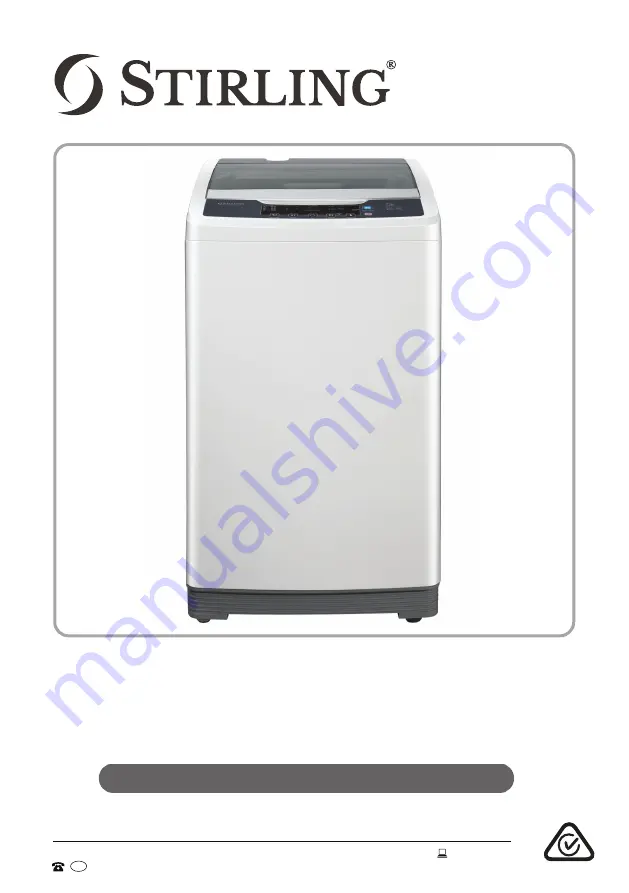
7kg Top Load Washing Machine
INSTRUCTION MANUAL
E209
Page 1: ...AFTER SALES SUPPORT 1300 886 649 info tempo org AUS MODEL STR TLW70 PRODUCT CODE 700586 04 2020 Model Number STR TLW70 7kg Top Load Washing Machine INSTRUCTION MANUAL E209 ...
Page 2: ...oosing to buy a STIRLING product All products brought to you by STIRLING are manufactured to the highest standards of performance and safety and as part of our philosophy of customer service and satisfaction are backed by our comprehensive 3 Year In Home Warranty We hope you will enjoy using your purchase for many years to come ...
Page 3: ...CT CODE 700586 04 2020 Contents 02 Welcome 04 Warranty Details 05 General Safety Instructions 09 Product Overview 10 Getting Started Installation 14 Features 16 Instructions 24 FAQs and Troubleshooting 26 Other Useful Information 31 Repair and Refurbished Goods or Parts Notice ...
Page 4: ...remedies in respect of the product that the consumer has under the Competition and Consumer Act 2010 and similar state and territory laws Our goods come with guarantees that cannot be excluded under the Australian Consumer Law You are entitled to a replacement or refund for a major failure and to compensation for any other reasonably foreseeable loss or damage You are also entitled to have the goo...
Page 5: ...autions and accident prevention measures when using an electrical appliance including the following Electrical safety Before connecting and turning on the washing machine ensure the electrical voltage and circuit frequency correspond to those indicated on the appliance Only connect the washing machine to a grounded earthed electrical outlet Do not insert any objects into the appliance Do not kink ...
Page 6: ...ng children with reduced physical sensory or mental capabilities or lack of experience and knowledge unless they have been given supervision or instruction concerning use of the appliance by a person responsible for their safety Children should be supervised to ensure they do not play with the appliance Before loading the machine always ensure no pet or young child has climbed into it Make sure al...
Page 7: ...due of flammable materials Do not use the appliance if the power cord or plug is damaged to avoid an electric shock short circuit or fire Regularly clean the power plug to remove dust and dirt and avoid contact failure Turn the machine off before pulling out the plug from the socket if the machine is not in use Do not place any flammable items on top of the washing machine Insert the power plug se...
Page 8: ...e Do not pull the power cord when removing the plug Do not wash jackets raincoats fishing coats and similar clothes in the washing machine Do not allow children to lay or sit on top of the washing machine The water temperature should not exceed 60 C when washing with warm water Cautions Do not pull out or insert the plug with wet hands to avoid electric shock No wet hands To avoid electric shock f...
Page 9: ...gent box 5 Lint filter 6 Wash spin tub 7 Water supply hose connections 8 Drain pump filter 9 Drain hose connection 10 Adjustable leg 1 13 12 11 11 Hot water supply hose 12 Cold water supply hose 13 Drain hose with elbow Base cover and screw for attaching it to the unit not shown C Documentation not shown Instruction manual Quick start guide Warranty certificate Front view Top inside view 1 3 2 10 ...
Page 10: ...l the parts and operating principles of the washing machine Pay particular attention to the safety instructions on the previous pages Installing the base cover Levelling the washer Install the washer on a stable and level surface in a dry location out of sunlight If levelling is necessary adjust the adjustable leg at the front right side of the machine as illustrated right The maximum permissible ...
Page 11: ...nd as illustrated below the sealing washer is a part of and located inside the tap end Attach the curved end of the hose to the corresponding inlet valve of the washer Tighten the coupling nuts securely by hand as illustrated below Tighten the nut by turning it clockwise while holding the hose To detach the water supply hose turn the nut anticlockwise after turning the tap off Turn on the taps and...
Page 12: ... on the drain hose connect it to the drain hose connection at the back of the washer as illustrated below centre Insert the hose clips for the water drainage hose marked with red arrows in the illustration on the right into the mounting holes at the back of the washer Turn the clips so you can lead the hose through the clips up the back of the machine Installing the drain hose CAUTION Use only the...
Page 13: ...dance with all local standards and requirements Do not modify the plug under any circumstances If the plug does not fit your outlet consult a licensed electrician and have the outlet changed When the washer is in use put the drain hose into a drain spout or into a sink tub as illustrated below CAUTION While the washer is in use ensure the height of the drain hose is at least 70cm otherwise the was...
Page 14: ...e appropriate water power and level and wash rinse and spin times Use this button to select the water level appropriate for your load size Different water levels for washing and rinsing are optional See page 21 for details Features The control panel Water Level button Digital display The digital display shows the currently selected option For example During washing it shows the time remaining e g ...
Page 15: ...utes of inactivity after the Power On Off button has been pressed Press this button to start operation During operation press this button to stop the washer temporarily press it again to restart it You can also use this button to cancel the end buzzer press and hold it for 4 seconds until a beep has acknowledged the command NOTE This is not a cancel button Press this button to select the desired w...
Page 16: ...rotection On the back Install the drain hose at a height of 70 100cm to prevent water drain age and overflowing problems A B D C E 3 Put your washing in the machine loading items uniformly in the tub 4 Add washing detergent see opposite for details 5 Press the Power On Off button 6 Refer to the program selection guide page 17 and select a suitable wash program 7 Close the lid and press the Start P...
Page 17: ...warm water all other programs have cold water as a default water temperature is adjustable see page 21 Times and quantities depend on the wash load and water level Detergent and load recommendations We suggest you use detergent in the amounts recommended below Too little will give poor washing results but too much will affect rinse performance and may cause overflow of suds which could interfere w...
Page 18: ...ocess the relevant indicator light will start flashing when the option is selected Then press the Set button and set the option 5 Press the Water Level button and choose an appropriate water level 6 Close the lid and press the Start Pause button for the washing program to start 7 At the end of the washing program a buzzer will sound to alert you that the program has finished before the power is sh...
Page 19: ...s shut off automatically 8 Close the water taps and unplug the power plug from the wall outlet 9 We recommend cleaning the lint filter after washing a blanket see page 25 for instructions NOTE If you notice that the blanket floats up during the wash press the Start Pause button the washer will stop working temporarily Push the blanket down and then press the Start Pause button again to continue wa...
Page 20: ...s for the wash to finish 5 Select the water level if necessary 6 Add any detergents see below and page 17 for details 7 Close the washer lid and press the Start Pause button 8 After setting the preset the corresponding light will illuminate and all other lights will be switched off about one minute later From this time on until the preset time only the Power On Off and Set buttons will respond whe...
Page 21: ...e values however if you want adjust them yourself see page 18 for how to customise processes Hot cold warm water wash This top load washing machine must be connected to both a cold and a hot water tap With both hoses connected to a cold and hot water tap you can set the washer to use either just cold water for a cold water wash or just hot water for a hot water wash or both hot and cold water for ...
Page 22: ...ause button Press the Set button again for standard water power the display will show H0 Press the Set button again repeatedly to increase the water power level from H1 H2 H3 to the strongest H4 Press the Set button again repeatedly to decrease the water power level from L1 L2 L3 to the weakest L4 Memory function When you run the NORMAL COTTON or HEAVY DUTY program the machine memorises your choic...
Page 23: ...the water will continue to flow in see page 17 for the eight water levels This early start of washing will increase the wash time and allow the detergent to dissolve fully before the start of the set wash time This function will be ineffective When the first two water levels 20L or 25L are selected When the DELICATE or BLANKET program is selected When SOAK is selected after the soaking process NOT...
Page 24: ...nce test in the factory and no cause for concern Why is there still some water intake during the wash or rinse cycle When the water level is low the washing machine will automatically refill during the washing or rinsing process This is no cause for concern At the beginning of the spin cycle why is the tub turning first and then stopping This is intermittent spinning and it results in better spinn...
Page 25: ...f Check whether the metal filter of the water inlet is clogged Make sure your water pressure is appropriate and no water has frozen in the hoses Water does not drain out Check and ensure the drain hose is properly connected and installed at a 1m maximum height Check the drain hose for kinks or obstructions Check whether the drain hose is clogged Check and ensure that the filter at the drain pump i...
Page 26: ...any chemical alkaline or abrasive cleaning agents to avoid damaging the surface Do not spray water directly onto the washer housing IMPORTANT If you frequently use a COLD wash cycle you will need to clean the inside of your washing machine regularly every three months especially if you use a fabric softener Liquid detergents can cause detergent scum to build up around the outside of the inner tub ...
Page 27: ...ths To avoid blockage of the mesh filter at the water inlet after long time use detach the water inlet hose making sure you have turned off the water supply at the taps beforehand Take the mesh filter out of the water inlet valve and clean the filter with a soft brush Then assemble the mesh filter back into the valve and reconnect the water inlet hose Cleaning the hose filter suggested interval ev...
Page 28: ...sconnect the washer from the power source 2 If necessary wait until the water has cooled down 3 Place a container underneath the pump opening to collect any spillage see below left 4 Turn the filter cap anticlockwise to take it out gently see below right Always keep a rag nearby to dry up water spillage when removing the pump filter 5 To remove any objects from the filter wash it thoroughly in a b...
Page 29: ...e Bearing assembly Panel sticker Control circuit board complete Pour inlet assembly Detergent tray Pulsator Drain hose assembly inside outside Pump Drain pipe Reed switch Feed hose assembly Response switch water level sensor Hinge shaft Safety device switch Hose band Soundproof board Leg Suspension rod complete Lid complete Suspension rod complete motor side Lid handle Top plate Lid spring Torque ...
Page 30: ... a detrimental effect on the environment and human health if disposed of inappropriately Observe any local regulations regarding the disposal of electrical consumer goods and dispose of it appropriately for recycling Contact your local authorities for advice on recycling facilities in your area Compliance This appliance has been fully tested and meets all requirements as set out by standards AS NZ...
Page 31: ... recommend you save this data elsewhere prior to sending the product for repair You should also be aware that rather than repairing goods we may replace them with refurbished goods of the same type or use refurbished parts in the repair process Please be assured though refurbished parts or replacements are only used where they meet ALDI s stringent quality specifications If at any time you feel yo...
Page 32: ...ork If you encounter problems with this product or if it fails to perform to your expectations make sure to contact our After Sales Support Centre on 1300 886 649 for advice For an electronic copy of this manual please go to www stirlingappliances com au and download a copy or contact our after sales support centre Instruction Manual Revision Index Version No Issue Date Description V1 0 04 Decembe...