background image


Pedometer with Speed Sensor 

Function Keys/Modes/Setting 

_____________________________________________________________ 

AFTER SALES SUPPORT 


[email protected] 


Toll Free Number 1-800-493-9137


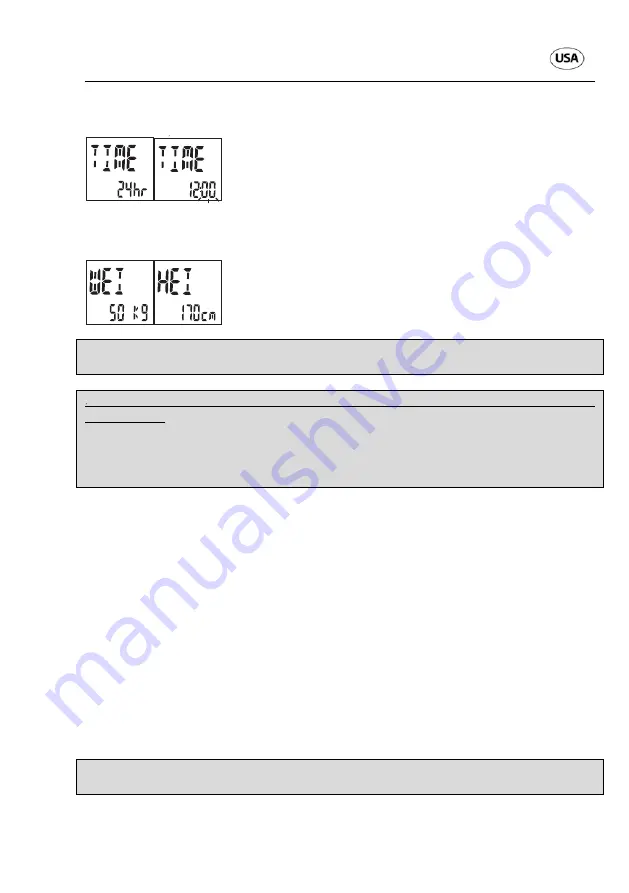
           Set Time


Press SEL to toggle 12 or 24 hr Format, press SET to 
confirm and advance to SET hours. 
Press SEL to advance to desired hours, press SET to 
confirm and advance to set minutes. 
Press SEL to advance to desired minutes, press SET to 
confirm and advance to set weight. 


Set Weight and Height


The unit default of weight is 50KG or 110LB. 
Press SEL to advance to desired weight, press SET to 
confirm and advance to set height. 
The unit default of height is 150cm or 59inch. 
Press SEL to advance to desirable height,  press SET to 
confirm and advance to Calibration Mode. 

Note: It is necessary to enter the correct weight and height to receive a meaningful 
value of calorie consumption and fat burning. 
 

Note:

  By calibrating the pedometer  it calculates your step length for running and 

walking itself.  
It is strongly recommended that the user calibrates the pedometer  to  its  personal 
moving pattern. Otherwise this unit will use only statistical data based on the weight 
and height input by the user. The performance of the unit will not be in this full 
capacity. 


  Pedometer Calibration 

3.4

You can choose between YES and NO with the SEL key. Choose YES and confirm 
with the SET key or choose NO for calibrating later.  


The unit enters into Calibration RUNWALK mode, press SET to confirm and 
advance to SET RUNWALK Distance. 


Press SEL to set the run distance, increment by 100 meter (= 109,36 yards). 
Press SET to confirm the distance. Now the unit is ready for Calibration 
Running Stripe Length. The display shows “PRESS START”. Then press 
SET and start running. 


At the time distance covered, press SET to stop. Display “DONE and 
SAVED” appears. The calibration was correct and was saved. 


ATTENTION: 

You can only enter the distance for calibration in meters. 100 meters are 109,36 
yards. This means that you should walk/run a distance of 100 m resp. 109,36 yards. 
This is the usual length of a track in a stadium.  

Note:

 It is important that you also perform the calibration for walking, as described in 

the following section: 

Summary of Contents for AU4-PE-3A

Page 1: ...Pedometer with Speed Sensor User Manual ...

Page 2: ...ct description Pedometer with Speed Sensor MODEL NO AU4 PE 3A 3B Importer Krippl Watches Warenhandels GmbH Maria Theresia Str 41 A 4600 Wels Austria PRODUCT COMPONENTS SCOPE OF DELIVERY 1 pedometer AU4 PE 3A B Type PDD VB 1 clip 1 x 3 V battery type CR2032 already inserted User manual Warranty card TABLE OF CONTENTS 1 GENERAL INFORMATION 3 2 SAFETY AND SERVICING 3 Batteries 3 2 1 Operational Envir...

Page 3: ...tion All specified data are merely for guidance Subject to technical modifications 2 SAFETY AND SERVICING Please read the safety instructions carefully and only use the pedometer as described in these instructions to avoid accidental injuries or damage Retain these instructions for future reference These instructions should be handed over when passed on to a new owner Important Always consult a ph...

Page 4: ... circuit The pedometer should therefore never be exposed to extreme changes in temperature The unit should never be placed near very strong magnet fields e g electrical welding equipment current transformers as this could cause variations in the time measurement Non compliance with these directions can result in malfunction or damage of the pedometer Water Resistance 2 3 The pedometer is not water...

Page 5: ... If you attach it as shown you can read the values from above when wearing it Or you can put the pedometer without a clip in your pocket Function keys of the Pedometer 3 2 We would like to advise that the upper key in the drawing above is identified as SEL in the following text as well as the lower key is identified as SET Pedometer 3 3 This pedometer is delivered in sleep mode Please press any ke...

Page 6: ...t is strongly recommended that the user calibrates the pedometer to its personal moving pattern Otherwise this unit will use only statistical data based on the weight and height input by the user The performance of the unit will not be in this full capacity Pedometer Calibration 3 4 You can choose between YES and NO with the SEL key Choose YES and confirm with the SET key or choose NO for calibrat...

Page 7: ...ful In case the calibration was not successful the display FAIL appears After a few seconds the display CALI for Run or Walk appears again and you can start a new calibration Note After calibration if the height is changed all calibrated data will be lost And the stride length will be reset according to the new entry of height Turn ON OFF Pedometer Function Press SET key until the 2 foot print ico...

Page 8: ...Memory Scroll through the operation modes by pressing the MODE key Main Mode 4 1 By pressing the SEL key in the main mode you can see current information of STEP in upper display and sub information in lower display as below CLOCK EXERCISE TIMER DISTANCE and CURRENT SPEED Note Distance and Timer reset automatically every night at 0 00 Exercise Mode 4 2 By pressing the SEL key in the Exercise mode ...

Page 9: ... data please hold SET key in Exercise Mode until SET appears on the second as in figure Press SEL to toggle between four target types press SET to confirm Press SEL to advance to desired target values press SET to confirm 4 2 2 Target Alert For Step Timer and Distance there will be an alert when target met For Speed there will be an alert when speed is below target The unit defaults are as followi...

Page 10: ...In exercise mode the user can change to Stopwatch mode by pressing SEL key Daily Record Mode 4 3 Calorie Fat Burn Average Speed and Maximum Speed automatically are recorded daily These data reset every night at 0 00 Scroll through the records by pressing the SEL key Note Features Reset including Daily Step Training Timer Distance Calorie Fat Burn Average Speed Maximum Speed In Record Mode hold SET...

Page 11: ...ode display sequence part B Odometer Save Function Before changing battery or perform a TOTAL RESET please write down the accumulated distance travelled and use this function to input distance back to the pedometer To set go to odometer mode hold SET until ODOMETER SAVE screen appears and first digit in the lower line starts to blink press SEL to choose number and SET to confirm Repeat the procedu...

Page 12: ...DATA Your pedometer has a 3 V lithium battery type CR2032 1 x 3 V 0 02mA CR2032 6 BATTERY CHANGE Caution Risk of explosion with improper replacement of the battery Replacement only with the same or equivalent type of battery For battery replacement proceed as follows Open the cover at the back of the pedometer and remove them Then open the battery holder by carefully lifting the locking bracket ov...

Page 13: ...he FCC Rules These limits are designed to provide reasonable protection against harmful interference in a residential installation This equipment generates uses and can radiate radio frequency energy and if not installed and used in accordance with the instructions may cause harmful interference to radio communications However there is no guarantee that interference will not occur in a particular ...

Page 14: ...d for activities on even surfaces Apply the same pace when walking or running as when calculating the stride length Please be aware that the measurements can be imprecise irregular for less active people What shall I do if my weight changes Insert the new weight as the once set weight is saved until it is changed How is the calorie output measured The calorie output mainly depends on the number of...

Reviews: