1
O V E R V I E W
The
Wireless Remote Release
(order part
RR-1BUTTON
) is a
device used to wirelessly unlock Trilogy Networx
™
series locking
devices, OR locking devices wired to the
RR-RECEIVER
(see
WI2012). The Wireless Remote is intended for fixed mounting to
the underside of a desk or other hidden location with a short
hook and loop strip provided (for a portable pocket-size remote
release, see part
RR-4BKEYFOB
). The Wireless Remote re-
quires one battery (pre-installed) that features a service life of up
to 24,000 openings (use 3V lithium button cell, type CR2450
only). During normal operation, the locking device typically
opens within 2 seconds of the button press.
Note:
Up to ten (10) Wireless Remotes can be ultimately
"paired" (connected) with one individual Networx locking device.
Each Wireless Remote can only be paired with one specific Net-
worx locking device at a time, thus when a paired Wireless Re-
mote is later paired with a second locking device, the first pairing
is erased.
The Wireless Remote is
not
currently supported by PL Series
Networx locking devices. Visit the Alarm Lock website (
www.
alarmlock.com
) for supported firmware versions.
P AI R I N G P R O C E D U R E
Pairing is performed locally at the keypad.
Important:
This pair-
ing procedure should be performed after the locking device has
been programmed by DL-Windows.
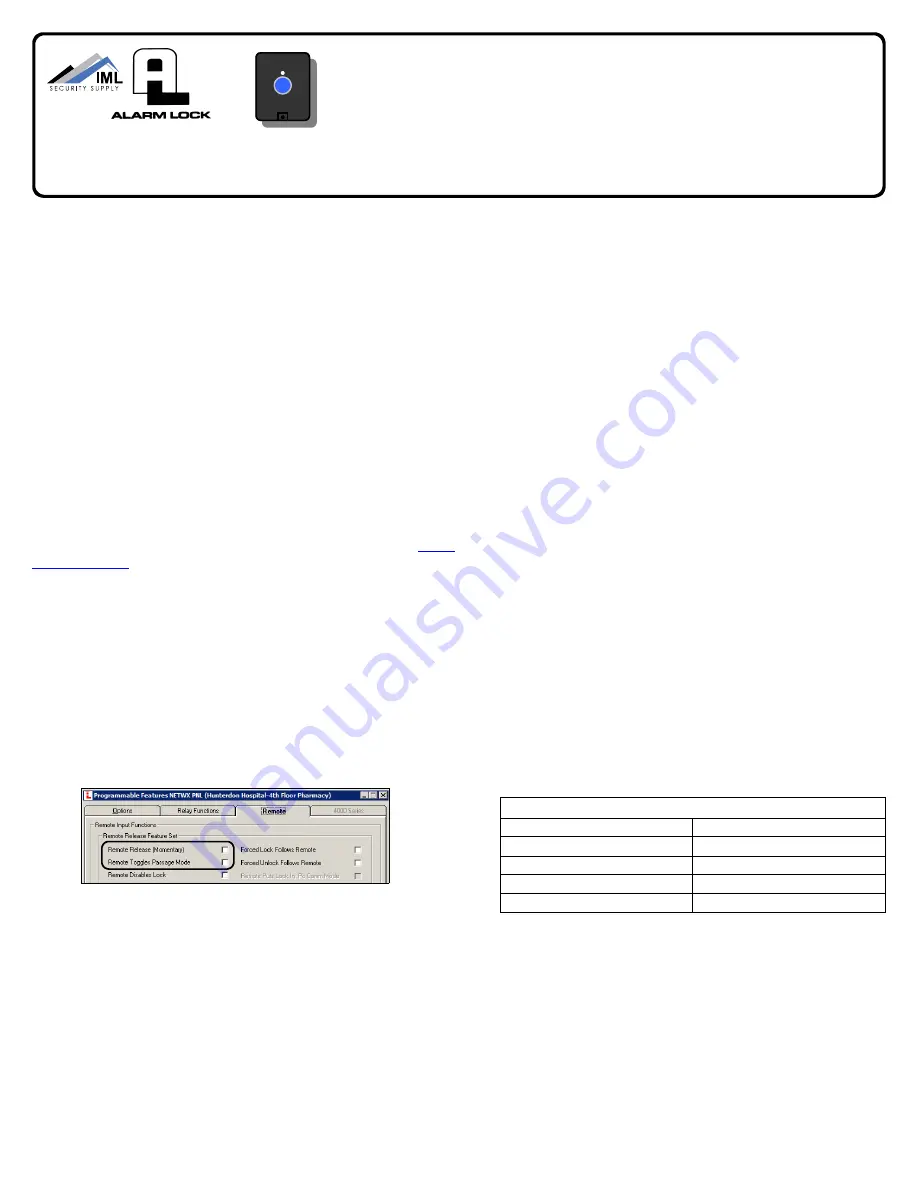
1. Open DL-Windows
, select the desired Lock Profile, open
the
Programmable Features
screen,
Remote
tab. Check
to enable one of the following desired features:
•
Remote Release (Momentary)
--or--
•
Remote Toggles Passage Mode
If neither are checked, the Wireless Remote pairing will be
disabled upon subsequent DL-Windows programming
downloads. Therefore, check to enable one of these two
features and then send the programming to the locking de-
vice (see OI352 for complete DL-Windows programming in-
structions). This will ensure that the pairings to be added
now will be unaffected by later downloads.
2. At the locking device keypad
, enter Program Mode (press
the Master Code followed by
;
).
3. To pair the first remote
, press:
;
6
5
;
1
:
Verify keypad sounds "
beep-beep-beep
" continuously. (The
"
beep-beep-beep
" indicates the locking device is ready and
will wait about 30 seconds for the next step).
4. With the Wireless Remote in hand
, observe its LED as
you perform the next steps:
a.
Press and hold
the button.
b. The red LED
lights
...keep holding the button…
c. When the LED
flashes green
, release the button...
d. Wait a few seconds...observe the LED as follows:
•
LED
solid green
= Pairing successful. Go to step 5 to
pair another Wireless Remote; otherwise go to step 6.
•
LED
solid red
= Pairing unsuccessful. Start again at
step 3.
5. To pair another Wireless Remote
, you will need to start
again at step 3, but with a slight change, as follows:
As previously stated, up to ten (10) Wireless Remotes may
be enrolled into one locking device. Each Wireless Remote
added occupies a "slot" (numbered 1-10);
therefore, increment the "slot" number of the new Wireless
Remote in step 3. For example, when pairing the first re-
mote in step 3, you pressed:
;
6
5
;
1
:
To pair a second remote, you will need to press:
;
6
5
;
2
:
To pair a third remote, you will need to press:
;
6
5
;
3
:
...and so on. Therefore, to enroll another Wireless Remote,
go to step 3, but use the incremented Wireless Remote "slot"
number. Use the table below to track the location of each
Wireless Remote in your system:
6. Test to ensure correct operation:
Testing the Wireless Remote is
required
to synchronize the
Wireless Remote with the locking device. Furthermore, the
first time you perform the test below, the locking device may
not always open on the first try. DO NOT BE CONCERNED,
this is
normal
during this testing process. Test as follows:
a. At the keypad, exit Program Mode by pressing and hold-
ing any button.
b. Press and release the Wireless Remote button.
c. The LED lights red...
d. ...within two seconds the red LED turns off. The locking
device should open.
If not, do not be concerned, this
is normal
. Wait a few seconds and start again at step b
© ALARM LOCK 2012 WI1999 7/12
RR-1BUTTON Wireless Remote Release Button
Programming Instructions
When Used with Trilogy Networx
™
Locking Devices
345 Bayview Avenue
Amityville, New York 11701
For Sales and Repairs 1-800-ALA-LOCK
For Technical Service 1-800-645-9440
(Note: Technical Service is for security professionals only)
Publicly traded on NASDAQ Symbol: NSSC
Slot 1:
Slot 6:
Slot 2:
Slot 7:
Slot 3:
Slot 8:
Slot 4:
Slot 9:
Slot 5:
Slot 10:
Location of Locking Device:


