


en
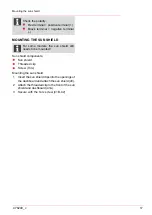
Setting the catcher holder
16
476240_c
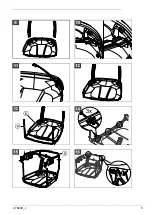
3 Clamp the front support strut (13a) into the
lower part of the grass catcher (13b) and use
M6x35 carriage bolts, washers and self-lo-
cking nuts to screw on from the outside (14).
4 Screw the top part of the frame (15a) firmly
onto the support strut using M6x35 carriage
bolts, washers and self-locking nuts.
5 Connect the top part to the support plates and
screw on using 2 Torx Tx30 and four carriage
bolts (16 and 17).
6 Trap the fabric of the grass catcher in the top
part (18).
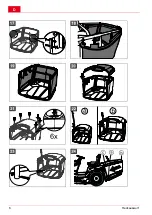
7 Put on the grass catcher cover and screw it
onto the frame (20 and 21).
Note: Oval-head screw (Torx) M6x22 and wa-
sher Ø 6x18.
8 Insert the hand lever through the grass cat-
cher (22), secure the oval-head screw (Torx)
M6x35 and self-locking nut to prevent them
being pulled out (23).
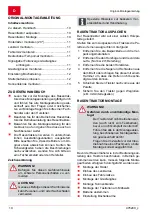
SETTING THE CATCHER HOLDER
ADVICE
Once the grass catcher has been moun-
ted, the spacing between the lawn tractor
and the grass catcher should be 0 mm!
(27, 28)
1 Measure the spacing between the grass cat-
cher and the lawn tractor on both the left and
the right.
If the spacing is > 0 mm, then the catcher holding
arms must be reset according to the measured
spacing!
2 Remove the grass catcher (30).
3 Loosen the 4 hexagon bolts on both catcher
holding arms each by one half turn (31).
4 Move the left and right holding arms up ac-
cording to the measured spacing and then re-
tighten the lower hexagon bolts on both hol-
ding arms (32).
5 Set a spacing of 189 mm at a 90° angle from
the back extending to the connecting rod of
the catcher holding arms (33).
6 Re-tighten the upper hexagon bolts of the cat-
cher holding arms to 40 - 50 Nm.
7 Re-hook in the grass catcher (35).
8 Check the spacing between the grass catcher
and the lawn tractor. Re-adjust if necessary!
(36)
INSTALLING THE STARTER BATTERY
The lawn tractor is supplied with a starter battery.
The starter battery mount is located under the en-
gine cover.
The starter battery is always supplied from the
factory pre-charged.
WARNING!
Danger if the starter battery is not
handled correctly!
Please comply with the following points
to avoid dangers from incorrect handling
of the battery!
Do not store the starter battery in the imme-
diate vicinity of naked flames, do not burn it
or place it on heaters. Risk of explosion.
Keep the starter battery in a cool, dry room
(10 - 15 °C) over winter. Avoid storing at tem-
peratures below the freezing point.
Do not leave the starter battery without
charge for a long period. If the starter battery
is not used for a long period, it should be char-
ged using a suitable charger.
Do not smash the starter battery. The electro-
lyte (sulphuric acid) causes chemical burns
to the skin and clothing - immediately rinse
away with plenty of water.
Keep the starter battery clean. Only wipe
clean with a dry cloth. Do not use water, pe-
trol, thinners or the like for this purpose!
Keep the connection terminals clean and
grease them with terminal grease.
Do not short-circuit the connection terminals.
1. Remove the ignition key (7b).
2. Open the engine cover.
CAUTION!
Danger of short circuit!
To avoid a short circuit, always dis-
connect the negative cable (-) of the
battery first!
Always remove the ignition key be-
fore starting work on the battery!
3. Connect the battery cables to the connection
terminals of the battery (38).
Summary of Contents for 119589
Page 1: ...476240_c I 12 2014 Rasentraktor Montageanleitung Heckauswurf...
Page 2: ...D 2 Heckauswurf...
Page 4: ...D 4 Heckauswurf...
Page 5: ...476240_c 5...
Page 6: ...D 6 Heckauswurf...
Page 7: ...476240_c 7...
Page 8: ...D 8 Heckauswurf...
Page 9: ...476240_c 9...


