18
Chapter 4—Loading
Z4/Z8 User Guide—Version 1.0
4 Loading
Loading
You can load Samples, Programs, Multis, Songs, and files as follows.
1
Press the LOAD button.
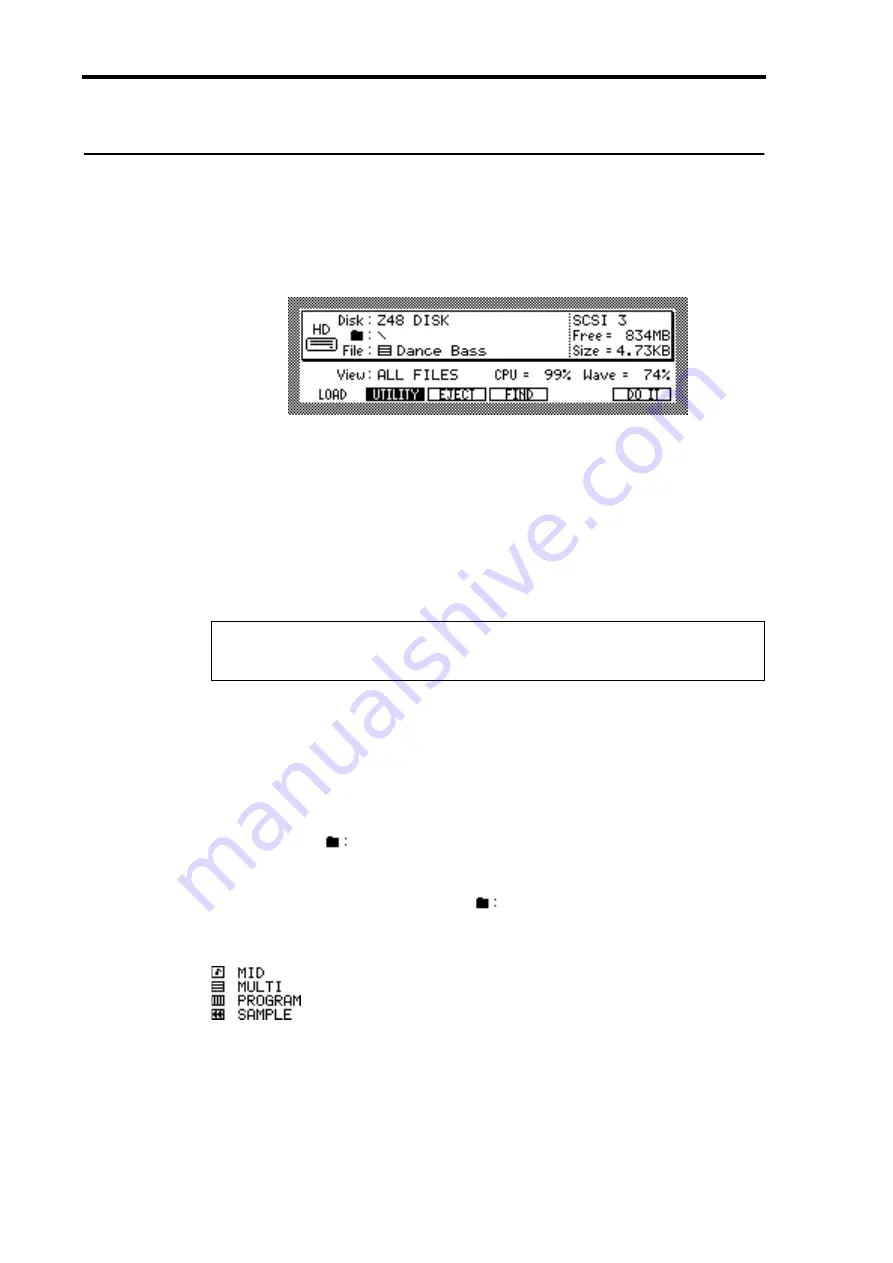
The Z8 enters Load mode, and the following page appears.
This page displays the amount of free space available on the currently selected disk
(“Free=”), the size of the currently selected file (“Size=”), and the amount of free Z8
memory (“Wave=”).
2
Select the “View” parameter, then use the JOG dial to select the type of
file that you want to load.
The “View” parameter allows you to filter the file types that can be selected by the File
parameter, which is useful when you have many files. For example, if you set the “View”
parameter to “SAMPLES,” only Sample files appear at the File parameter. Other options
include: ALL FILES, PROGRAMS, MULTIS, FOLDERS, and SONGS.
3
Turn the JOG dial in the “Disk” parameter.
The Disk List window appears.
4
Use the CURSOR buttons to select the desired disk, and press “CLOSE” to
close the Disk List window.
The specified disk is selected. See “Saving” on page 84 for more information on the Disk
List window.
5
Use the Folder (
) parameter to select the folder that contains the file you
wish to load.
If the selected disk does not contain any folders, or if you have selected the root directory
(the folder in the upper-most hierarchy), (
) appears in the display. Only files in the
selected folder can be selected by the File parameter. The files listed in the File parameter
have icons that correspond to the file types.
To move transversely through the folder hierarchy, while holding down the SHIFT but-
ton, use the Left and Right CURSOR buttons. To move down through the hierarchy, hold
down the SHIFT button, and press the Right CURSOR button. To move up through the
hierarchy, hold down the SHIFT button, and press the Left CURSOR button.
6
Press “DO IT” to display the Load Sample, Load Program, Load Multi, or
Load Folder window, depending on the selected file.
Note: If a removable storage device is connected, when you want to change the disk,
press “EJECT” on the SAVE page, not the eject button on the device. While the device
is connected to the Z8, its eject button is disabled.
Summary of Contents for Z4
Page 106: ......

