background image


18-07-2022 / A-00222-A


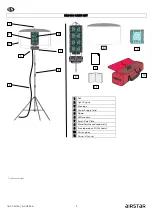
SIROCCO PARTS LIST 


1  Nut 

2  Light Engine 
3  Envelope 
4  Power Supply Cord 
5  Zipper 
6  LED module 

7  South Pole Plate 

8  Stand (purchased separately) 
9  Envelope repair Kit (2 sheets) 

10  Carrying bag 

11  Owner’s Manual 

3* 

*see details at right 

2* 

6* 

11 

10 

Summary of Contents for SIROCCO REDTECH 400

Page 1: ...18 07 2022 A 00222 A 1 SIROCCO REDTECH 400 700 1000 1300 USER S GUIDE ...

Page 2: ...ctrical source outlets 2 Always use Ground Fault Circuit Interrupter GFCI protection when operating your Sirocco in areas near water and during inclement weather KEEP THESE INSTRUCTIONS WITH YOUR PRODUCT PRECAUTIONARY PRINCIPLES 1 DO NOT LEAVE DEFLATED ENVELOPE UNCOVERED WHEN NOT IN USE 2 Store your Sirocco in a dry ventilated area away from heat sources and chemical products 3 Make sure that enve...

Page 3: ...LIST 1 Nut 2 Light Engine 3 Envelope 4 Power Supply Cord 5 Zipper 6 LED module 7 South Pole Plate 8 Stand purchased separately 9 Envelope repair Kit 2 sheets 10 Carrying bag 11 Owner s Manual 3 4 8 see details at right 2 7 6 5 1 11 9 10 2 3 ...

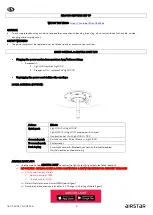
Page 4: ... cord deflates the envelope LOCAL CONTROL BUTTON Actions Effects Quick push Light ON Full Light 100 Light OFF Full Light 0 envelope still inflated If animation set Full Light 100 OFF 4 seconds push Switch animation Pulse Beacon Light 100 10 seconds push Factory reset Push plug Smart light control Bluetooth connection 2 blinks disabled Maintain button pushed and plug AIRSTAR LIGHT APP Use the mobil...

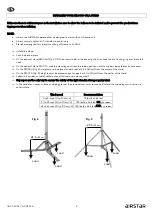
Page 5: ... from the folded position until the support bars are exactly horizontal On the P500AH Fig 4 weights must be placed on each foot at 24 in 60 cm from the center of the stand On the P500TA Fig 5 weights must be placed on each support at 20 in 50 cm from the center of the stand Follow this correlation table indicative for a flat floor and a steady wind Guy ropes are the only way to ensure the safety o...

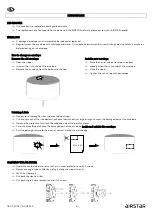
Page 6: ...rom top to bottom Loosely screw the nut on top of the envelope Close the zipper Tighten the nut on top of the envelope Patching A Hole Make sure to thoroughly clean the area to be patched Cut a square out of the included self adhesive fabric sheet just large enough to cover the damaged part of the envelope Remove the protective film from the adhesive side of the patch material Carefully place the ...

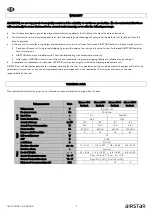
Page 7: ...equired AIRSTAR must receive original unit before shipping replacement unit AIRSTAR cannot be held responsible for improper handling by the user Any operation on the envelope or electric equipment that is not specified in this manual or any use of unapproved tools or components is not covered by this warranty and remains the sole responsibility of the user TECHNICAL DATA Not contractual informatio...

Page 8: ...18 07 2022 A 00222 A 8 ZA Champ 7 Laux 38190 Champ Près Froges France Tel 33 0 476 13 12 20 www airstar light com ...

Reviews: