1
© Airflow • We reserve the right to make changes without prior notice
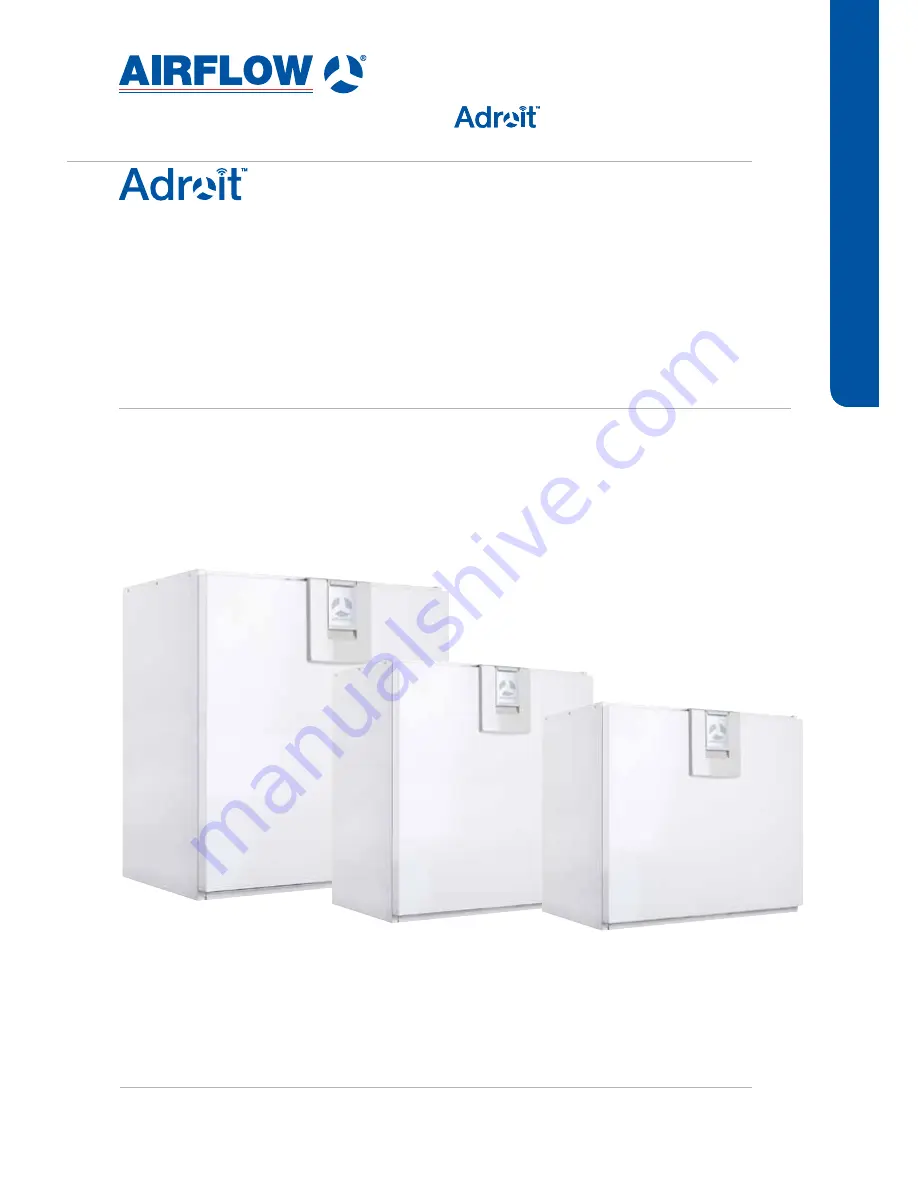
DV96 DV110 DV145
Instruction Manual
INSTRUCTION MANUAL
Page 1: ...We reserve the right to make changes without prior notice DV96 DV110 DV145 Airflow We reserve the right to make changes without prior notice DV96 DV110 DV145 Instruction Manual INSTRUCTION MANUAL DV96 DV110 DV145 ...
Page 2: ...2 DV96 DV110 DV145 INSTRUCTION MANUAL ...
Page 3: ...s and sensors Settings filter display settings time and date week clock turning the unit off 4 MAINTENANCE Filters Heat recovery cell Fans Condensing water Troubleshooting 5 TECHNICAL SPECIFICATIONS Technical specifications input powers air volumes sound values fan curves dimensions duct outlets and measurement points Internal electrical connection External electrical connection 6 INSTALLATION Ins...
Page 4: ...RACT AIR FAN BEHIND THE PROTECTIVE COVER SUPPLY AIR FAN BEHIND THE EXTRACT AIR DUCT OUTDOOR AIR FILTER F7 HEAT RECOVERY CELL AUTOMATIC SUMMER WINTER DAMPER OUTDOOR AIR FILTER G4 EXTRACT AIR FILTER G4 OPTIONAL POST HEATER BEHIND THE EXTRACT AIR DUCT SAFETY SWITCH ADROIT DIGITAL CONTROLLER ADROIT CO2 TRANSMITTER ADROIT HUMIDITY TRANSMITTER INTERNAL HUMIDITY SENSOR ...
Page 5: ...t Settings 3 Press connect button in Adroit Cloud Service section 4 Registration Page is now opened 5 Enter the following information a Device name enter the desired name for the device b User name c E mail address d Password 6 Press the create account button 7 An e mail with your log in details will be sent to the e mail given during the registration process 8 A verification e mail will be sent t...
Page 6: ...e basic safety regulations and the intended usage of the ventilation system Read this manual before operating the ventilation unit Keep this manual for later use In case of loss you can download the manual from our website This user manual contains all important tips for operating the system safely This user manual must be observed by all persons who operate and maintain the ventilation system Fur...
Page 7: ...ess this button to Reduce the value of the selected setting Return to the previous menu item Move from a week view to a one day view in the temperature relative humidity of air and carbon dioxide level graphs Up arrow button Pressing this button takes you upwards in the menu Down arrow button Pressing this button takes you downwards in the menu Statistics button Pressing this button opens the temp...
Page 8: ...onitoring service or building automation by using voltage signals or Modbus messages The required ventilation may also be adjusted automatically with the optional carbon dioxide and humidity sensors In this case ventilation remains optimal even if the dwelling is unoccupied By using the week clock you can create just the right ventilation for your individual lifestyle WARNING The unit is not inten...
Page 9: ...ventilation unit for the first time or after any maintenance procedure when the unit starts up the diagnostic display will appear for a few seconds until the At home profile main screen is opened If the unit is switched off from the control panel you can start the ventilation unit by pressing any button on the control panel NOTE The first launch of the unit may take a while as the control panel wi...
Page 10: ... the date and time the Time and date screen is opened first 1 Use the Plus and Minus buttons to set the hours 2 Press the Right arrow button 3 Use the Plus and Minus buttons to set the minutes 4 The time is now set 5 Proceed to the next phase by pressing the Right arrow button SET THE 24 OR 12 HOUR CLOCK By default the system uses the 24 hour clock If you want to use the 24 hour clock proceed to t...
Page 11: ...ttons to set the date 2 Press the Right arrow button 3 Use the Plus and Minus buttons to set the month 4 Press the Right arrow button 5 Use the Plus and Minus buttons to set the year 6 Press the OK button 7 The date is now set FINISHING UP THE DEPLOYMENT When you have made the basic settings for the deployment the acknowledgement screen is opened If you want to continue and make the advanced setti...
Page 12: ...ser level the user s access to some menus is restricted Limited At the limited user level the user has access only to the basic functions of the ventilation units For more information on user levels see chapter 9 User level diagrams When you want to set the system user level proceed as follows 1 The deployment wizard User level screen is opened 2 Use the Plus and Minus buttons to set the user leve...
Page 13: ...low 3 C on a plastic cell the ventilation device may have to defrost the heat exchanger cell If this occurs you cannot adjust the air flows and the Defrosting figure is shown on the control panel SUPPLY AIR When you want to make the system supply air settings proceed as follows 1 The deployment wizard Fan settings screen is opened 2 Set the supply air quantity as a percentage of the maximum by usi...
Page 14: ...ly air temperature for the At Home profile by using the Plus and Minus buttons You can adjust the temperature in the range of 10 C 25 C 7 The At home profile supply air temperature is now set 8 Press the Right arrow button 9 The setup screen for the automatic fan speed control based on the relative humidity appears 10 Use the Plus and Minus buttons to select whether the automatic fan speed control...
Page 15: ...is opened 6 Set the desired supply air temperature for the Away profile by using the Plus and Minus buttons You can adjust the temperature in the range of 10 C 25 C 7 The Away profile supply air temperature is now set 8 Press the Right arrow button 9 The setup screen for automatic fan speed control based on the relative humidity appears 10 Use the Plus and Minus buttons to select whether the autom...
Page 16: ... automatic fan speed control based on the relative humidity appears 8 Use the Plus and Minus buttons to select whether the automatic fan speed control based on the relative humidity is used or not 9 Press the Right arrow button 10 The setup screen for the automatic fan speed control based on the carbon dioxide content appears 11 Use the Plus and Minus buttons to select whether the automatic fan sp...
Page 17: ...at the ventilation zone We do not recommend reducing the extract air fan speed 7 The Fireplace function supply air fan speed is now set 8 Press the Right arrow button 9 The screen for setting the profile extract air fan speed appears 10 Set the Fireplace function extract air fan speed as a percentage of the maximum by using the Plus and Minus buttons 11 The Fireplace function extract air fan speed...
Page 18: ... as follows 1 If you want to go back to repair or change a value use the arrow buttons to select the desired line and press the OK button 2 Repeat the selected setup phase or phases until you are satisfied with the settings 3 When you are satisfied with the settings use the arrow buttons to select Start and press the OK button EXPERT SETTINGS ...
Page 19: ...At home Away or Boost profile The week clock is on The Fireplace profile is used The week clock might be turned on These symbols indicate the fan speed of the currently active profile The smallest fan icon indicates that the Away profile is in use and the largest fan icon indicates that the Boost profile is being used Droplet symbols indicate the relative humidity of air The symbols are One drop T...
Page 20: ... than the set value Outdoor air Indicates the outdoor air temperature Fan speed Indicates the fan speed If the automatic fan speed boost is turned on the set value is shown in brackets first followed by the actual fan speed Cell status Indicates the status of the ventilation unit heat recovery cell The status options are Heat recovery The heat recovery cell heats the air streaming in from outdoors...
Page 21: ...s turned on the set value is shown in brackets first followed by the actual fan speed Cell status Indicates the status of the ventilation unit heat recovery cell Possible statuses are Heat recovery The heat recovery cell heats the air streaming in from outdoors Cooling The heat recovery cell cools the air streaming in from outdoors Cell bypass The inflowing air by passes the heat recovery cell Def...
Page 22: ...are Heat recovery The heat recovery cell heats the air streaming in from outdoors Cooling The heat recovery cell cools the air streaming in from outdoors Cell bypass The inflowing air bypasses the heat recovery cell Defrosting The heat recovery cell is being defrosted 4 Press the Right arrow button 5 The second information display for the profile opens This display shows the following information ...
Page 23: ...t home profile main view 2 Press the Profile information button 3 Press the Edit button 4 The fan speed setup screen is opened 5 Set the At home profile fan speed as a percentage of the maximum by using the Plus and Minus buttons 6 Press the Right arrow button 7 The temperature setup screen is opened 8 Set the desired supply air temperature for the At home profile by using the Plus and Minus butto...
Page 24: ... and Minus buttons You can adjust the temperature in the range 10 C 25 C The recommended temperature is 15 C or 2 3 C below the room temperature 9 Press the Right arrow button 10 The setup screen for automatic fan speed control based on the relative humidity appears 11 Use the Plus and Minus buttons to select whether the automatic fan speed control based on the relative humidity is used or not 12 ...
Page 25: ...e automatic fan speed control based on the relative humidity appears 11 Use the Plus and Minus buttons to select whether the automatic fan speed control based on the relative humidity is used or not 12 Press the Right arrow button 13 The setup for automatic fan speed control based on the carbon dioxide level opens 14 Use the Plus and Minus buttons to select whether the automatic fan speed control ...
Page 26: ...s and Minus buttons TIP In the fireplace mode we recommend that you increase the supply air fan speed in order to obtain a positive pressure at the ventilation zone We do not recommend reducing the extract air fan speed 9 Press the Right arrow button 10 The screen for setting the profile extract air fan speed will appear 11 Set the Fireplace function extract air fan speed as a percentage of the ma...
Page 27: ...lect Settings Temperatures and sensors 2 Press the OK button 3 The temperatures summary screen is opened 4 Press the Statistics button 5 A graph is opened describing the indoor air temperature over the last 24 hours 6 To view weekly statistics press the Plus button 7 A graph is opened describing the indoor air temperature over the last seven days 8 You can return to daily statistics by pressing th...
Page 28: ...y pressing the Back button 28 To exit the menu press the Back button TEMPERATURES AND SENSORS USING THE UNIT VIEWING HUMIDITY AND CARBON DIOXIDE VALUES When you want to view individual humidity and carbon dioxide sensor data proceed as follows 1 Select Settings Temperatures and sensors 2 Press the OK button 3 The temperature and sensors summary screen is opened 4 Press the Right arrow button 5 A s...
Page 29: ...sor group selection by pressing the Back button 12 Press the Right arrow button twice 13 A screen displaying the values of the carbon dioxide sensors 1 3 is opened 14 Press the Statistics button 15 15 A graph is opened describing the values from the carbon dioxide sensor that gave the largest carbon dioxide value over the last 24 hours 16 If you want to view weekly statistics press the Plus button...
Page 30: ...al Indicates the filter replacement interval in months SETTING THE DATE THE FILTER WERE LAST REPLACED This section describes how to enter information in the control panel on replacing the ventilation unit filter Replacing the filter itself is described in the ventilation unit maintenance instructions When you want to set the date when you replaced the ventilation unit filter proceed as follows 1 S...
Page 31: ...on unit filter proceed as follows 1 Select Settings Filter 2 Press the OK button 3 The filter status summary screen is opened 4 Press the Edit button 5 Press the Right arrow button 6 The Filter status 2 2 screen is opened 7 Set the desired reminder interval in months in the Reminder interval field by using the Plus and Minus buttons You can set the interval value from 1 to 12 months The factory se...
Page 32: ...leep time has elapsed To reactivate the Adroit Digital Controller press any button ADJUSTING THE DISPLAY BRIGHTNESS To set the display brightness proceed as follows 1 Select Settings Display settings 2 Press the OK button 3 The Display settings screen appears 4 Press the Right arrow button 5 The Display settings 2 2 screen appears 6 Use the Plus and Minus buttons to set the display brightness 7 Pr...
Page 33: ...ns to set the minutes 7 Press the OK button SELECTING THE 24 OR 12 HOUR CLOCK By default the system uses a 24 hour clock If you want to use the 12 hour clock proceed as follows 1 Select Settings Time and date 2 Press the OK button 3 The Time and date settings are opened 4 Press the Right arrow until the display 2 4 opens 5 Press the Minus button The 24 Hour Time setting value is changed to Off 6 P...
Page 34: ...e the At home profile Away Use the Away profile Boost Use the Boost profile Blank Do not change the profile NOTE If you change the profile manually when the Week clock is on the selected profile will be active until the Week clock switches to the next profile in the program If the humidity or carbon dioxide sensors control the ventilation they will adjust the fan speed regardless of whether the pr...
Page 35: ... profile icons The icons are This icon selects the At home profile This icon selects the Away profile This icon selects the Boost profile 7 Set the other profile changes for the Week clock as described above 8 Press the Settings button 9 The Week clock menu opens 10 Select Save and Quit 11 To exit without saving the weekly program or changes select Cancel and Quit 12 A confirmation display opens 1...
Page 36: ... weekly program has been set Mon Fri 08 00 17 00 Away from home Mon Fri 17 00 08 00 At home Sat 08 00 18 00 At home Sat 18 00 21 00 Boost that might be needed for cooking Sat 21 00 Mon 08 00 At home To set the Week clock proceed as follows 1 Open the week clock 2 Select Monday and make the following settings At 8 00 select the Away profile At 17 00 select the At home profile 3 Also make the corres...
Page 37: ...USING THE UNIT SWITCHING THE UNIT OFF To turn the ventilation unit off 1 Select Settings Turn unit off 2 Press the OK button 3 The system asks for confirmation 4 Press the OK button 5 The ventilation unit has now been turned off TIP To re start the ventilation unit press any key SETTINGS ...
Page 38: ...filter filters insects heavy pollen and other relatively large foreign objects out of the outdoor air Class F7 fine filter filters microscopic pollen and dust particles out of the supply air The coarse filter filters the extract air and keeps the heat recovery cell clean The filter change interval depends on the ambient concentrations of dust It is recommended that the filters be changed every spr...
Page 39: ...ed To check the heat recovery cell proceed as follows 1 Disconnect the power for the ventilation unit 2 Open the ventilation unit door by lifting the latch up 3 Lift the door off 4 Remove the filters A B C 5 Remove the sealing strip E above the cell in the direction of the arrow 6 Lift and pull the cell D out of the unit 7 If the cell is dirty clean it by immersing it in warm water with a mild det...
Page 40: ... supply air fan proceed as follows 1 Disconnect the power to the ventilation unit 2 Open the ventilation unit door by lifting the latch up 3 Lift the door off 4 Remove the extract air filter C the cell top bracket E and the heat recovery cell D as described in sections Filters and Heat Recovery Cell 5 Pull out the temperature sensor figure 1 located at the top of the extract air duct G Remove the ...
Page 41: ...ary remove the arm pins Use pliers to press the pins straight so that they are easier to install back later b Push the fan gently upwards figure 9 c Pry the plastic lock to the right of the fan with for example a screwdriver figure 10 d The fan falls down e Pull the fan out of the unit figure 11 f Disconnect the fan wire quick connector figure 12 The fan has now been removed for cleaning 11 Reasse...
Page 42: ...ure 1 on the extract air fan cover and remove the cover figure 2 6 The fan can now be cleaned in place 7 7 If you want to remove the fan for cleaning proceed as follows a Push the fan gently upward figure 3 b Pry the plastic lock to the right of the fan with for example a screwdriver figure 4 c The fan falls down figure 5 d Pull the fan out of the unit e Disconnect the fan wire quick connector fig...
Page 43: ...ation must be checked and if required the heater must be replaced Contact the service centre Message on the user interface Bus fault Problems with the data transfer bus Make sure that the Modbus bus is connected correctly and that the devices connected to it are properly functioning The ventilation unit is not working the control panel is not working Power input to the unit is lost Check Fuse in t...
Page 44: ...9 53 54 500 38 50 54 57 60 63 65 66 28 39 44 47 49 53 55 56 1000 34 48 54 57 59 62 64 65 23 36 42 45 48 51 54 55 2000 24 43 50 55 57 61 64 65 13 24 31 35 37 41 43 44 4000 16 32 42 47 49 54 56 58 16 17 21 24 26 30 33 33 8000 21 21 27 34 38 44 48 49 21 21 21 21 21 22 23 24 LW dB LWA dB A 45 57 64 66 69 73 74 74 33 43 49 52 55 59 62 63 39 52 58 61 64 67 69 70 28 39 45 48 51 54 57 57 Sound pressure le...
Page 45: ...red 5 Summer winter damper 6 Outdoor air filter G4 7 Extract air filter G4 8 Optional post heater behind the extract air duct 9 Safety switch DIMENSIONS AND DUCT OUTLETS Dimensions DUCT OUTLETS Model R Inner diameter of the female collar ø125 1 Supply air from the unit to the apartment 2 Extract air from the apartment to the unit 3 Exhaust air flowing outdoors from the unit 4 Outdoor air to the un...
Page 46: ...53 55 58 Sound pressure level in decibels A coming through the envelope from the room in which the unit is installed 10m2 sound absorption ADJUSTMENT POSITION AIR FLOWS supply extract Adjustment position 31 42 47 54 59 66 72 100 Air flow l s 29 32 45 50 51 59 60 67 67 75 77 84 84 90 98 105 Air flow m3 h 104 4 115 2 162 180 183 6 212 4 216 241 2 241 2 270 277 2 302 4 302 4 324 352 8 378 LpA dB A 24...
Page 47: ...ct air filter G4 8 Optional post heater behind the extract air duct 9 Safety switch DIMENSIONS AND DUCT OUTLETS Dimensions DUCT OUTLETS Model R Inner diameter of the female collar ø160 1 Supply air from the unit to the apartment 2 Extract air from the apartment to the unit 3 Exhaust air flowing outdoors from the unit 4 Outdoor air to the unit Model L Inner diameter of the female collar ø160 1 Exha...
Page 48: ...evel in decibels A coming through the envelope from the room in which the unit is installed 10m2 sound absorption ADJUSTMENT POSITION AIR FLOWS supply extract Adjustment position 31 42 47 54 59 66 72 100 Air flow l s 36 39 56 62 68 74 81 89 92 98 105 113 116 126 131 142 Air flow m3 h 129 6 140 4 201 6 223 2 244 8 266 4 291 6 320 4 331 2 352 8 378 406 8 417 6 453 6 471 6 511 2 LpA dB A 27 34 37 40 ...
Page 49: ...r filter G4 8 Optional post heater behind the extract air duct 9 Safety switch DIMENSIONS AND DUCT OUTLETS Dimensions DUCT OUTLETS Model R Inner diameter of the female collar ø200 1 Supply air from the unit to the apartment 2 Extract air from the apartment to the unit 3 Exhaust air flowing outdoors from the unit 4 Outdoor air to the unit Model L Inner diameter of the female collar ø200 1 Exhaust a...
Page 50: ...colours BU Blue BN Brown WT White GY Grey YE Yellow YEGN Yellow green RS_A Local hardware Modbus A signal RS_B Local hardware Modbus B signal NTC External temperature sensor connector D I1 Digital input 1 D I2 Digital input 2 11V1 11 1V operating voltage AN I Analog input 0 10VDC RM I 24 V relay input RM O 24 V relay output T Supply air fan P Extract air fan M Damper actuator CM230 L TK Safety swi...
Page 51: ...tial Wire colours BK Black BU Blue BN Brown WT White GY Grey YE Yellow YEGN Yellow green RS_A Local hardware Modbus A signal RS_B Local hardware Modbus B signal NTC External temperature sensor connector D I1 Digital input 1 D I2 Digital input 2 11 V1 11 1 V operating voltage AN I Analog input 0 10VDC RM I 24 V relay input RM O 24 V relay output 4 Supply fan tacho WT 5 GND GN 6 Supply fan PWM YE 1 ...
Page 52: ... Brown WT White GY Grey YE Yellow YEGN Yellow green RS_A Local hardware Modbus A signal RS_B Local hardware Modbus B signal NTC External temperature sensor connector D I1 Digital input 1 D I2 Digital input 2 11 V1 11 1 V operating voltage AN I Analog input 0 10VDC RM I 24 V relay input RM O 24 V relay output 4 Supply fan tacho WT 5 GND GN 6 Supply fan PWM YE 1 Extract fan tacho WT 2 GND GN 3 Extra...
Page 53: ...l input 2 11V1 11 1 V operating voltage AN I Analog input 0 10VDC RM I 24 V relay input RM O 24 V relay output Analog input two different functions Potential free contact data 24VDC can be programmed to display information such as errors or the status of the cell bypass Power supply cable Adroit Digital Controller Adroit Digital Controller REMOTE MONITORING Modbus RTU VENTILATION UNIT INTERNAL ELE...
Page 54: ...with a mounting plate as shown in the adjacent figure Make sure that the unit is horizontally level after mounting MEASURING TUBES The accessory bag with the unit include four airflow measuring tubes These can be inserted in the ducts to allow for easier ventilation adjustment NOTE Mount DV145 on the floor rack or on the wall with a mounting plate CEILING MOUNTING BY USING THE CEILING MOUNTING PLA...
Page 55: ...ate 3 Put the locking devices to the top of the ventilation unit at the openings in the ceiling mounting plate and lift upwards Make sure that the unit is locked in place 4 Check that the condensing water insulation between the unit and the ceiling mounting plate is in place in the exhaust and outdoor air duct TIP You can detach the unit from the ceiling mounting plate by pulling the spring loaded...
Page 56: ...UTLET 1 Push the main body of the condensing water outlet downward from above through the hole in the bottom plate of the ventilation unit 2 Push the tension pin downward from below towards the main body 3 Place the valve ball inside the housing of the condensing water outlet 4 Attach the housing to the condensing water outlet 30 30 495 435 625 685 465 655 80 23 min 30 133 min 8 Ø 8 Ø 22 The lengt...
Page 57: ... If you use the alternative condensing water outlet move the gasket ring and the locking part to the tube joint part that will be mounted on the wall NOTE The alternative condensing water outlet installation requires 47mm of free space below the ventilation unit 47 mm R L 55 R L 121 143 143 121 L 140 140 R 141 43 43 180 180 141 141 141 28 28 38 ALTERNATIVE WATER SEAL DIMENSIONING FIGURES DV96 DV11...
Page 58: ...r supply and extract air equipped with heat recovery and operating as part of a ventilation system has been designed and manufactured to the following specifications 1 Low Voltage Directive 2006 95 EC 2 EMC Directive 2004 108 EC Fulfils technical specification of harmonized standards EN 60335 1 2012 EN 61000 6 1 2007 EN 62000 3 3 2006 A1 2009 A2 2009 EN 61000 3 3 2008 EN 61000 6 3 2007 A1 2011 Thi...
Page 59: ...mbly 60000196 4 Water seal 60000240 12 Extract air outlet 60000225 20 Door latch assembly 60000224 5 Filter set 2 x G4 1 x F7 90000375 13 Internal humidity sensor 60000219 21 NTC sensor 1pc 60000134 6 Outdoor air G4 filter stand 60000237 14 Adroit motherboard 60000195 22 Glass tube fuse 5 x 20 80 mA slow 60000231 7 HR cell 60000232 15 Safety switch 60000135 23 Adroit Digital Controller optional 90...
Page 60: ...0000240 13 Extract air outlet 60000226 22 Door latch assembly 60000224 5 Filter set 2 x G4 1 x F7 90000378 14 Internal humidity sensor 60000219 23 NTC sensor 1pc 60000134 6 Outdoor air G4 filter stand 60000238 15 Adroit motherboard 60000195 24 Glass tube fuse 5 x 20 80 mA slow 60000231 7 Lower support for HR cell 60000235 16 Safety switch 60000135 25 Adroit Digital Controller optional 90000610 8 H...
Page 61: ...22 Door latch assembly 60000224 4 Water seal 60000240 13 Extract air outlet 60000227 23 NTC sensor 1pc 60000134 5 Filter set 2xG4 1xF7 90000376 14 Internal humidity sensor 60000219 24 Glass tube fuse 5 x 20 80 mA slow 60000231 6 Outdoor air G4 filter stand 60000239 15 Adroit motherboard 60000195 25 Adroit Digital Controller optional 90000610 7 Lower support for HR cell 60000236 16 Safety switch 60...
Page 62: ...ttings Sensor settings Fan settings I O settings Password and access rights Defrost settings Relay I O settings Panel address Modbus settings Turn unit on Setup Away At home Ventilation boost Fireplace profile Menu Away information At home information Boost information Fireplace information Service Menu Language Week clock on off Filter status Temperatures and sensors Time and date Display setting...
Page 63: ...eplace information Service Menu Language Week clock on off Filter status Temperatures and sensors Time and date Display settings Expert settings Turn unit off Edit Edit Edit Edit Edit Edit Next reminder Error log Cell defrost Self test display Service diagnostics display Fan test Heater test Summer winter test Save and restore settings Sensor settings Fan settings I O settings Password and access ...
Page 64: ...the unit Has been installed and used in accordance with the fitting and wiring instructions supplied with each unit Has not been connected to an unsuitable electrical supply Has not been subjected to misuse neglect or damage Has not been modified or repaired by any person not authorised by Airflow Developments Ltd Has been installed in accordance with latest Building Regulations and IEEE wiring re...