


42
Installation and Verification Manual
2
Installation (Getting Started)
Recalling Default Settings
1
Press
<Menu>
, choose
Tx/Rx > Stored Settings
then press
<Select>
.
2
Select
Default
then
Recall.
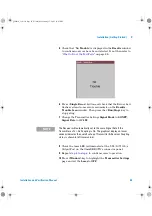
3
Select
OK
then wait for a few seconds for instrument to
reconfigure to the default settings. Recall has completed
when the dialog box clears.
4
Select
Close
.
5
Proceed with the Back-to-Back functional checks.
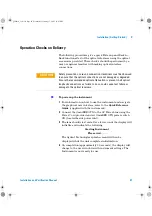
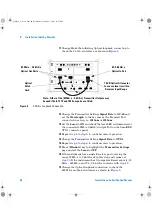
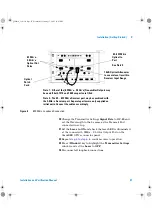
Back-to-Back Functional Checks
The supplied Optical Patch Cord and 15 dB Optical Attenuator
assembly are used to make an optical connection between the
Transmit and Receive Ports for these checks.
Remove any dust protectors from the ends of Patch Cord and
Attenuator before fitting and make sure the (white) exposed
ends are not touched by fingers or otherwise become
contaminated.
When making connections ensure full location in port key/notch
then tighten/lock by hand depending on the connector type.
N O T E
While running the instrument, a single line of text appears at the bottom of
the display. This gives you helpful information relating to the area of the
screen that is highlighted. In addition, online help is available on the
instrument. If you require assistance at any time press the
<Help>
button
on the front panel. This will display the online help.
To return to the normal instrument display press the
<Help>
button again.
To ensure instrument is set to a known state
panther3_iv.book Page 42 Wednesday, January 15, 2003 12:03 PM