


Performance Tests
3
Installation and Verification Manual
111
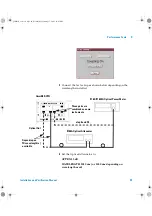
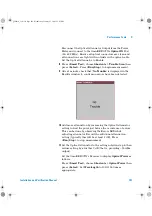
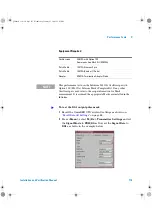
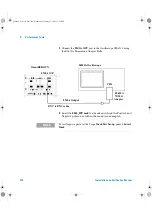
Press
<Menu>
, choose
Tx/Rx > Transmitter Settings
then
press
<Select>
. Select the
Physical
tab. Set the
Signal Mode
to
SONET
and
the
Signal Rate
to
OC192
. Ensure the
Laser
is
set to
ON
.
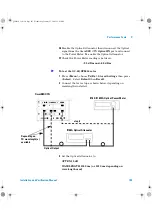
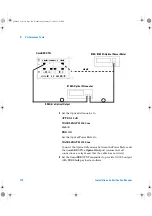
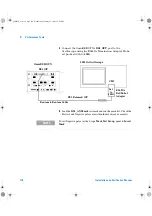
Check the laser LED is illuminated at the 9.95/10.71 Gb/s
Optical Out Port.
5
Adjust the Optical Attenuator to obtain a reading of –14 dBm
on the Power Meter. Take note of the Attenuator setting.
6
Set the Optical Attenuator to Disable mode.
Note:
do not switch OFF the OmniBER OTN laser.
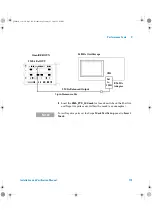
Disconnect the Optical Attenuator Output from the Power
Meter and connect to the OmniBER OTN’s
Optical IN
Port
(9.95/10.71 Gb/s). Ensure all optical connectors are clean
and all connections are tight with no twists in the optical
cable. Set the Optical Attenuator to Enable.
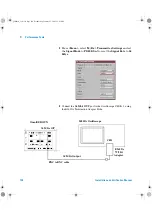
7
Set the OmniBER OTN to
TX>RX Coupled Mode
.
8
Press
<Smart Test>
, choose
Shortcuts > Trouble Scan
then
press
<Select>
. Press
<Run/Stop>
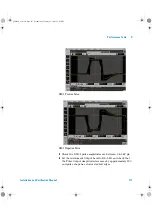
to begin measurement.
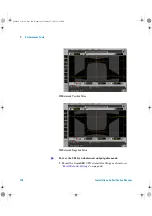
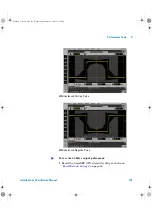
After 1 minute check that
‘No Trouble’
is displayed in the
Results window to confirm no errors have been detected.
9
Increase the Optical Attenuator setting to find the point just
before the occurrence of errors by observing the Errors LED
while adjusting attenuator. Record the additional attenuation
setting. (typically, this will be at least 1 dB).
Press
<Run/Stop>
to stop measurement.
10
Re-set Optical Attenuator to the setting noted in
(providing –14dBm output).
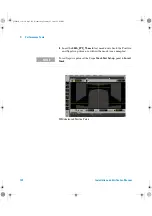
Set the OmniBER OTN’s Receiver to display
Optical Power
and check that the optical power measurement reads
between:
–15.5 dBm and –12.5 dBm
Set the OmniBER OTN’s Receiver to display
Frequency
and
check that the frequency measurement reads between:
9953.2799 MHz and 9953.2801 MHz
panther3_iv.book Page 111 Wednesday, January 15, 2003 12:03 PM