7
EN
7 The file name is assigned according to the DCF
(Design Rule for Camera File System) standard.
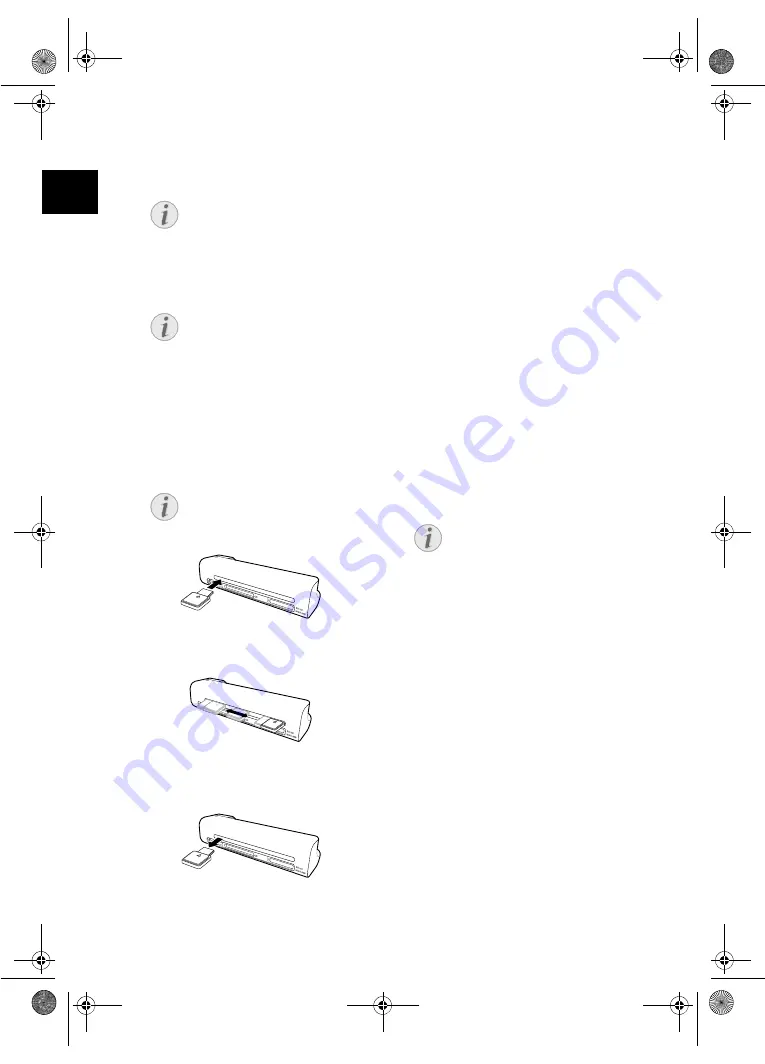
Cleaning the Scanner Glass
Clean scanner glass AS 1110
If lines appear on the scanned image or the image
is not sharp, you need to clean the scanner glass.
1 Switch the device off.
2 Insert the cleaning pen into the left hand end
of the document ejector.
3 Move the cleaning pen carefully two or three
times to the other end of the document ejector.
4 Move the cleaning pen to the left hand side of
the document ejector again and then remove
the cleaning pen.
Computer Connection
You also use the scanner as a memory card reader
in combination with a computer.
Requirements
Your computer must meet the following minimum
requirements:
Operating System
Operating System
Windows: Windows 2000 · XP · Vista · or later ver-
sions
Macintosh: Mass Storage Class Mac OS9.x or Mac
OSX
Connecting to the PC
Hot-Plug-and-Play
The device is Hot-Plug-and-Play capable which
means you can link your computer to the device,
whilst its running. You do not need to close down
your computer to link the device to it.
1 Connect the device to your PC by means of the
USB cable.
2 If the USB is working correctly, the device is
recognised automatically. A drive letter is as-
signed to each memory card slot.
3 You can access the memory card (drive) and
edit the saved files.
Notice
Scanning documents with the protec-
tive cover
Remove the document from the pro-
tective cover after the scanning proc-
ess in order to avoid the document
sticking to the protective cover.
Notice
Stand-by Mode
If the scanner has not been used for
approx. 15 minutes, it automatically
switches off.
Notice
Instructions for Cleaning
The cleaning pen must be free of any
dust.
Notice
Connecting to an USB hub
If you would like to connect the de-
vice to a USB hub = (USB distributor),
ensure that the USB hub is connect-
ed to the computer before you con-
nect the device to the USB hub.
as-1110_1111-manual-03-en-c.book Seite 7 Montag, 29. Juni 2009 10:57 10
Summary of Contents for AS 1111
Page 135: ...14 CZ as 1110_1111 manual 09 cz c book Seite 14 Montag 29 Juni 2009 12 15 12...
Page 136: ...15 CZ as 1110_1111 manual 09 cz c book Seite 15 Montag 29 Juni 2009 12 15 12...
Page 151: ...15 HU as 1110_1111 manual 10 hu c book Seite 15 Montag 29 Juni 2009 11 34 11...
Page 152: ...16 HU as 1110_1111 manual 10 hu c book Seite 16 Montag 29 Juni 2009 11 34 11...
Page 153: ...17 HU as 1110_1111 manual 10 hu c book Seite 17 Montag 29 Juni 2009 11 34 11...
Page 154: ...18 HU as 1110_1111 manual 10 hu c book Seite 18 Montag 29 Juni 2009 11 34 11...
Page 213: ...3 GR 1 2 USB USB as 1110_1111 manual 15 gr c book Seite 3 Montag 29 Juni 2009 12 36 12...
Page 216: ...6 GR 1 2 Mini USB USB 3 as 1110_1111 manual 15 gr c book Seite 6 Montag 29 Juni 2009 12 36 12...
Page 220: ...10 GR 5 1 2 3 30 C 45 C as 1110_1111 manual 15 gr c book Seite 10 Montag 29 Juni 2009 12 36 12...
Page 227: ...3 RU 1 2 USB USB as 1110_1111 manual 16 ru c book Seite 3 Montag 29 Juni 2009 12 44 12...
Page 230: ...6 RU 1 2 USB USB 3 as 1110_1111 manual 16 ru c book Seite 6 Montag 29 Juni 2009 12 44 12...
Page 234: ...10 RU 5 1 2 3 30 45 C as 1110_1111 manual 16 ru c book Seite 10 Montag 29 Juni 2009 12 44 12...


