

HG–0244 Versa 4 Multi-Purpose Exam Cam Copyright © 2015 Alaska Native Tribal Health Consortium. All rights reserved.
1
AFHCAN
www.afhcan.org
Handy
Guide
HG–0244 Versa 4
Multi-Purpose Exam Camera
Live Imaging with Vidyo: This section describes how to use the Versa 4 Exam Camera for live imaging during
a video teleconference encounter using Vidyo.
1. Start your Vidyo
Session/ Power on the Versa 4 Camera
When ready to share exam camera image in live Vidyo visit
2. Click on the Settings Gear
on the Vidyo control panel
3. Click on the Devices tab
to bring up list of camera
options
4. Select the “UVC Camera” device
5. Click on save and close the Settings window
6. Verify that the image on Vidyo is coming from your Versa 4
camera
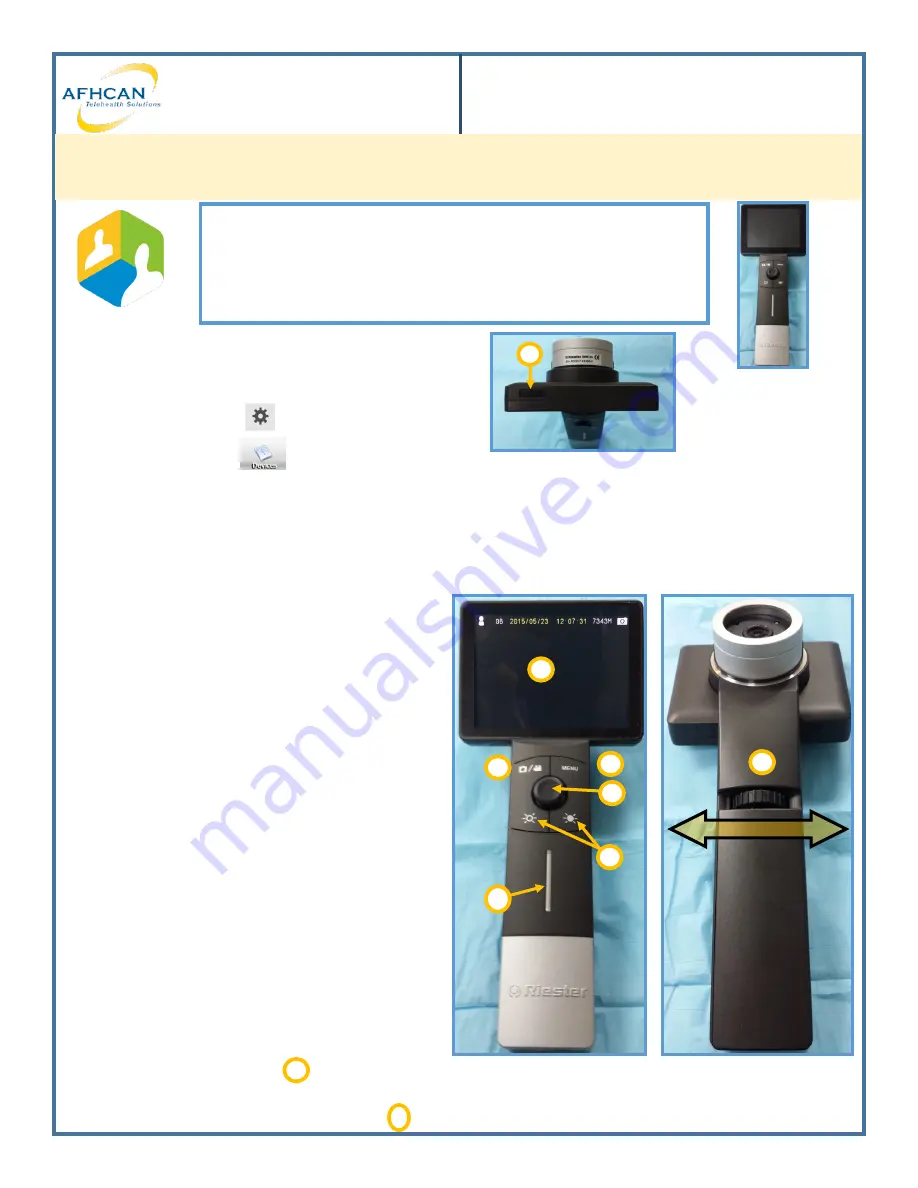
7. Using the Versa 4:
a.
LCD Screen
(Displays device’s live and stored images)
b.
Focus Wheel
(Rotate to adjust focus)
c.
Brightness Controls
(Toggles between 10 levels of
light brightness)
d.
Camera/Video Mode
(Toggles between still images
and video recording)
e.
Menu Button
(Press to view stored images and to de-
lete images, see back page for details)
f.
Pause Image
(Press this to pause image)
g.
Light bar
(blue when the power is on, red charging)
When you are finished sharing exam camera image:
8. Click on the Settings Gear on the Vidyo control panel to
switch back to primary video camera
9. Power off the handheld camera
and continue Vidyo
visit. A black screen doesn’t necessarily mean that the de-
vice is off. Check that the light bar is not lit blue.
Power on the Versa 4
(Hold for 2 seconds)
1
What do you need:
A. Versa 4 exam camera connected to;
B. Vidyo Desktop on cart or computer
C. Video camera, microphone, and speaker
d
e
f
c
b
Closer
Further
a
Note: You may need to adjust your self view settings
in Vidyo to view the exam camera live image
1
g
g


