GRID-TIED SOLAR INVERTERS
WIFI CONFIGURATION GUIDE
FOR INVERTER SERIES
AS-IR02 / AS-IR02-2 / AS-IC02-2
Thank you for choosing an AEG solar inverter! You have two
options for the WiFi configuration of your AEG inverter:
1) via Web Browser; or 2) via App.
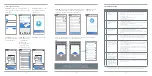
OPTION 1: CONFIGURATION VIA WEB BROWSER
1. PREPARATION
Turn on the inverter; Power on your WiFi Router.
2. WIFI CONFIGURATION
STEP #1 -
Connect your smart device to the WiFi „Solar-WiFi“ or „Solar-
WiFi*“ (* refers to the last 8 digits of your AEG inverter Serial Number).
Input 12345678 as password.
STEP #2 -
Visit the website http://10.10.100.253
Option 2.
WiFi Installation via App
Section 1. Preparation
•
Turn on the inverter
•
Switch on the WiFi router
•
V
Viissiitt w
ww
ww
w..aaeegg--iinndduussttrriiaallssoollaarr..ddee//ssoollaarr--iinnvveerrtteerrss ttoo aacccceessss tthhee A
AEEG
G IInnvveerrtteerr M
Moonniittoorriinngg PPoorrttaall
• The app is subject to upgrade without notification and you can always refer to the
latest instruction at
w ww.aeg-industrialsolar.de/solar-inverters
Solar Solutions GmbH | Brückenstrasse 94, 60594 Frankfurt am Main, Germany
+49 (0)69 400500810 | www.aeg-industrialsolar.de
Option 1. W
iFi Installation via Web Browser
Section 1. Preparation:
•
Turn on the inverter
•
Switch on the WiFi router
•
Connect smart device to Wi-Fi of inverter.
Section 2. Wi-Fi Configuration
Step 1.
Connect smart device to Wi-Fi "Solar-WiFi" or "Solar-WiFi*" with password 12345678
(*refers to the last eight digits of inverter's S
erial Number
)
Step 2.
Visit the website http//10.10.100.253
10.10.100.253
Tip: Specification of Wi-Fi module is available on Device Information at previous page.
Step 4.
Click "Start Setup"
Device information
Firmware version
MAC address
Wireless AP mode
SSID
IP address
Wireless STA mode
Router SSID
Encryption method
Encryption algorithm
V1.1.2.1
98:D8:63:70:C9:82
Enable
Solar-WiFi
10.10.100.253
Enable
WiFi_Burn-in
WAP2PSK
AES
Cannot join the network, may caused by:
Router doesn
’
t exist, or signal is too week, or password is incorrect
Help:
Wizard will help you to complete setting within one minute.
Start Setup
Step 5.
Select available Wi-Fi and click "Next"
Please select you current wireless network
Help:
When RSSI of the selected Wi-Fi network is lower than
30%, the connection may be unstable. Please select other
available network or shorten the distance between the device
and router. If your wireless router does not broadcast SSID,
please click "Next" and add a wireless network manually.
SSID
WiFi_Burn-in
WiFi_Burn-in
WiFi_Burn-in
WiFi_Burn-in2
RSSI
66
100
70
72
Channel
1
1
1
1
AUTH/ENCRY
WPAPSKWPA2PSK/TKIPAES
WPAPSKWPA2PSK/TKIPAES
WPAPSKWPA2PSK/TKIPAES
WPAPSKWPA2PSK/TKIPAES
Refresh
Back
Next
There are two options to complete Wi-Fi configuration.
Tip: Please refresh the page if there appears "Unauthorization Login".
Step 3.
Enter username (admin) and password (admin), Click "Log In"
Log in to 10.10.100.253
Your password will be sent
unencrypted.
admin
admin
Cancel
Log In
Section 3. More Information
Step 6.
Enter the password accordingly and
click "Next".
Tip: Please make sure there is no unacceptable character in the password otherwise, it may
cause unsuccessful Wi-Fi configuration.
Step 7.
Click "Complete" to confirm
Save success!
The current configuration will take effect after
restart.
If you still neet to configure the other pages of
information, please go to complete your required
configuration.
Configuration is completed, you can to the
Management page, Click on the restart "OK" button.
Confirm to complete?
Back
Complete
Add wireless network manually
Please enter the wireless network passwork:
Network name (SSID)
Encryption method
Encryption algorithm
Passwork
show psk
Note:
Case sensitive for SSID and password.
Please make sure all parameters of wireless network are
matched with router, including password.
Back
Next
Network name
●●●●●●●●●●●
AES
WPA2-PSK
The network name (SSID) and password
of Wi-Fi module can be modified in
advanced setting. You may give different
names to the devices to differentiate.
It is strongly recommended that
you change the password of your
"Solar-WiFi*" before or after the
installation. The manufacturer will
NOT be responsible for any of the
privacy information leakage caused
by using the default password of
"Solar-WiFi*".
Wizard
Management
Advanced
Access point setting
Network name (SSID)
Encryption mod
Encryption algorithm
Password (8 to 63 characters)
Network name
Input new password
AES
WPA/WPA2-PSK
DHCP setting for STA
IPDHCP Mode
IP address
Subnet mask
Gateway address
DNS server address
192.168.204.254
80.59.16.0
192.168.204.149
255.255.255.0
DHCP
Save
Save
Note:
config the device's parameter under the access point mode.
Note:
After changing the setting, the device must be restarted.
- 01 -
- 02 -
WIFI INSTALLATION
AND CONFIGURATION
GUIDE
FOR INVERTER SERIES
AS-IR02 / AS-IR02-2 /
AS-IC02-2
VERSION GD202102 EN V1-
1-1
GRID-TIED SOLAR INVERTERS
(should you see the message „Unauthorized login“ please refresh the page).
STEP#3 -
Enter username (admin) and password (admin).
Click on „Log in“.
STEP#4 -
Click on „Start setup“
STEP #5 -
Select the available WiFi
and click „Next“
Option 2.
WiFi Installation via App
Section 1. Preparation
•
Turn on the inverter
•
Switch on the WiFi router
•
V
Viissiitt w
ww
ww
w..aaeegg--iinndduussttrriiaallssoollaarr..ddee//ssoollaarr--iinnvveerrtteerrss ttoo aacccceessss tthhee A
AEEG
G IInnvveerrtteerr M
Moonniittoorriinngg PPoorrttaall
• The app is subject to upgrade without notification and you can always refer to the
latest instruction at
w ww.aeg-industrialsolar.de/solar-inverters
Solar Solutions GmbH | Brückenstrasse 94, 60594 Frankfurt am Main, Germany
+49 (0)69 400500810 | www.aeg-industrialsolar.de
Option 1. W
iFi Installation via Web Browser
Section 1. Preparation:
•
Turn on the inverter
•
Switch on the WiFi router
•
Connect smart device to Wi-Fi of inverter.
Section 2. Wi-Fi Configuration
Step 1.
Connect smart device to Wi-Fi "Solar-WiFi" or "Solar-WiFi*" with password 12345678
(*refers to the last eight digits of inverter's S
erial Number
)
Step 2.
Visit the website http//10.10.100.253
10.10.100.253
Tip: Specification of Wi-Fi module is available on Device Information at previous page.
Step 4.
Click "Start Setup"
Device information
Firmware version
MAC address
Wireless AP mode
SSID
IP address
Wireless STA mode
Router SSID
Encryption method
Encryption algorithm
V1.1.2.1
98:D8:63:70:C9:82
Enable
Solar-WiFi
10.10.100.253
Enable
WiFi_Burn-in
WAP2PSK
AES
Cannot join the network, may caused by:
Router doesn
’
t exist, or signal is too week, or password is incorrect
Help:
Wizard will help you to complete setting within one minute.
Start Setup
Step 5.
Select available Wi-Fi and click "Next"
Please select you current wireless network
Help:
When RSSI of the selected Wi-Fi network is lower than
30%, the connection may be unstable. Please select other
available network or shorten the distance between the device
and router. If your wireless router does not broadcast SSID,
please click "Next" and add a wireless network manually.
SSID
WiFi_Burn-in
WiFi_Burn-in
WiFi_Burn-in
WiFi_Burn-in2
RSSI
66
100
70
72
Channel
1
1
1
1
AUTH/ENCRY
WPAPSKWPA2PSK/TKIPAES
WPAPSKWPA2PSK/TKIPAES
WPAPSKWPA2PSK/TKIPAES
WPAPSKWPA2PSK/TKIPAES
Refresh
Back
Next
There are two options to complete Wi-Fi configuration.
Tip: Please refresh the page if there appears "Unauthorization Login".
Step 3.
Enter username (admin) and password (admin), Click "Log In"
Log in to 10.10.100.253
Your password will be sent
unencrypted.
admin
admin
Cancel
Log In
Section 3. More Information
Step 6.
Enter the password accordingly and
click "Next".
Tip: Please make sure there is no unacceptable character in the password otherwise, it may
cause unsuccessful Wi-Fi configuration.
Step 7.
Click "Complete" to confirm
Save success!
The current configuration will take effect after
restart.
If you still neet to configure the other pages of
information, please go to complete your required
configuration.
Configuration is completed, you can to the
Management page, Click on the restart "OK" button.
Confirm to complete?
Back
Complete
Add wireless network manually
Please enter the wireless network passwork:
Network name (SSID)
Encryption method
Encryption algorithm
Passwork
show psk
Note:
Case sensitive for SSID and password.
Please make sure all parameters of wireless network are
matched with router, including password.
Back
Next
Network name
●●●●●●●●●●●
AES
WPA2-PSK
The network name (SSID) and password
of Wi-Fi module can be modified in
advanced setting. You may give different
names to the devices to differentiate.
It is strongly recommended that
you change the password of your
"Solar-WiFi*" before or after the
installation. The manufacturer will
NOT be responsible for any of the
privacy information leakage caused
by using the default password of
"Solar-WiFi*".
Wizard
Management
Advanced
Access point setting
Network name (SSID)
Encryption mod
Encryption algorithm
Password (8 to 63 characters)
Network name
Input new password
AES
WPA/WPA2-PSK
DHCP setting for STA
IPDHCP Mode
IP address
Subnet mask
Gateway address
DNS server address
192.168.204.254
80.59.16.0
192.168.204.149
255.255.255.0
DHCP
Save
Save
Note:
config the device's parameter under the access point mode.
Note:
After changing the setting, the device must be restarted.
- 01 -
- 02 -
WIFI INSTALLATION
AND CONFIGURATION
GUIDE
FOR INVERTER SERIES
AS-IR02 / AS-IR02-2 /
AS-IC02-2
VERSION GD202102 EN V1-
1-1
GRID-TIED SOLAR INVERTERS
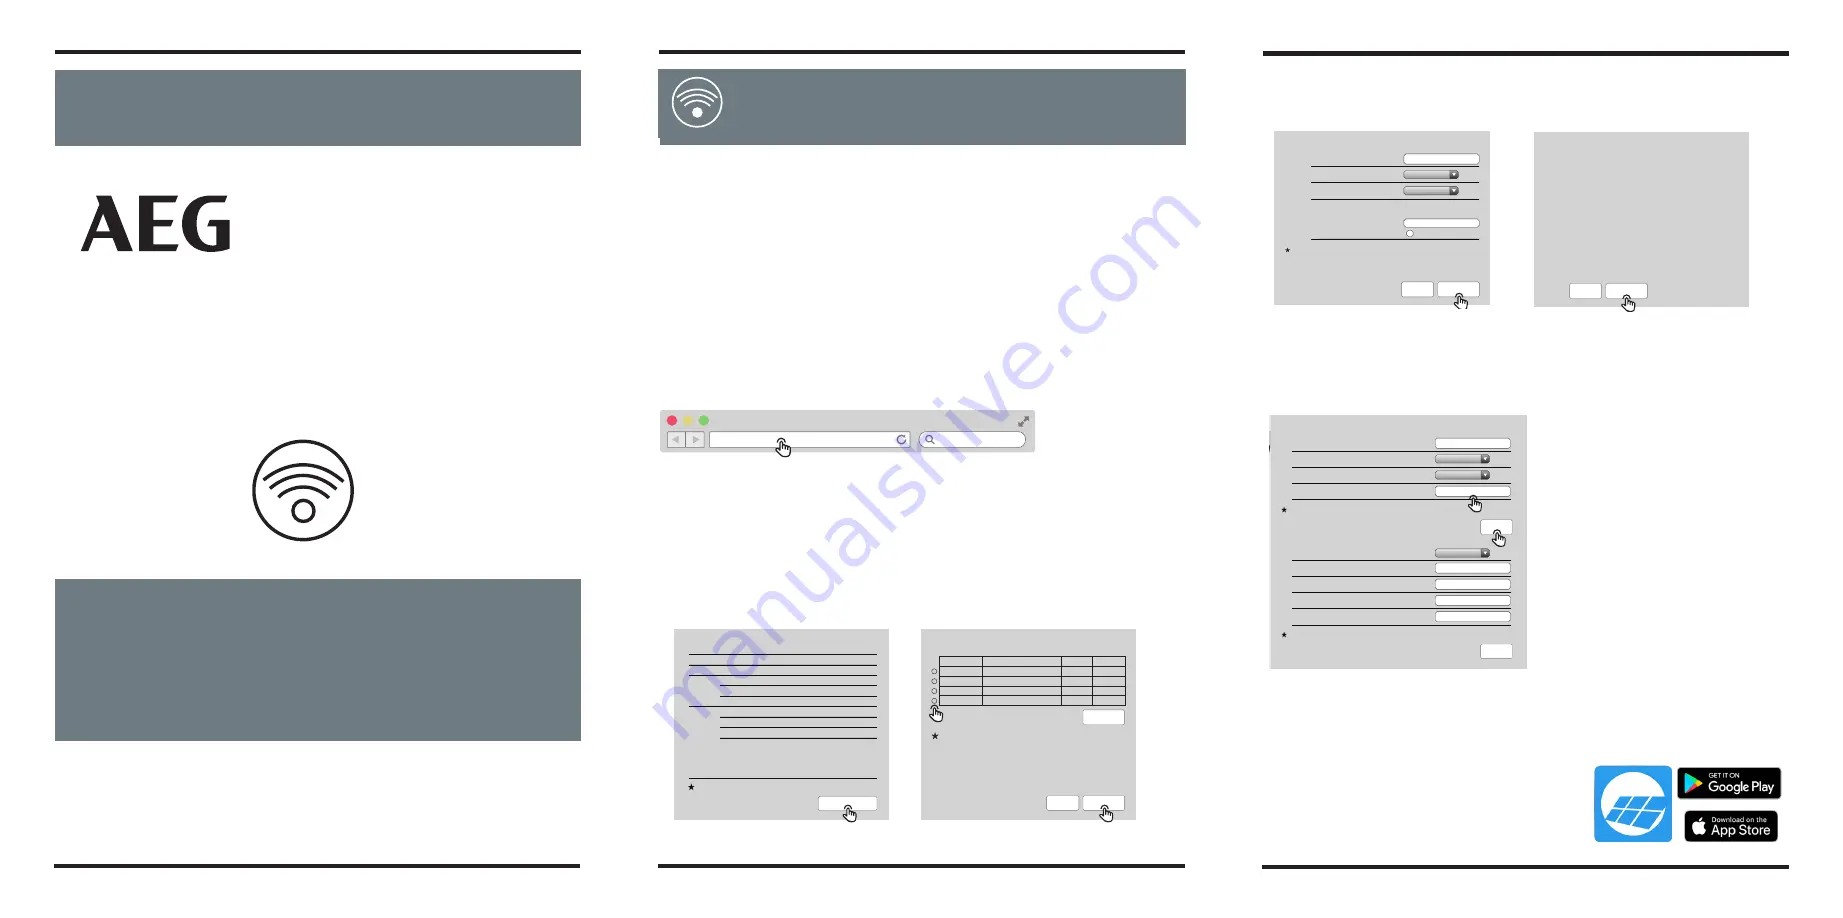
(Tip: WiFi module specifications are found under „Device Information“)
STEP#6 -
Enter the WiFi network
password and click „Next“
STEP #7 -
Click „Complete“ to
confirm
Option 2.
WiFi Installation via App
Section 1. Preparation
•
Turn on the inverter
•
Switch on the WiFi router
•
V
Viissiitt w
ww
ww
w..aaeegg--iinndduussttrriiaallssoollaarr..ddee//ssoollaarr--iinnvveerrtteerrss ttoo aacccceessss tthhee A
AEEG
G IInnvveerrtteerr M
Moonniittoorriinngg PPoorrttaall
• The app is subject to upgrade without notification and you can always refer to the
latest instruction at
w ww.aeg-industrialsolar.de/solar-inverters
Solar Solutions GmbH | Brückenstrasse 94, 60594 Frankfurt am Main, Germany
+49 (0)69 400500810 | www.aeg-industrialsolar.de
Option 1. W
iFi Installation via Web Browser
Section 1. Preparation:
•
Turn on the inverter
•
Switch on the WiFi router
•
Connect smart device to Wi-Fi of inverter.
Section 2. Wi-Fi Configuration
Step 1.
Connect smart device to Wi-Fi "Solar-WiFi" or "Solar-WiFi*" with password 12345678
(*refers to the last eight digits of inverter's S
erial Number
)
Step 2.
Visit the website http//10.10.100.253
10.10.100.253
Tip: Specification of Wi-Fi module is available on Device Information at previous page.
Step 4.
Click "Start Setup"
Device information
Firmware version
MAC address
Wireless AP mode
SSID
IP address
Wireless STA mode
Router SSID
Encryption method
Encryption algorithm
V1.1.2.1
98:D8:63:70:C9:82
Enable
Solar-WiFi
10.10.100.253
Enable
WiFi_Burn-in
WAP2PSK
AES
Cannot join the network, may caused by:
Router doesn
’
t exist, or signal is too week, or password is incorrect
Help:
Wizard will help you to complete setting within one minute.
Start Setup
Step 5.
Select available Wi-Fi and click "Next"
Please select you current wireless network
Help:
When RSSI of the selected Wi-Fi network is lower than
30%, the connection may be unstable. Please select other
available network or shorten the distance between the device
and router. If your wireless router does not broadcast SSID,
please click "Next" and add a wireless network manually.
SSID
WiFi_Burn-in
WiFi_Burn-in
WiFi_Burn-in
WiFi_Burn-in2
RSSI
66
100
70
72
Channel
1
1
1
1
AUTH/ENCRY
WPAPSKWPA2PSK/TKIPAES
WPAPSKWPA2PSK/TKIPAES
WPAPSKWPA2PSK/TKIPAES
WPAPSKWPA2PSK/TKIPAES
Refresh
Back
Next
There are two options to complete Wi-Fi configuration.
Tip: Please refresh the page if there appears "Unauthorization Login".
Step 3.
Enter username (admin) and password (admin), Click "Log In"
Log in to 10.10.100.253
Your password will be sent
unencrypted.
admin
admin
Cancel
Log In
Section 3. More Information
Step 6.
Enter the password accordingly and
click "Next".
Tip: Please make sure there is no unacceptable character in the password otherwise, it may
cause unsuccessful Wi-Fi configuration.
Step 7.
Click "Complete" to confirm
Save success!
The current configuration will take effect after
restart.
If you still neet to configure the other pages of
information, please go to complete your required
configuration.
Configuration is completed, you can to the
Management page, Click on the restart "OK" button.
Confirm to complete?
Back
Complete
Add wireless network manually
Please enter the wireless network passwork:
Network name (SSID)
Encryption method
Encryption algorithm
Passwork
show psk
Note:
Case sensitive for SSID and password.
Please make sure all parameters of wireless network are
matched with router, including password.
Back
Next
Network name
●●●●●●●●●●●
AES
WPA2-PSK
The network name (SSID) and password
of Wi-Fi module can be modified in
advanced setting. You may give different
names to the devices to differentiate.
It is strongly recommended that
you change the password of your
"Solar-WiFi*" before or after the
installation. The manufacturer will
NOT be responsible for any of the
privacy information leakage caused
by using the default password of
"Solar-WiFi*".
Wizard
Management
Advanced
Access point setting
Network name (SSID)
Encryption mod
Encryption algorithm
Password (8 to 63 characters)
Network name
Input new password
AES
WPA/WPA2-PSK
DHCP setting for STA
IPDHCP Mode
IP address
Subnet mask
Gateway address
DNS server address
192.168.204.254
80.59.16.0
192.168.204.149
255.255.255.0
DHCP
Save
Save
Note:
config the device's parameter under the access point mode.
Note:
After changing the setting, the device must be restarted.
- 01 -
- 02 -
WIFI INSTALLATION
AND CONFIGURATION
GUIDE
FOR INVERTER SERIES
AS-IR02 / AS-IR02-2 /
AS-IC02-2
VERSION GD202102 EN V1-
1-1
GRID-TIED SOLAR INVERTERS
(Tip: please ensure there are no invalid / not accepted characters in the password. This may
cause the installation to fail).
3. FURTHER INFORMATION
Option 2.
WiFi Installation via App
Section 1. Preparation
•
Turn on the inverter
•
Switch on the WiFi router
•
V
Viissiitt w
ww
ww
w..aaeegg--iinndduussttrriiaallssoollaarr..ddee//ssoollaarr--iinnvveerrtteerrss ttoo aacccceessss tthhee A
AEEG
G IInnvveerrtteerr M
Moonniittoorriinngg PPoorrttaall
• The app is subject to upgrade without notification and you can always refer to the
latest instruction at
w ww.aeg-industrialsolar.de/solar-inverters
Solar Solutions GmbH | Brückenstrasse 94, 60594 Frankfurt am Main, Germany
+49 (0)69 400500810 | www.aeg-industrialsolar.de
Option 1. W
iFi Installation via Web Browser
Section 1. Preparation:
•
Turn on the inverter
•
Switch on the WiFi router
•
Connect smart device to Wi-Fi of inverter.
Section 2. Wi-Fi Configuration
Step 1.
Connect smart device to Wi-Fi "Solar-WiFi" or "Solar-WiFi*" with password 12345678
(*refers to the last eight digits of inverter's S
erial Number
)
Step 2.
Visit the website http//10.10.100.253
10.10.100.253
Tip: Specification of Wi-Fi module is available on Device Information at previous page.
Step 4.
Click "Start Setup"
Device information
Firmware version
MAC address
Wireless AP mode
SSID
IP address
Wireless STA mode
Router SSID
Encryption method
Encryption algorithm
V1.1.2.1
98:D8:63:70:C9:82
Enable
Solar-WiFi
10.10.100.253
Enable
WiFi_Burn-in
WAP2PSK
AES
Cannot join the network, may caused by:
Router doesn
’
t exist, or signal is too week, or password is incorrect
Help:
Wizard will help you to complete setting within one minute.
Start Setup
Step 5.
Select available Wi-Fi and click "Next"
Please select you current wireless network
Help:
When RSSI of the selected Wi-Fi network is lower than
30%, the connection may be unstable. Please select other
available network or shorten the distance between the device
and router. If your wireless router does not broadcast SSID,
please click "Next" and add a wireless network manually.
SSID
WiFi_Burn-in
WiFi_Burn-in
WiFi_Burn-in
WiFi_Burn-in2
RSSI
66
100
70
72
Channel
1
1
1
1
AUTH/ENCRY
WPAPSKWPA2PSK/TKIPAES
WPAPSKWPA2PSK/TKIPAES
WPAPSKWPA2PSK/TKIPAES
WPAPSKWPA2PSK/TKIPAES
Refresh
Back
Next
There are two options to complete Wi-Fi configuration.
Tip: Please refresh the page if there appears "Unauthorization Login".
Step 3.
Enter username (admin) and password (admin), Click "Log In"
Log in to 10.10.100.253
Your password will be sent
unencrypted.
admin
admin
Cancel
Log In
Section 3. More Information
Step 6.
Enter the password accordingly and
click "Next".
Tip: Please make sure there is no unacceptable character in the password otherwise, it may
cause unsuccessful Wi-Fi configuration.
Step 7.
Click "Complete" to confirm
Save success!
The current configuration will take effect after
restart.
If you still neet to configure the other pages of
information, please go to complete your required
configuration.
Configuration is completed, you can to the
Management page, Click on the restart "OK" button.
Confirm to complete?
Back
Complete
Add wireless network manually
Please enter the wireless network passwork:
Network name (SSID)
Encryption method
Encryption algorithm
Passwork
show psk
Note:
Case sensitive for SSID and password.
Please make sure all parameters of wireless network are
matched with router, including password.
Back
Next
Network name
●●●●●●●●●●●
AES
WPA2-PSK
The network name (SSID) and password
of Wi-Fi module can be modified in
advanced setting. You may give different
names to the devices to differentiate.
It is strongly recommended that
you change the password of your
"Solar-WiFi*" before or after the
installation. The manufacturer will
NOT be responsible for any of the
privacy information leakage caused
by using the default password of
"Solar-WiFi*".
Wizard
Management
Advanced
Access point setting
Network name (SSID)
Encryption mod
Encryption algorithm
Password (8 to 63 characters)
Network name
Input new password
AES
WPA/WPA2-PSK
DHCP setting for STA
IPDHCP Mode
IP address
Subnet mask
Gateway address
DNS server address
192.168.204.254
80.59.16.0
192.168.204.149
255.255.255.0
DHCP
Save
Save
Note:
config the device's parameter under the access point mode.
Note:
After changing the setting, the device must be restarted.
- 01 -
- 02 -
WIFI INSTALLATION
AND CONFIGURATION
GUIDE
FOR INVERTER SERIES
AS-IR02 / AS-IR02-2 /
AS-IC02-2
VERSION GD202102 EN V1-
1-1
GRID-TIED SOLAR INVERTERS
The network name (SSID) and
password of the WiFi module
can be changed
in the Advanced Settings.
We strongly recommend to
change the password of your
„Solar WiFi“ before or after the
installation process.
Solar Solutions cannot be
held responsible for any leak
of private information caused
by the use of the „Solar WiFi*“
default password.
OPTION 2: WIFI INSTALLATION VIA APP
1. PREPARATION
Turn on the inverter; Power on your WiFi
Router. Download the
SolarPortal
App from
Google Play Store or Apple Store (choose
according to your mobile device.)
VERSION: GD202206 EN V1-22
01
02