


27
Display Screen
There are two main areas of the MRI PC Vision display:
The control/settings area, and the measurement/display areas.
The control/settings area fills the upper portion of the screen. This is where you specify test conditions
such as frequency and span, and test options such as sweep speed and Limit-line options. The
measurement/display area takes up the rest of the screen. It is further subdivided into SWR and
Return Loss graphs, as well as Z-Plot and Smith Chart displays. Each of these displays (except for
the Smith Chart) has a drop-down menu control to select the scale to use.
Running across the top of the screen is the Menu Bar. Here, there are four pull-down menus:
File
- Utilities to upload/download files to/from the instrument, and to view save trace files.
Tools
- Misc utilities and tools to get status information from the instrument, change chart labels, etc.
COM Port Mgr.
- Use this to manually set COM port settings should your unit not attach automatically
(see the section above).
Calibration
- Select this item to
initiate a calibration cycle of the instrument (AFTER you’ve set the
frequency range you want to test). Please note that this menu is for compatibility with earlier
versions; the S11 Calibrate button will do the same thing.
Basic Operation
Once the MRI PC Vision application has established communications with the instrument, the
application can now use the instrument to actually make measurements. First and foremost, you must
select the frequency range to test. The frequency information entered in the appropriate boxes in the
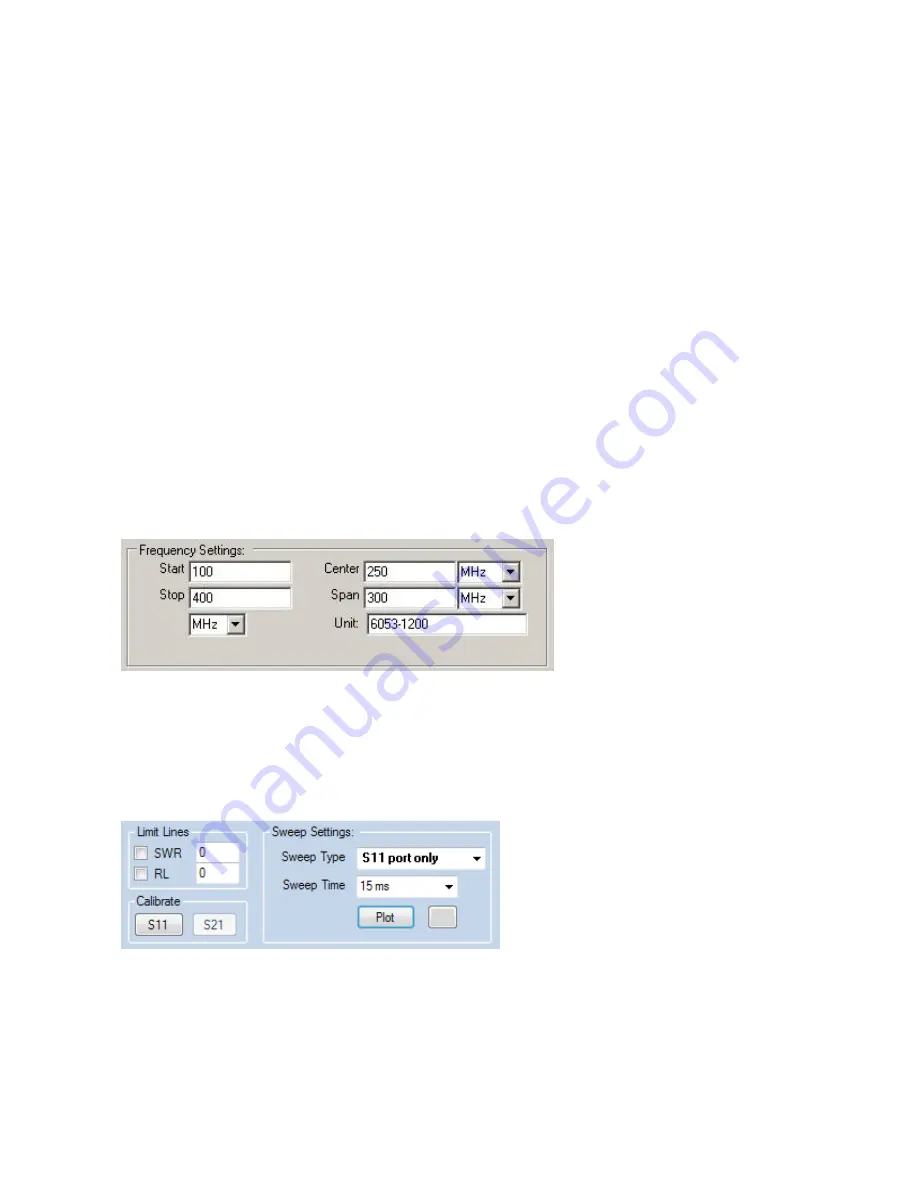
‘Frequency Settings’ section at the top of the screen:
The Frequency Settings section (above) can accept frequency information expressed in center/span
or start/stop frequency formats. Whatever format you use, ensure that the correct units are selected
for each (KHz, MHz).
Once a frequency range has been selected, you should adjust your sweep settings using the controls
in the ‘Sweep Settings’ section, shown here:
The sweep type setting can be set to 'S11 Port' or 'S21 Port', although if a single port unit is being
used, only the S11 selection will be allowed. Select the Sweep Time you wish to use using the
'Sweep Time' roll box. Lower sweep times will result in faster screen updates, but sweep times of
<15ms are not recommended.
Do NOT press the ‘Plot’ button at this time.


