background image

23

A.6  PS/2 Keyboard and Mouse Connector (CN10)

Table A.5: 

A.7  USB Connector

Table A.6: Keyboard & Mouse Connector Pin Assigns

Pin

Signal Name

1

KB DATA

2

MS  DATA

3

GND

4

VCC

5

KB CLOCK

6

MS  CLOCK

Table A.7: USB Connector Pin Assignments

Pin Signal Name

Cable Color

1

VCC

Red

2

DATA-

White

3

DATA+

Green

5

GND

Black

6

5

4

2

1

3

Summary of Contents for UNO-1140/F

Page 1: ...UNO 1140 F Advantech EVA x86 SoC Fanless Box PC with 1 x LAN 8 x Isolated COM User Manual ...

Page 2: ... Ltd Information provided in this manual is intended to be accurate and reli able However Advantech Co Ltd assumes no responsibility for its use nor for any infringements of the rights of third parties which may result from its use Acknowledgements IBM PC AT PS 2 and VGA are trademarks of International Business Machines Corporation Intel and Pentium are trademarks of Intel Corporation Microsoft Wi...

Page 3: ...placement materials service time and freight Please consult your dealer for more details If you think you have a defective product follow these steps 1 Collect all the information about the problem encountered For example CPU speed Advantech products used other hardware and software used etc Note anything abnormal and list any onscreen messages you get when the problem occurs 2 Call your dealer an...

Page 4: ...ill be required to correct the interference at his own expense Technical Support and Assistance Step 1 Visit the Advantech web site at www advantech com support where you can find the latest information about the product Step 2 Contact your distributor or Advantech s customer service center if you need additional assistance Have the following info ready Product name and serial number Description o...

Page 5: ...r cord so that people cannot step on it Do not place anything over the power cord 10 All cautions and warnings on the equipment should be noted 11 If the equipment is not used for a long time disconnect it from the power source to avoid damage by transient overvoltage 12 Never pour any liquid into an opening This may cause fire or elec trical shock 13 Never open the equipment For safety reasons th...

Page 6: ... than 70 dB A DISCLAIMER This set of instructions is given according to IEC 704 1 Advantech disclaims all responsibility for the accuracy of any statements contained herein Safety Precaution Static Electricity Follow these simple precautions to protect yourself from harm and the products from damage 1 To avoid electrical shock always disconnect the power from your PC chassis before you work on it ...

Page 7: ...tor 12 2 6 LED Indicators 12 2 7 PS 2 Keyboard and Mouse Connector 12 2 8 Universal Serial Bus Connectors 12 2 9 VGA VGA Display Connector 13 2 10 RESET Reset Button 13 Chapter 3 Initial Setup 16 3 1 CompactFlash Installation 16 3 2 Chassis Grounding 16 3 3 Power Connection 16 3 4 BIOS Setup and System Assignments 17 3 5 DIN rail Mounting Setup 17 3 6 Wallmounting Setup 18 Appendix A Pin Assignmen...

Page 8: ...UNO 1140 F User Manual viii ...

Page 9: ...1 UNO 1140 F Overview Sections include Introduction Hardware Specifications Safety Precautions UNO 1140 F Series Chassis Dimensions CHAPTER ...

Page 10: ... platform 1 2 Hardware Specifications General Certifications CE FCC Class A UL CCC Dimensions WxHxD 71 x 155 x 140 mm Enclosure Aluminum SECC Mounting DIN rail Wallmount Industrial Grounding Isolation between chassis and power ground Power Consumption 18 W Typical Power Requirement 9 36 VDC e g 24 V 1 A Min 24 W AT Weight 1 kg OS Support DOS UNO 1140 Windows CE 5 0 Linux System Design Fanless desi...

Page 11: ...85 with DB9 connectors Automatic RS 485 data flow control UNO 1140F 4 x isolated RS 232 485 with DB9 con 4 x isolated RS 485 with screw terminal Automatic RS 485 data flow control Serial Port Speed COM1 COM4 RS 232 50 115 2 kbps RS 485 50 115 2 kbps COM5 8 UNO 1140F RS 485 300 921 6 kbps max Serial Port Protection 500VDC Isolation Protection UNO 1140F 2000VDC EFT Protection LAN 1 x 10 100 Base T R...

Page 12: ...e sen sitive electronic components Only experienced elec tronics personnel should open the chassis Caution Always ground yourself to remove any static electric charge before touching UNO 1140 F Modern elec tronic devices are very sensitive to static electric charges Use a grounding wrist strap at all times Place all electronic components on a static dissipative surface or in a static shielded bag ...

Page 13: ...5 1 5 Chassis Dimensions Figure 1 1 UNO 1140 F Chassis Dimensions 3 0 0 3 0 0 139 00 139 00 152 00 152 00 71 00 71 00 ...

Page 14: ...UNO 1140 F User Manual 6 ...

Page 15: ...40 F Peripherals COM1 COM4 RS 232 485 Interfaces COM5 COM8 RS 485 Interfaces LAN Ethernet Connector Power Connector LED Indicators PS 2 Keyboard and Mouse Connector Universal Serial Bus Connectors VGA VGA Display Connector RESET Reset Button CHAPTER ...

Page 16: ...nality 2 1 UNO 1140 F Peripherals The following figures show the connectors on UNO 1140 and UNO 1140F The following sections give you detailed information about func tion of each peripheral Figure 2 1 UNO 1140 F Front Views Figure 2 2 UNO 1140 Top View ...

Page 17: ...fault setting of each port are RS 232 2 2 1 Automatic Data Flow Control Function for RS 485 In RS 485 mode UNO 1140 F automatically senses the direction of incoming data and switches its transmission direction accordingly There fore no handshaking signal e g RTS signal is necessary This feature lets you simply and quickly build an RS 485 network with just two wires More importantly application sof...

Page 18: ...ces shown in Table 2 2 Please note to reset the system to adapt this configuration change Jumper Setting for RS 232 Interface Default Setting Figure 2 4 RS 232 Jumper Settings Jumper Setting for RS 485 Interfaces Figure 2 5 RS 485 Jumper Settings Table 2 1 Selecting RS 232 485 COM1 COM4 Serial Port Corresponding Jumper to Select RS 232 485 COM1 JSETCOM1 COM2 JSETCOM2 COM3 JSETCOM3 COM4 JSETCOM4 ...

Page 19: ...erial communication interface ports on the top side and they are COM5 COM8 Please refer to A 3 for pin assignments and Table 2 2 for the setting of Terminal resistors These COM ports come with Oxford OXmPCI954 UARTs containing 128 bytes FIFOs These upgraded FIFOs can greatly reduce CPU overhead The same as COM1 COM4 UNO 1140F COM5 COM8 RS 485 mode can also automatically senses the direction of inc...

Page 20: ...ssignments 2 6 LED Indicators There are three kinds of LEDs on the UNO 1140 F front panel PWR system power status CF CF status Txn Rxn Serial communication status of COM Port n 2 7 PS 2 Keyboard and Mouse Connector The UNO 1140 F provides a PS 2 keyboard and PS 2 mouse connector A 6 pin mini DIN connector is located on the rear panel of the UNO 1140 F The UNO 1140 F comes with an adapter to conver...

Page 21: ...abled in the system BIOS setup Please refer to Appendix A 7 for its pin assignments 2 9 VGA VGA Display Connector The UNO 1140 F provides a VGA controller for a high resolution VGA interface It supports VGA and VESA up to 1280 x 1024 256 color and 1024 x 768 24bpp resolution and up to 16 MB share memory The VGA interface is reserved for system testing and debugging 2 10 RESET Reset Button UNO 1140...

Page 22: ...UNO 1140 F User Manual 14 ...

Page 23: ...3 Initial Setup Sections include CompactFlash Installation Chassis Grounding Power Connection BIOS Setup and System Assignments DIN rail Mounting Setup Wallmounting Setup CHAPTER ...

Page 24: ...ix screws of the rear cover of UNO 1140 F 3 Remove the rear cover 4 Plug a CompactFlash card with user s OS and application program into a CompactFlash card slot on board 5 Screw back the rear cover with the six screws 3 2 Chassis Grounding Figure 3 1 Chassis Grounding Connection 3 3 Power Connection Connect the UNO 1140 F to a 9 36 VDC power source The power source can either be from a power adap...

Page 25: ... LOAD BIOS DEFAULTS from the BIOS Setup manual if UNO 1140 F does not work properly 3 5 DIN rail Mounting Setup Please follow these steps to mount the UNO 1140 F on a DIN rail 1 Screw the provided DIN rail Kit on the rear side of UNO 1140 F as the diagram shown below 2 Hang the UNO 1140 F to the DIN rail with angle of inclination about 30 degree 3 Let UNO 1140 F down straight to slide over the Rai...

Page 26: ...w the provided Wall Mounting Kit on the rear side of UNO 1140 F as the diagram shown below 2 Mount the device on the wall by the 2 pairs hooking hole provided by the Wallmounting Kit Note To get the UNO 1140 F down from the rail push the device top to down then pull the bottom of the device to let it off the rail smoothly ...

Page 27: ... F pin assignments Board Connectors and Jumpers RS 232 485 Serial Port COM1 COM4 RS 485 Serial Port COM5 COM8 Ethernet RJ 45 Connector Power Screw Terminal PS 2 Keyboard and Mouse Connector USB Connector VGA Display Connector Clear CMOS CMOS1 APPENDIX ...

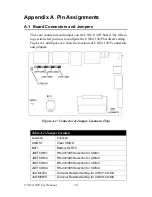
Page 28: ...igure A 2 show the locations of UNO 1140 F connectors and jumpers Figure A 1 Connector Jumper Locations Top Table A 1 Jumper Location Location Function CMOS1 Clear CMOS BAT1 Battery for RTC JSETCOM1 RS 232 485 Selection for COM1 JSETCOM2 RS 232 485 Selection for COM2 JSETCOM3 RS 232 485 Selection for COM3 JSETCOM4 RS 232 485 Selection for COM4 JCOM1234 Terminal Resistor Setting for COM1 COM4 JCOM5...

Page 29: ...21 A 2 RS 232 485 Serial Port COM1 COM4 Table A 2 RS 232 485 Serial Port Pin Assignments Pin RS 232 RS 485 1 DCD DATA 2 RxD DATA 3 TxD NC 4 DTR NC 5 GND GND 6 DSR NC 7 RTS NC 8 CTS NC 9 RI NC ...

Page 30: ...elding Ground A 4 Ethernet RJ 45 Connector A 5 Power Screw Terminal CN8 Table A 3 Ethernet RJ 45 Connector Pin Assigns Pin 10 100Base T Signal Name 1 XMT 2 XMT 3 RCV 4 NC 5 NC 6 RCV 7 NC 8 NC Table A 4 Phoenix Power Connector Pin Assigns Pin Signal Name 1 VIN 10 36 VDC 2 GND 3 Field Ground ...

Page 31: ...7 USB Connector Table A 6 Keyboard Mouse Connector Pin Assigns Pin Signal Name 1 KB DATA 2 MS DATA 3 GND 4 VCC 5 KB CLOCK 6 MS CLOCK Table A 7 USB Connector Pin Assignments Pin Signal Name Cable Color 1 VCC Red 2 DATA White 3 DATA Green 5 GND Black 6 5 4 2 1 3 ...

Page 32: ...lose jumper CMOS1 2 3 to clear CMOS 3 Remove jumper CMOS1 2 3 4 Turn on the system The CMOS is now cleared and BIOS is reset to its default setting Table A 8 VGA Adaptor Cable Pin Assignments Pin Signal Name Pin Signal Name 1 RED 9 EDID Power 2 GREEN 10 GND 3 BLUE 11 NC 4 NC 12 NC 5 GND 13 H SYNC 6 GND 14 V SYNC 7 GND 15 NC 8 GND Table A 9 CMOS1 setting for Clear CMOS Configuration Function Normal...

Reviews: