PCA-6194 User Manual
18
Chapter 2 Connecting Peripherals
2.1 Introduction
You can access most of the connectors from the top of the board while it
is installed in the chassis. If you have a number of cards installed or have
a packed chassis, you may need to partially remove the card to make all
the connections.
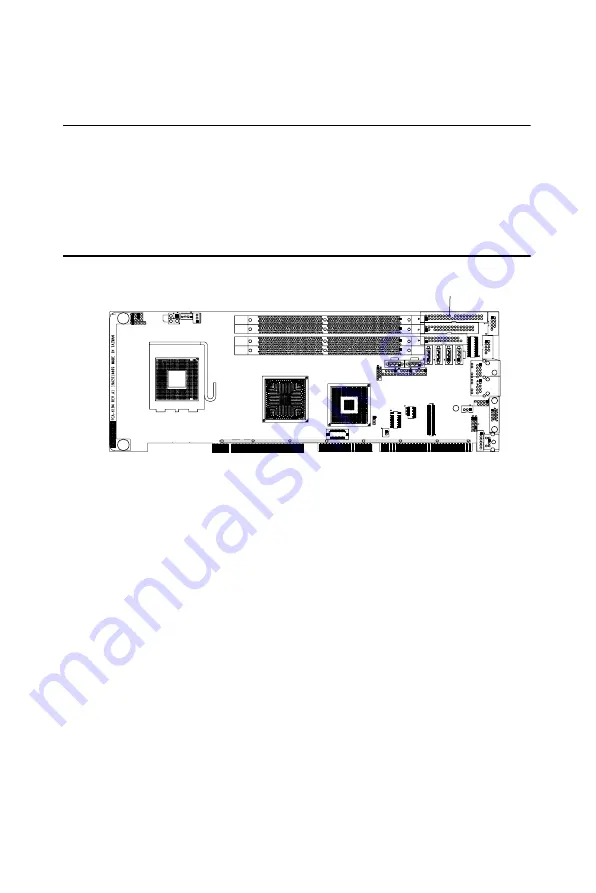
2.2 IDE Connectors (IDE1)
You can attach up to two IDE (Integrated Drive Electronics) drives to the
PCA-6194's built-in controller.
Wire number 1 on the cable is red or blue and the other wires are gray.
Connect one end to connector IDE1 on the single board computer. Make
sure that the red/blue wire corresponds to pin 1 on the connector (in the
upper right hand corner). See Chapter 1 for help finding the connector.
Unlike floppy drives, IDE hard drives can connect in either position on
the cable. If you install two drives to a single connector, you will need to
set one as the master and the other as the slave. You do this by setting the
jumpers on the drives. If you use just one drive per connector, you should
set each drive as the master. See the documentation that came with your
drive for more information.
Connect the first hard drive to the other end of the cable. Wire 1 on the
cable should also connect to pin 1 on the hard drive connector, which is
labeled on the drive circuit board. Check the documentation that came
with the drive for more information.
JFP1
JFP2
JFP3
CPU1
ATX1
CPUFAN1
ATXF1
DIMMA1
DIMMA2
DIMMB1
DIMMB2
VCN1
CMOS1
JCASE1
GPIO1
SPI
BMC1
HDAUD1
USB3 USB2 USB1
IPMB1
LANLED1
JIR1
JOBS1
JWDT1
KBMS2
SATA1
SATA2
SATA
3
SATA
4
SATA
6
SATA
5
IDE1
FDD1
LPT1
JSET
COM2
COM2
COM1
LAN2
LAN1
VGA1
KBMS1
IDE1
Summary of Contents for PCA-6194
Page 16: ...PCA 6194 User Manual xvi...
Page 17: ...1 Chapter1 CHAPTER 1 Hardware Configuration...
Page 25: ...9 Chapter1 1 6 PCA 6194 Block Diagram Figure 1 2 PCA 6194 Block Diagram...
Page 32: ...Step 3 Put back the socket cap and press down the bar to fix it...
Page 33: ...17 Chapter2 CHAPTER 2 Connecting Peripherals...
Page 48: ...PCA 6194 User Manual 32...
Page 49: ...33 Chapter3 CHAPTER 3 Award BIOS Setup...
Page 72: ...PCA 6194 User Manual 56...
Page 73: ...57 Chapter4 CHAPTER 4 Chipset Software Installation Utility...
Page 78: ......
Page 79: ...63 Chapter5 CHAPTER 5 VGA Setup...
Page 83: ...67 Chapter5...
Page 84: ......
Page 85: ...69 Chapter6 CHAPTER 6 Onboard Security Setup...
Page 87: ...71 Chapter6 3 Click Next when you see the following message...
Page 90: ...PCA 6194 User Manual 74...
Page 91: ...75 Chapter7 CHAPTER 7 LAN Configuration...
Page 94: ...PCA 6194 User Manual 78 4 Click Yes to continue the installation...
Page 97: ...81 Chapter8 CHAPTER 8 SATA RAID Setup...
Page 99: ...83 Chapter9 CHAPTER 9 IPMI...
Page 105: ...89 AppendixA Appendix A Programming the Watchdog Timer...
Page 115: ...99 AppendixB Appendix B I O Pin Assignments...
Page 132: ...PCA 6194 User Manual 116...
Page 133: ...117 AppendixC Appendix C Programming the GPIO...


