


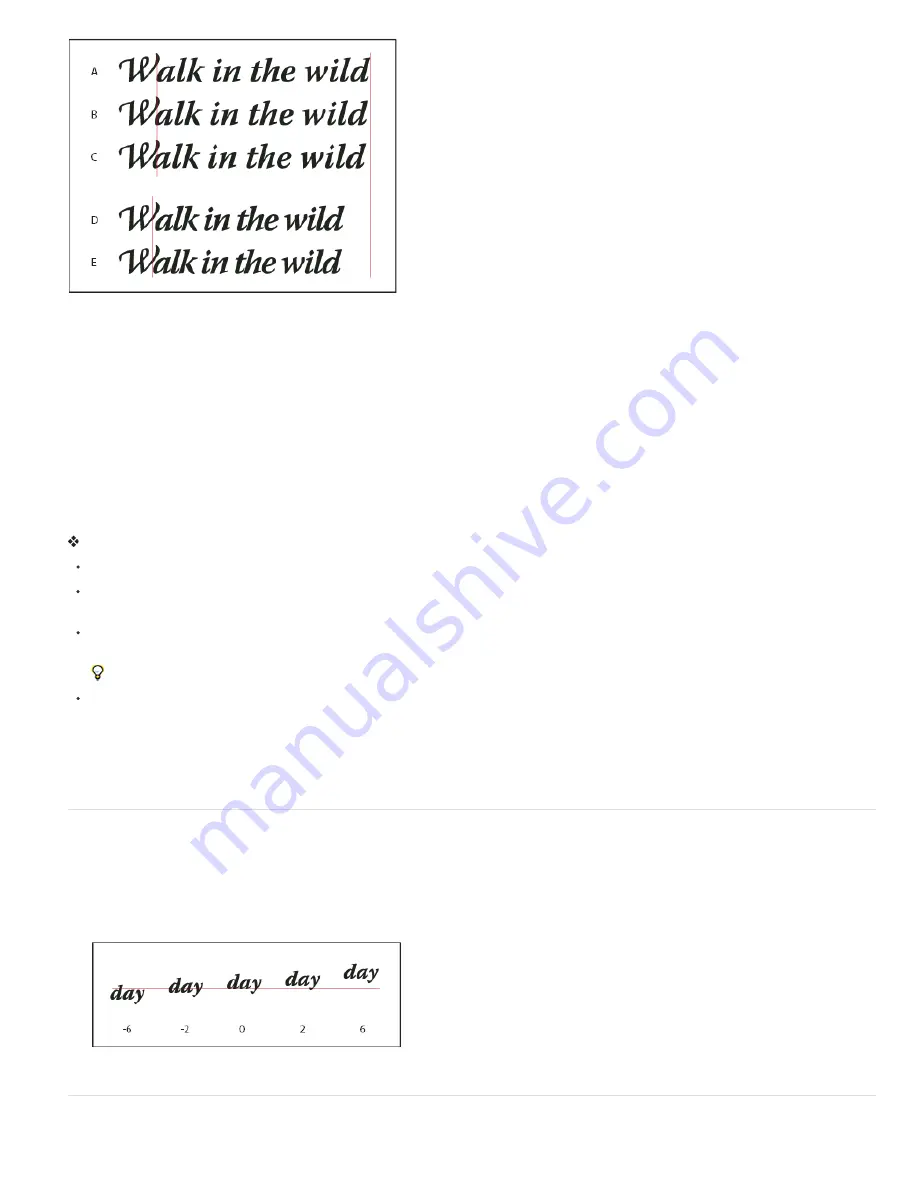
Kerning and tracking options
A. Original text B. Text with optical kerning C. Text with manual kerning between W and a D. Text with tracking E. Cumulative kerning and
tracking
You can also use manual kerning, which is ideal for adjusting the space between two letters. Tracking and manual kerning are cumulative, so you
can first adjust individual pairs of letters, and then tighten or loosen a block of text without affecting the relative kerning of the letter pairs.
When you click to place the insertion point between two letters, kerning values appear in the Character panel. Similarly, if you select a word or a
range of text, the tracking values appear in the Character panel.
Tracking and kerning are both measured in 1/1000 em, a unit of measure that is relative to the current type size. In a 6
-
point font, 1 em equals 6
points; in a 10
-
point font, 1 em equals 10 points. Kerning and tracking are strictly proportional to the current type size.
Note: Values for kerning and tracking affect Japanese text, but normally these options are used to adjust the aki between roman characters.
Adjust kerning
Do any of the following:
To use a font’s built
-
in kerning information for selected characters, select Metrics for the Kerning option in the Character panel.
To automatically adjust the spacing between selected characters based on their shapes, select Optical for the Kerning option in the
Character panel.
To adjust kerning manually, place an insertion point between two characters, and set the desired value for the Kerning option in the
Character panel. (Note that if a range of text is selected, you can’t manually kern the text. Instead, use tracking.)
Press Alt+Left/Right Arrow (Windows) or Left/Right Arrow (Mac OS) to decrease or increase the kerning between two characters.
To turn off kerning for selected characters, set the Kerning option in the Character panel to 0 (zero).
Adjust tracking
1. Select the range of characters or the type object that you want to adjust.
2. In the Character panel, set the Tracking option.
Shift the baseline
Use Baseline Shift to move selected characters up or down relative to the baseline of the surrounding text. Shifting the baseline is especially
useful when you’re hand-setting fractions or adjusting the position of a picture font.
1. Select the characters or type objects you want to change. If you don’t select any text, the shift applies to new text you create.
2. In the Character panel, set the Baseline Shift option. Positive values move the character’s baseline above the baseline of the rest of the line;
negative values move it below the baseline.
Type with different Baseline Shift values
Turn fractional character widths off or on
Summary of Contents for Photoshop CS6
Page 1: ...ADOBE PHOTOSHOP Help and tutorials...
Page 65: ...Legal Notices Online Privacy Policy...
Page 100: ...Image and color basics...
Page 108: ...Legal Notices Online Privacy Policy...
Page 176: ...Legal Notices Online Privacy Policy...
Page 182: ...Legal Notices Online Privacy Policy...
Page 193: ...applied to the original Smart Object More Help topics Legal Notices Online Privacy Policy...
Page 236: ...Legal Notices Online Privacy Policy...
Page 286: ...More Help topics Adjusting image color and tone in CS6 Legal Notices Online Privacy Policy...
Page 376: ...Legal Notices Online Privacy Policy...
Page 457: ...Text...
Page 461: ...Legal Notices Online Privacy Policy...
Page 548: ...Legal Notices Online Privacy Policy...
Page 570: ...Saving and exporting...
Page 598: ...Printing...
Page 627: ...Legal Notices Online Privacy Policy...
Page 646: ...Web graphics...
Page 662: ...Legal Notices Online Privacy Policy...
Page 722: ...Legal Notices Online Privacy Policy...
Page 730: ...Color Management...
Page 739: ......
Page 748: ......


