


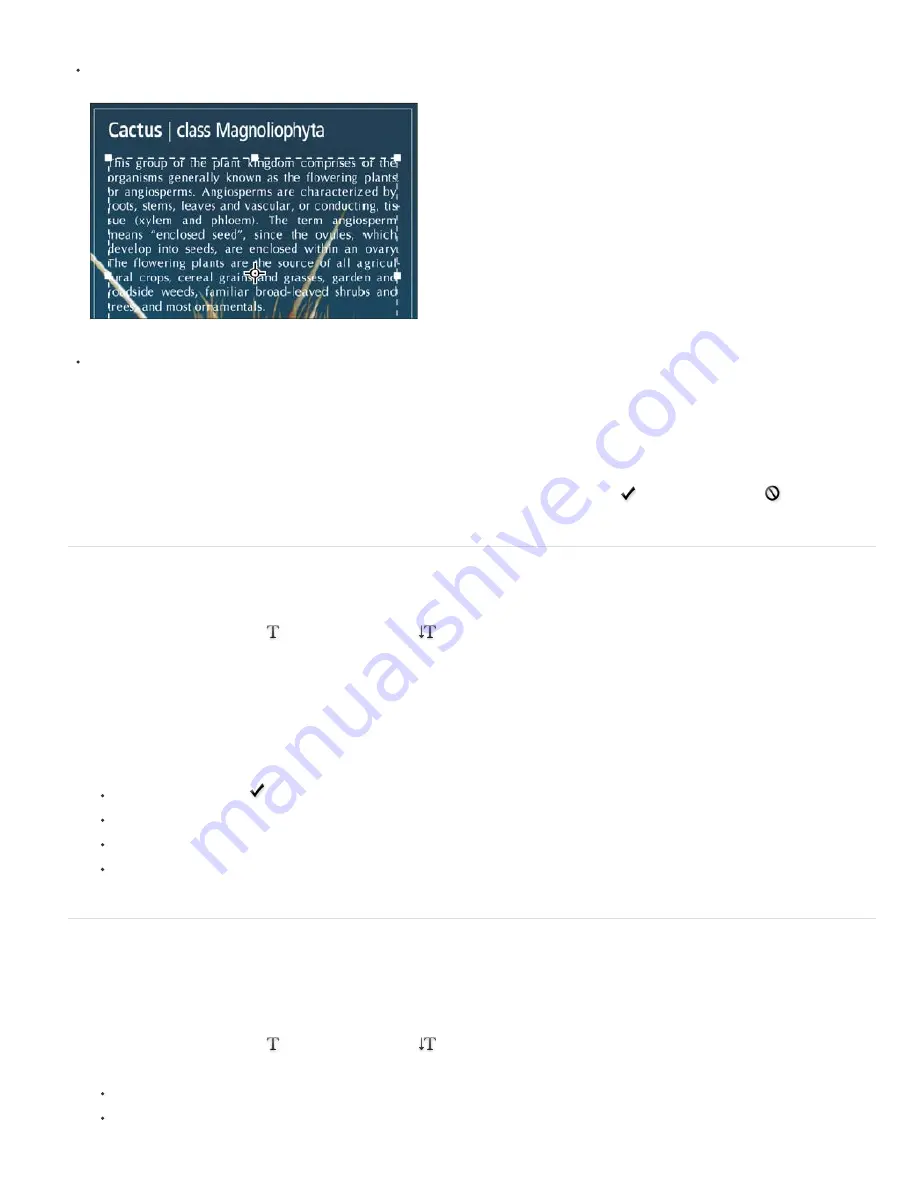
words to your image.
Paragraph type uses boundaries to control the flow of characters, either horizontally or vertically. Entering text this way is useful when you
want to create one or more paragraphs, such as for a brochure.
Type entered as point type (top) and in a bounding box (bottom)
Type on a path flows along the edge of an open or a closed path. When you enter text horizontally, characters appear along the path
perpendicular to the baseline. When you enter text vertically, characters appear along the path parallel to the baseline. In either case, the
text flows in the direction in which points were added to the path.
If you enter more text that can fit within a paragraph boundary or along a path, a small box or circle containing a plus symbol (+) appears in
place of a handle in the corner of the boundary or anchor point at the end of the path.
Clicking in an image with a type tool puts the type tool in edit mode. When the tool is in edit mode, you can enter and edit characters as well as
perform some other commands from the various menus; however, certain operations require that you first commit changes to the type layer. To
determine whether a type tool is in edit mode, look in the options bar—if you see the Commit button
and the Cancel button
, the type tool is
in edit mode.
Enter point type
When you enter point type, each line of type is independent—the line expands or shrinks as you edit it, but it doesn’t wrap to the next line. The
type you enter appears in a new type layer.
1. Select the Horizontal Type tool
or the Vertical Type tool
.
2. Click in the image to set an insertion point for the type. The small line through the I
-
beam marks the baseline of the type (the imaginary line
on which type rests). For vertical type, the baseline marks the center axis of the characters.
3. Select additional type options in the options bar, Character panel, or Paragraph panel.
4. Enter the characters. To begin a new line, press Enter (Windows) or Return (Mac OS).
Note: You can also transform point type while in edit mode. Hold down the Ctrl (Windows) or Command (Mac OS) key. A bounding box
appears around the type. You can grab a handle to scale or skew the type. You can also rotate the bounding box.
5. When you finish entering or editing the type, do one of the following:
Click the Commit button
in the options bar.
Press the Enter key on the numeric keypad.
Press Ctrl+Enter (Windows) or Return (Mac OS).
Select any tool in the toolbox; click in the Layers, Channels, Paths, Actions, History, or Styles panel; or select any available menu
command.
Enter paragraph type
When you enter paragraph type, the lines of type wrap to fit the dimensions of the bounding box. You can enter multiple paragraphs and select a
paragraph justification option.
You can resize the bounding box, causing the type to reflow within the adjusted rectangle. You can adjust the bounding box while you enter type or
after you create the type layer. You can also use the bounding box to rotate, scale, and skew type.
1. Select the Horizontal Type tool
or the Vertical Type tool
.
2. Do one of the following:
Drag diagonally to define a bounding box for the type.
Hold down Alt (Windows) or Option (Mac OS) as you click or drag to display the Paragraph Text Size dialog box. Enter values for Width
Summary of Contents for Photoshop CS6
Page 1: ...ADOBE PHOTOSHOP Help and tutorials...
Page 65: ...Legal Notices Online Privacy Policy...
Page 100: ...Image and color basics...
Page 108: ...Legal Notices Online Privacy Policy...
Page 176: ...Legal Notices Online Privacy Policy...
Page 182: ...Legal Notices Online Privacy Policy...
Page 193: ...applied to the original Smart Object More Help topics Legal Notices Online Privacy Policy...
Page 236: ...Legal Notices Online Privacy Policy...
Page 286: ...More Help topics Adjusting image color and tone in CS6 Legal Notices Online Privacy Policy...
Page 376: ...Legal Notices Online Privacy Policy...
Page 457: ...Text...
Page 461: ...Legal Notices Online Privacy Policy...
Page 548: ...Legal Notices Online Privacy Policy...
Page 570: ...Saving and exporting...
Page 598: ...Printing...
Page 627: ...Legal Notices Online Privacy Policy...
Page 646: ...Web graphics...
Page 662: ...Legal Notices Online Privacy Policy...
Page 722: ...Legal Notices Online Privacy Policy...
Page 730: ...Color Management...
Page 739: ......
Page 748: ......


