


Note:
1. Select what you want to warp.
2. Do one of the following:
Choose Edit > Transform > Warp.
If you chose a different transform command or the Free Transform command, click the Switch Between Free Transform And Warp
Modes button
in the options bar.
3. Do one or more of the following:
To warp using a specific shape, choose a warp style from the Warp pop
-
up menu in the options bar.
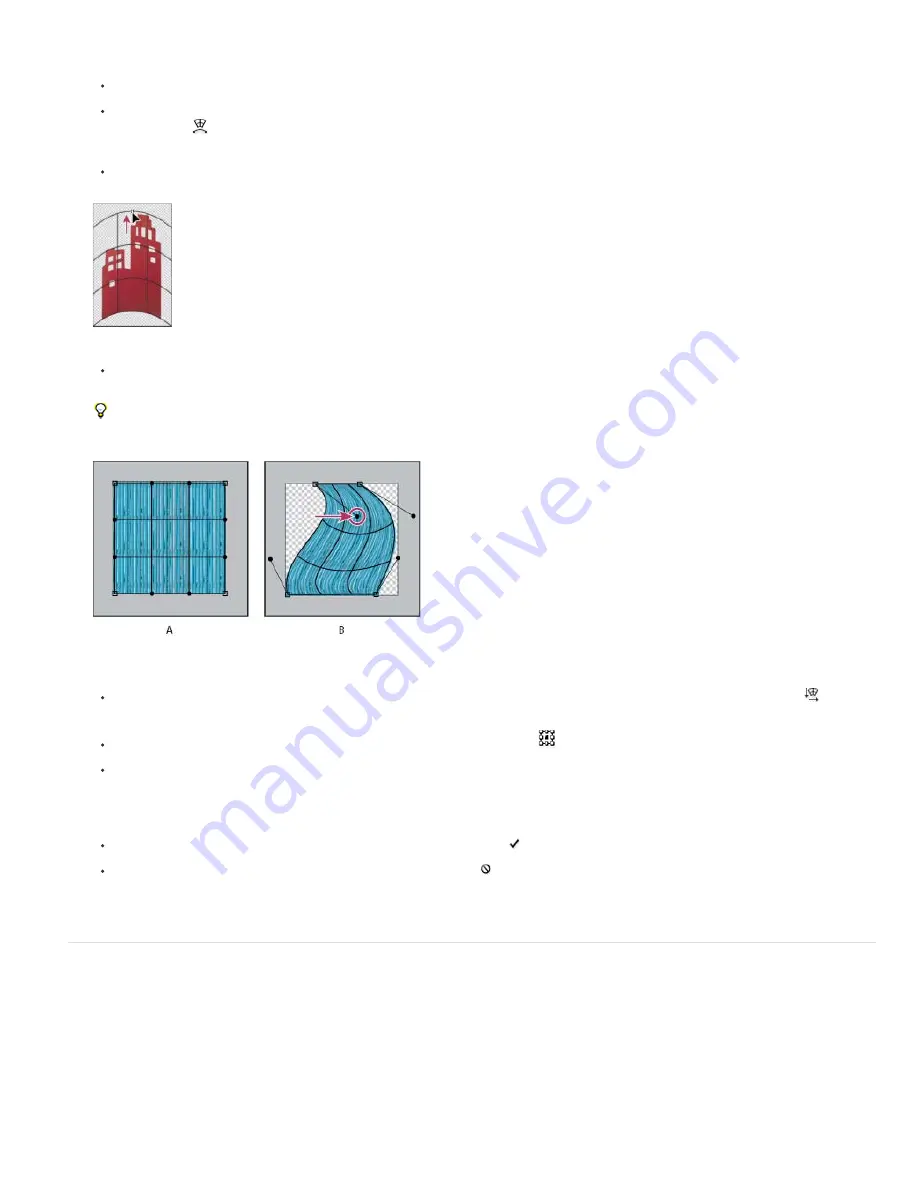
Dragging a control point to warp the mesh
To the manipulate the shape, drag the control points, a segment of the bounding box or mesh, or an area within the mesh. When
adjusting a curve, use the control point handles. This is similar to adjusting the handles in the curved segment of a vector graphic.
To undo the last handle adjustment, choose Edit > Undo.
Manipulating the shape of a warp
A. Original warp mesh B. Adjusting the handles, mesh segments, and areas within the mesh
To change the orientation of a warp style that you chose from the Warp menu, click the Change The Warp Orientation button
in the
options bar.
To change the reference point, click a square on the Reference point locator
in the options bar.
To specify the amount of warp using numeric values, enter the values in the Bend (set bend), X (set horizontal distortion) and Y (set
vertical distortion) text boxes in the options bar. You can’t enter numeric values if you have chosen None or Custom from the Warp Style
pop
-
up menu.
4. Do one of the following:
Press Enter (Windows) or Return (Mac OS), or click the Commit button in the options bar.
To cancel the transformation, press Esc or click the Cancel button in the options bar.
When you warp a bitmap image (versus a shape or path), the image becomes slightly less sharp each time you commit a transformation;
therefore, performing multiple commands before applying the cumulative transformation is preferable to applying each transformation separately.
Puppet Warp
Puppet Warp provides a visual mesh that lets you drastically distort specific image areas, while leaving other areas intact. Applications range from
subtle image retouching (such as shaping hair) to total transformations (such as repositioning arms or legs).
In addition to image layers, you can apply Puppet Warp to layer and vector masks. To nondestructively distort images, use Smart Objects. (See
1. In the Layers panel, select the layer or mask you want to transform.
2. Choose Edit > Puppet Warp.
Summary of Contents for Photoshop CS6
Page 1: ...ADOBE PHOTOSHOP Help and tutorials...
Page 65: ...Legal Notices Online Privacy Policy...
Page 100: ...Image and color basics...
Page 108: ...Legal Notices Online Privacy Policy...
Page 176: ...Legal Notices Online Privacy Policy...
Page 182: ...Legal Notices Online Privacy Policy...
Page 193: ...applied to the original Smart Object More Help topics Legal Notices Online Privacy Policy...
Page 236: ...Legal Notices Online Privacy Policy...
Page 286: ...More Help topics Adjusting image color and tone in CS6 Legal Notices Online Privacy Policy...
Page 376: ...Legal Notices Online Privacy Policy...
Page 457: ...Text...
Page 461: ...Legal Notices Online Privacy Policy...
Page 548: ...Legal Notices Online Privacy Policy...
Page 570: ...Saving and exporting...
Page 598: ...Printing...
Page 627: ...Legal Notices Online Privacy Policy...
Page 646: ...Web graphics...
Page 662: ...Legal Notices Online Privacy Policy...
Page 722: ...Legal Notices Online Privacy Policy...
Page 730: ...Color Management...
Page 739: ......
Page 748: ......


