to precisely match the object’s edges.
5. Drag the side handles to extend the cropping bounds while preserving the perspective.
Do not move the center point of the cropping marquee. The center point needs to be in its original position in order to perform perspective
correction.
6. Do one of the following:
Press Enter (Windows) or Return (Mac OS), click the Commit button in the options bar, or double-click inside the cropping marquee.
To cancel the cropping operation, press Esc or click the Cancel button in the options bar.
Crop and straighten scanned photos
You can place several photos on your scanner and scan them in one pass, which creates a single image file. The Crop and Straighten Photos
command is an automated feature that can create separate image files from the multiple-image scan.
For best results, keep 1/8 inch between the images in your scan, and the background (typically the scanner bed) should be a uniform color with
little noise. The Crop and Straighten Photos command works best on images with clearly delineated outlines. If the Crop and Straighten Photos
command cannot properly process the image file, use the Crop tool.
1. Open the scanned file that contains the images you want to separate.
2. Select the layer that contains the images.
3. (Optional) Draw a selection around the images you want to process.
4. Choose File > Automate > Crop And Straighten Photos. The scanned images are processed, and then each image opens in its own window.
If the Crop And Straighten Photos command incorrectly splits one of your images, make a selection border around the image and some
background, and then hold down Alt (Windows) or Option (Mac OS) as you choose the command. The modifier key indicates that only
one image should be separated from the background.
Straighten an image
The Ruler tool provides a Straighten option that quickly aligns images with horizon lines, building walls, and other key elements.
1. Select the Ruler tool
. (If necessary, click and hold the Eyedropper tool to reveal the Ruler.)
2. In the image, drag across a key horizontal or vertical element.
3. In the options bar, click Straighten.
Photoshop straightens the image and automatically crops it. To reveal image areas that extend beyond the new document boundaries,
choose Edit > Undo.
To entirely avoid automatic cropping, hold down Alt (Windows) or Option (Mac OS) when you click Straighten.
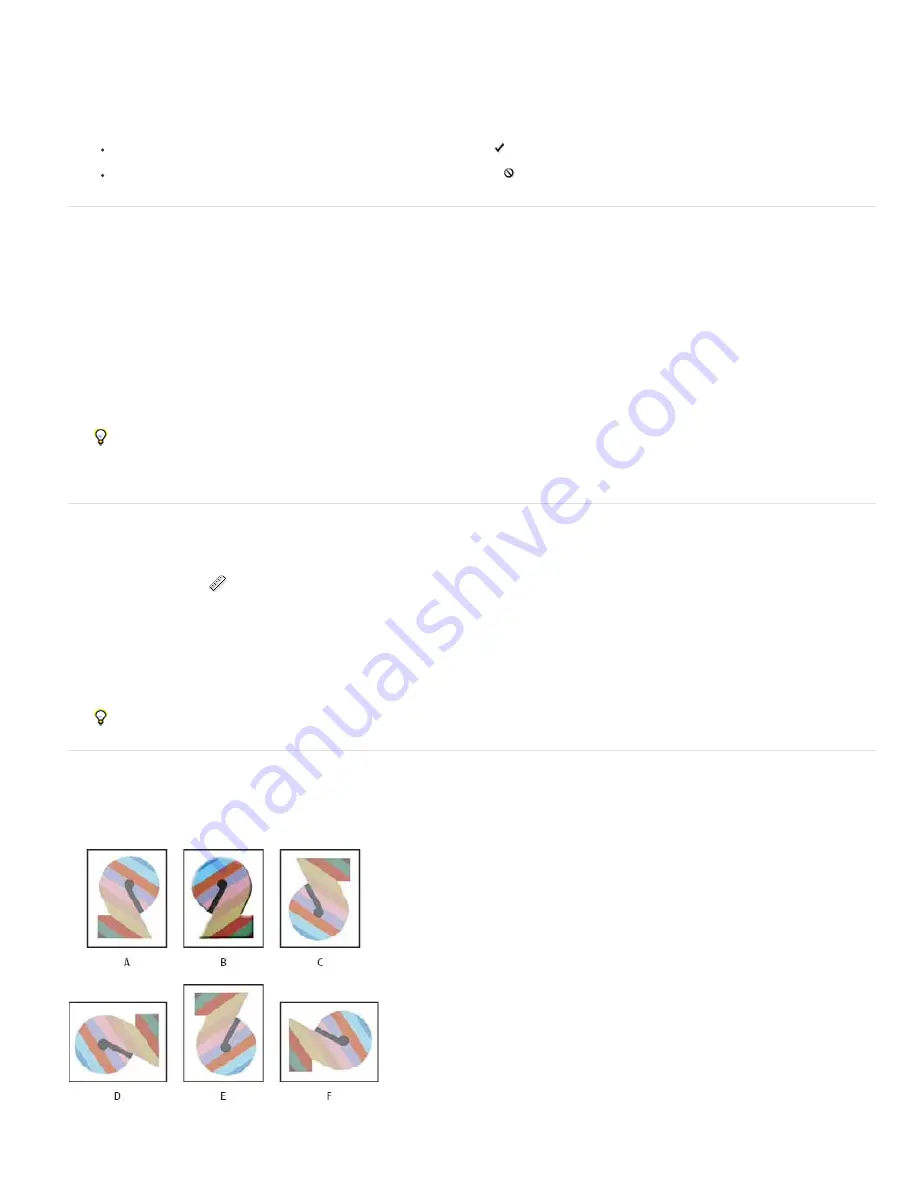
Rotate or flip an entire image
The Image Rotation commands let you rotate or flip an entire image. The commands do not work on individual layers or parts of layers, paths, or
selection borders. If you want to rotate a selection or layer, use the Transform or Free Transform commands.
Rotating images
A. Flip Horizontal B. Original image C. Flip Vertical D. Rotate 90° CCW E. Rotate 180° F. Rotate 90° CW
Summary of Contents for Photoshop CS6
Page 1: ...ADOBE PHOTOSHOP Help and tutorials...
Page 65: ...Legal Notices Online Privacy Policy...
Page 100: ...Image and color basics...
Page 108: ...Legal Notices Online Privacy Policy...
Page 176: ...Legal Notices Online Privacy Policy...
Page 182: ...Legal Notices Online Privacy Policy...
Page 193: ...applied to the original Smart Object More Help topics Legal Notices Online Privacy Policy...
Page 236: ...Legal Notices Online Privacy Policy...
Page 286: ...More Help topics Adjusting image color and tone in CS6 Legal Notices Online Privacy Policy...
Page 376: ...Legal Notices Online Privacy Policy...
Page 457: ...Text...
Page 461: ...Legal Notices Online Privacy Policy...
Page 548: ...Legal Notices Online Privacy Policy...
Page 570: ...Saving and exporting...
Page 598: ...Printing...
Page 627: ...Legal Notices Online Privacy Policy...
Page 646: ...Web graphics...
Page 662: ...Legal Notices Online Privacy Policy...
Page 722: ...Legal Notices Online Privacy Policy...
Page 730: ...Color Management...
Page 739: ......
Page 748: ......


