


NeuronBot
List of Figures
67
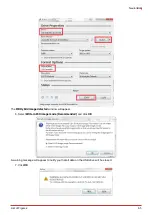
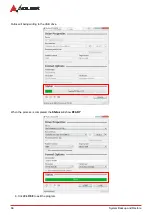
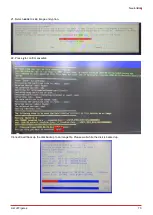
The bootable Clonezilla USB drive is now ready. You can use the Clonezilla USB drive to back up and restore the
system.
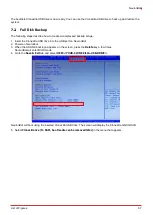
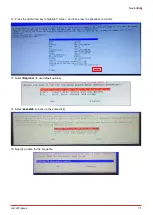
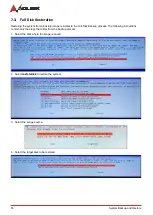
7.2. Full Disk Backup
The following steps describe how to create a compressed backup image.
1. Insert the Clonezilla USB drive into the USB port on NeuronBot
2. Power on Neuronbot.
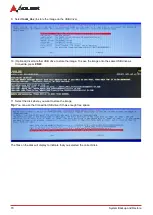
3. When the ADLINK boot logo appears on the screen, press the
Delete
key a few times.
NeuronBot will enter BIOS mode.
4. Go to the
Save & Exit
tab and select
UEFI: <YOUR-CLONEZILLA-USB-DRIVE>
.
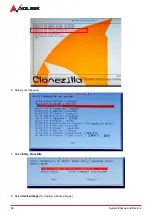
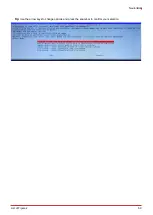
NeuronBot will boot using the inserted Clonezilla USB drive. The screen will display the Clonezilla GNU GRUB.
5. Select
Clonezilla live (To RAM, boot media can be removed later)
in the menu that appears.