smartHUB
2
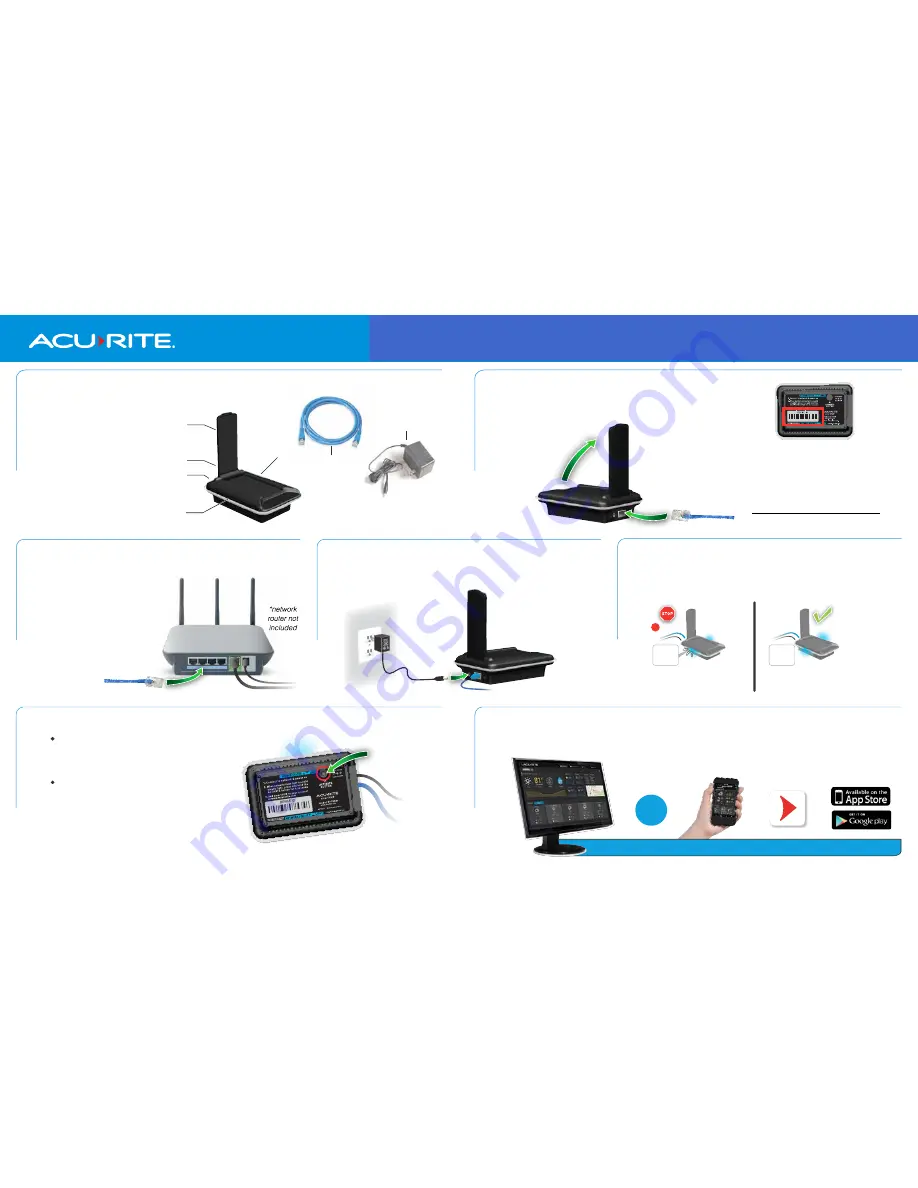
CONNECT smartHUB
Connect the Ethernet cable to the smartHUB
and flip up the antenna.
smartHUB
FLIP UP
6
CONNECT ROUTER
3
Connect
the
Ethernet cable
to your network router.*
WAIT
5
After powering on your smartHUB, it will connect to the
My AcuRite servers and download available firmware
updates. This may take up to 30 minutes.
NETWORK
STATUS
LIGHT
FLASHING
NETWORK
STATUS
LIGHT
SOLID
WAIT
!
When Network Status Light stops
flashing (is solid), you are
READY
for the next step.
READY
Automatically
DOWNLOADING
latest software updates.
DO NOT UNPLUG CABLES
1
PACKAGE CONTENTS
1. Flip-Up Antenna
2. Power Adapter Port
3. Ethernet Port
4. Network Status Light
5. Sensor Status Light
6. Ethernet Cable
7. Power Adapter
1
2
3
4
5
6
7
4
PLUG IN
Plug In
the power adapter.
The smartHUB will take a
minute to start up.
POWER
ON
During startup,
the blue status
lights will illuminate.
CREATE YOUR ACCOUNT
7
Create your account and register your smartHUB at www.MyAcuRite.com or within the AcuRite mobile
app. Note: It may take up to 10 minutes for the smartHUB to communicate with the My AcuRite servers.
OR
DEVICE ID
WRITE DOWN THE smartHUB Device ID;
printed on the bottom of the device.
You will need this when adding the
smartHUB to your account.
1A2B3C4D5E6F
PRESS AND HOLD
for 4 seconds
1A2B3C4D5E6F
WHAT YOU NEED
(not included)
• Network router with an
available Ethernet port
• At least one compatible
AcuRite sensor
• “Always-on” Internet
connection
www.
MyAcuRite
.com
AcuRite
APP
After the firmware update is complete and the
Network Status Light is solid, press and hold the
ACTIVATE button for 4 seconds to begin
communication with the My AcuRite servers.
The Network Status Light will remain solid,
indicating normal operation.
ACTIVATE smartHUB


