

Before
you
proceed,
let
’
s
make
sure
you
have
everything
you
need
for
a
successful
installation.
ATRx
Biometric
1000
Quick
Start
www.acroprint.com
Take
Inventory
1
6
Let
’
s
Get
Connected
4
Getting
Started
5
Activate
the
HandPunch
1000
to
PC
Communications
6
a
Activate
the
HandPunch
1000
to
PC
Communications
6
b
6
c
Enrolling
Employee
for
Punch
Confirmation
7
a
If
you
have
completed
all
of
steps
listed
above,
then
you
are
ready
to
load
the
software.
1. Confirm
Attendance
Rx
software
is
running
by
verifying
the
system
tray
icon
appears
in
the
bottom
right-hand
corner
of
your
computer
desktop
window
next
to
the
Windows
PC
clock.
2.
To
enable
the
HP1000,
you
must
right
click
on
the
System
Tray
and
select
System
Utilities
from
the
menu
by
left
clicking
one
time
on
the
item.
3.
Enter
the
Administrative
password
you
created
during
the
installation
and
setup
process
into
the
password
field.
Hardware:
IBM
PC
Compatible
Computer,
Intel
Pentium
II
400
mhz
or
higher,
128
MB
RAM,
150
MB
Free
Space
on
HD,
CD-Rom
Drive,
At
least
256
SVGA
video,
Minimum
800
x
600
resolution
Software:
Microsoft
®
Windows
98SE,
Windows
2000
Professional,
Windows
XP
Professional,
Windows
XP
Home,
Windows
2003
Server
Contents
for
the
ATRx
Biometric
1000
™
:
ATRx
Biometric
Enabled
™
software
CD
HP
1000
Communication
Cable
Power
Transformer
Minimum
System
Requirements:
Installing
the
HandPunch
2
Accessing
the
Software
User
Manual
3
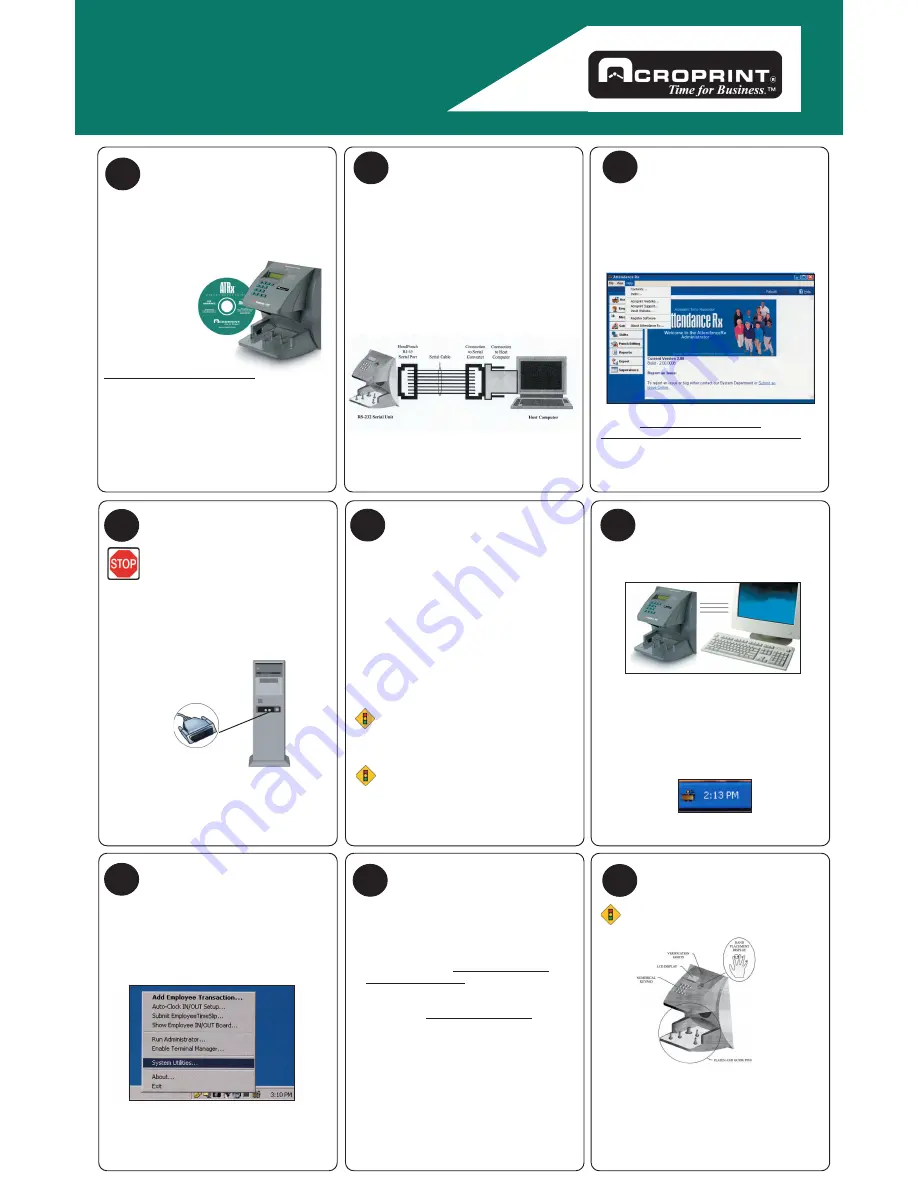
FIRST,
TURN
OFF
YOUR
PC!
1. To
avoid
damage
to
the
PC
port,
PC
power
must
be
completely
shutdown
prior
to
attaching
the
HP1000
communication
cable.
2. Connect
the
serial
connector
of
the
communication
cable
to
a
serial
port
on
the
back
of
your
PC.
3. Connect
the
other
end
of
the
communication
cable
to
the
RS232
port
on
the
back
of
HP1000.
You
can
access
the
user
manual
in
two
ways:
A.
Click
on
the
Help
menu
in
the
Administrator
section
of
the
software.
Search
for
information
by
topic.
B.
Go
to
http://www.acroprint.com/
acroprintstore/solutions/user-manuals.aspx
to
download
a
complete
manual
from
our
website.
The
user
manual
is
offered
in
format,
which
requires
Adobe
Acrobat
Reader
to
view.
The
quick
start
sheet
reviews
the
installation
of
software
and
the
connection
of
the
HandPunch
to
your
PC.
For
instructions
on
preparing
the
HandPunch
for
wall
mounting,
routing
of
wiring,
and
wiring
connections,
please
refer
to
the
user
manual
on
pages
15-21.
Be
sure
to
test
and
enroll
the
employees
prior
to
mounting
the
Handpunch.
1. Install
ATRx
Biometrically
Enabled
Software
by
inserting
the
CD
into
the
CD-ROM
drive
and
complete
the
installation
wizard.
2. Select
Restart
the
PC
at
the
end
of
the
software
installation.
3. Follow
the
on-screen
Setup
Wizard
entering
in
your
company
information,
such
as
pay
period
type,
overtime
rules,
and
shift
settings.
You
will
be
prompted
to
enter
your
employee
information
at
this
time.
If
you
do
NOT
complete
the
Setup
Wizard
the
program
will
not
run
successfully.
Please
write
down
your
administrative
password
and
store
in
a
safe
place.
You
will
be
prompted
to
enter
the
password
in
Step
6b
of
this
quick
start
guide.
NOTE
NOTE
Activate
the
HandPunch
1000
to
PC
Communications
4.
Select
the
second
tab
labeled
Biometrics
in
the
Systems
Utilities
screen.
5.
Place
a
check
in
the
Enable
Attendance
Rx
Biometric
Functionality
box
by
left
clicking
one
time
in
the
check
box
field.
6.
Under
the
text
Install
Biometrics
Device,
left
click
one
time
on
the
drop
down
menu
and
select
the
IR
HandPunch
1000
(DEV-2).
7.
Select
YES
on
the
Enable
Terminal
Manager
window
to
start
the
Terminal
Manager
automatically.
8.
Close
the
Systems
Utilites
window
by
left
clicking
one
time
on
the
Close
button.
NOTE
Employees
must
have
a
PIN
assigned
before
enrolling.
1. From
your
desktop
open
the
Attendance
Rx
Administrator
by
double
clicking
on
the
desktop
icon
labeled
Administrator.
2. Enter
your
password
in
the
space
provided.
3. Left
click
one
time
on
the
Employee
button
located
on
the
Navigation
Bar
to
the
left.


