Appendix A: Panel Mounting and VESA Mounting
The
APA9XXX
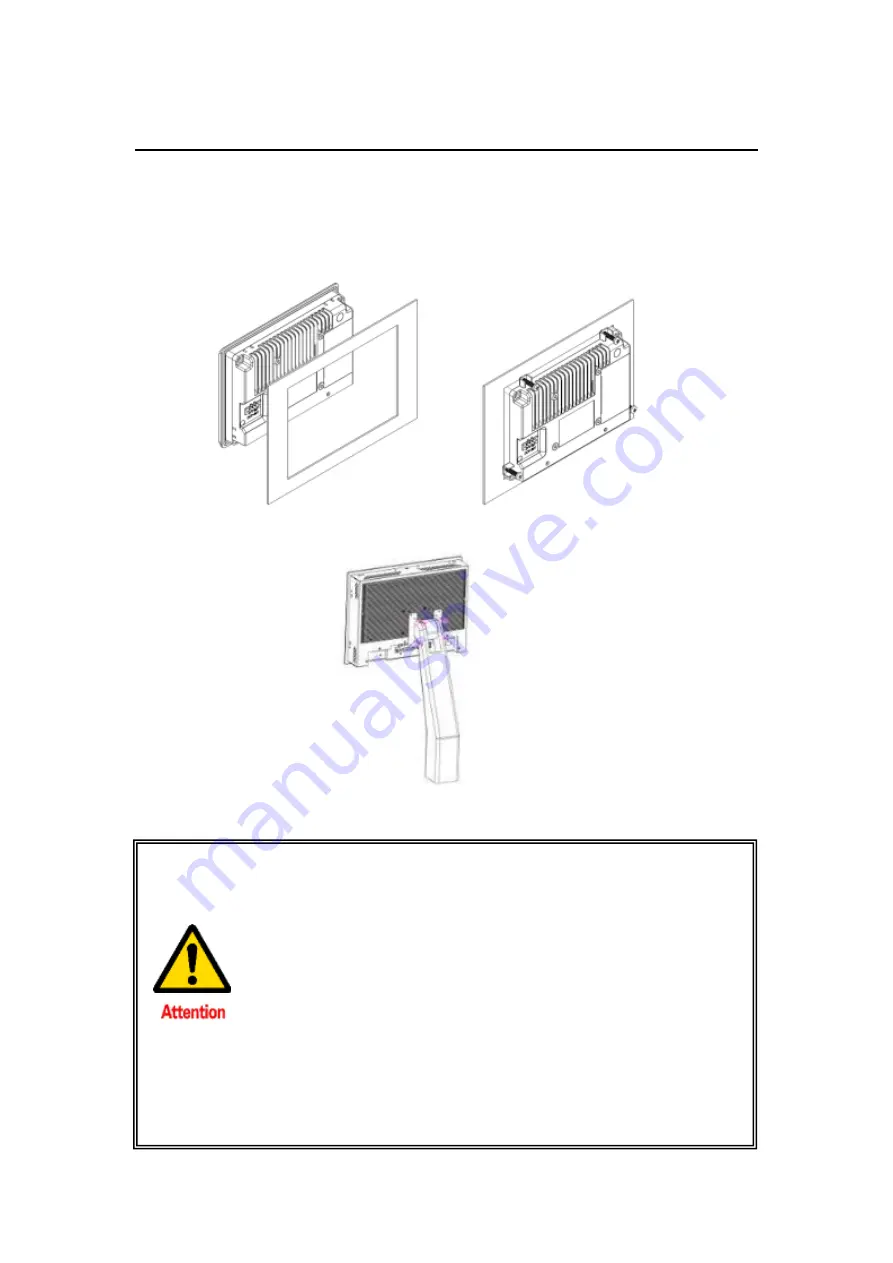
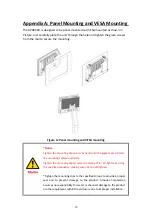
is designed to be panel-mounted and VESA mounted as shown in
Picture. Just carefully place the unit through the hole and tighten the given screws
from the rear to secure the mounting.
Figure A: Panel mounting and VESA mounting
*
Notice
:
Tighten the mounting clip screws by hand until the gasket seal contacts
the mounting surface uniformly.
Tighten the mounting clips screws to a torque of 8 ~ 10 kgf-cm by using
the specified sequence, making sure not to overtighten.
*Tighten the mounting clips to the specified torque to provide a proper
seal and to prevent damage to the product. Acnodes Corporation
assumes no responsibility for water or chemical damage to the product
or other equipment within the enclosure due to improper installation.
70
Summary of Contents for AP9120
Page 10: ...1 3 Dimensions Figure 1 1 Dimensions of APA9070 Figure 1 2 Dimensions of APA9080 9 ...
Page 11: ...Figure 1 3 Dimensions of APA9101 Figure 1 4 Dimensions of AP9120 10 ...
Page 12: ...Figure 1 5 Dimensions of APA9150 Figure 1 6 Dimensions of APA9156 11 ...
Page 13: ...Figure 1 7 Dimensions of APA9170 Figure 1 8 Dimensions of APA9185 12 ...
Page 14: ...Figure 1 9 Dimensions of APA9190 Figure 1 10 Dimensions of APA9215 13 ...
Page 15: ...Figure 1 11 Dimensions of APA9238 Figure 1 12 Dimensions of APA9320 14 ...
Page 17: ...Figure 1 13 Front View of APA9070 Figure 1 14 Rear View of APA9070 16 ...
Page 18: ...Figure 1 15 Front View of APA9080 Figure 1 16 Rear View of APA9080 17 ...
Page 19: ...Figure 1 17 Front View of APA9101 Figure 1 18 Rear View of APA9101 18 ...
Page 20: ...Figure 1 19 Front View of AP9120 Figure 1 20 Rear View of AP9120 19 ...
Page 21: ...Figure 1 21 Front View of APA9150 Figure 1 22 Rear View of APA9150 20 ...
Page 22: ...Figure 1 23 Front View of APA9156 Figure 1 24 Rear View of APA9156 21 ...
Page 23: ...Figure 1 25 Front View of APA9170 Figure 1 26 Rear View of APA9170 22 ...
Page 24: ...Figure 1 27 Front View of APA9185 Figure 1 28 Rear View of APA9185 23 ...
Page 25: ...Figure 1 29 Front View of APA9190 Figure 1 30 Rear View of APA9190 24 ...
Page 26: ...Figure 1 31 Front View of APA9215 Figure 1 32 Rear View of APA9215 25 ...
Page 27: ...Figure 1 33 Front View of APA9238 Figure 1 34 Back View of APA9238 26 ...
Page 28: ...Figure 1 35 Front View of APA9320 Figure 1 36 Back View of APA9320 27 ...
Page 44: ...Information part 43 ...
Page 47: ...Step 4 Click Yes to continue Step 5 Click Finish to complete installation 46 ...
Page 49: ...Step 3 Click Next to continue Step 4 Click Install RS232 interface driver 48 ...
Page 51: ...Step 8 Go to C Program Files eGalaxTouch Click Next Step 9 Click Next 50 ...
Page 58: ...Edge Compensation You can use Edge Compensation to calibrate more subtly 57 ...
Page 69: ...Hardware Saturn Hardware Configuration 68 ...
Page 70: ...About To display information about eGalaxTouch and its version 69 ...


