Laser Ultra Short-Throw ProjectorUser’s Manual
Z850V/RL40/DU-800/Z850/RL30/DU-600
Page 1: ...Laser Ultra Short Throw Projector User s Manual Z850V RL40 DU 800 Z850 RL30 DU 600 ...
Page 2: ...jected Image 15 Adjusting the Projector s Height 15 Adjusting the Projector s Focus 16 Adjusting Projection Image Size Diagonal 17 User Controls 19 Control Panel Remote Control 19 Control Panel 19 Remote Control 20 On screen Display Menus 22 How to operate 22 Picture 23 Screen 25 Setting 27 Volume 29 Options 30 Options Laser Settings 32 3D 33 Blending mode 34 LAN 35 Multimedia 49 Accessing Multime...
Page 3: ...ck ventilation As an example do not place the projector on a crowded coffee table sofa bed etc Do not put the projector in an enclosure such as a book case or a cabinet that restricts air flow 2 Do not use the projector near water or moisture To reduce the risk of fire and or electric shock do not expose the projector to rain or moisture 3 Do not install near heat sources such as radiators heaters...
Page 4: ...ser s guide Warning Do not look into the projector s lens when the lamp is on The bright light may hurt and damage your eyes Warning To reduce the risk of fire or electric shock do not expose this projector to rain or moisture Warning Please do not open or disassemble the projector as this may cause electric shock ...
Page 5: ...not Block the slots and openings on the unit provided for ventilation Use abrasive cleaners waxes or solvents to clean the unit Use under the following conditions In extremely hot cold or humid environments Sea level to 6000 feet Extremely hot 35 C Extremely cool 5 C 6000 feet above Extremely hot 30 C Extremely cool 5 C Extremely humid 70 R H Relative Humidity In areas susceptible to excessive dus...
Page 6: ...may have different accessories Power Cord Package Overview Unpack and inspect the box contents to ensure all parts listed below are in the box If something is missing please contact your nearest customer service center Projector VGA Cable Documentation User s Manual Quick Start Guide ...
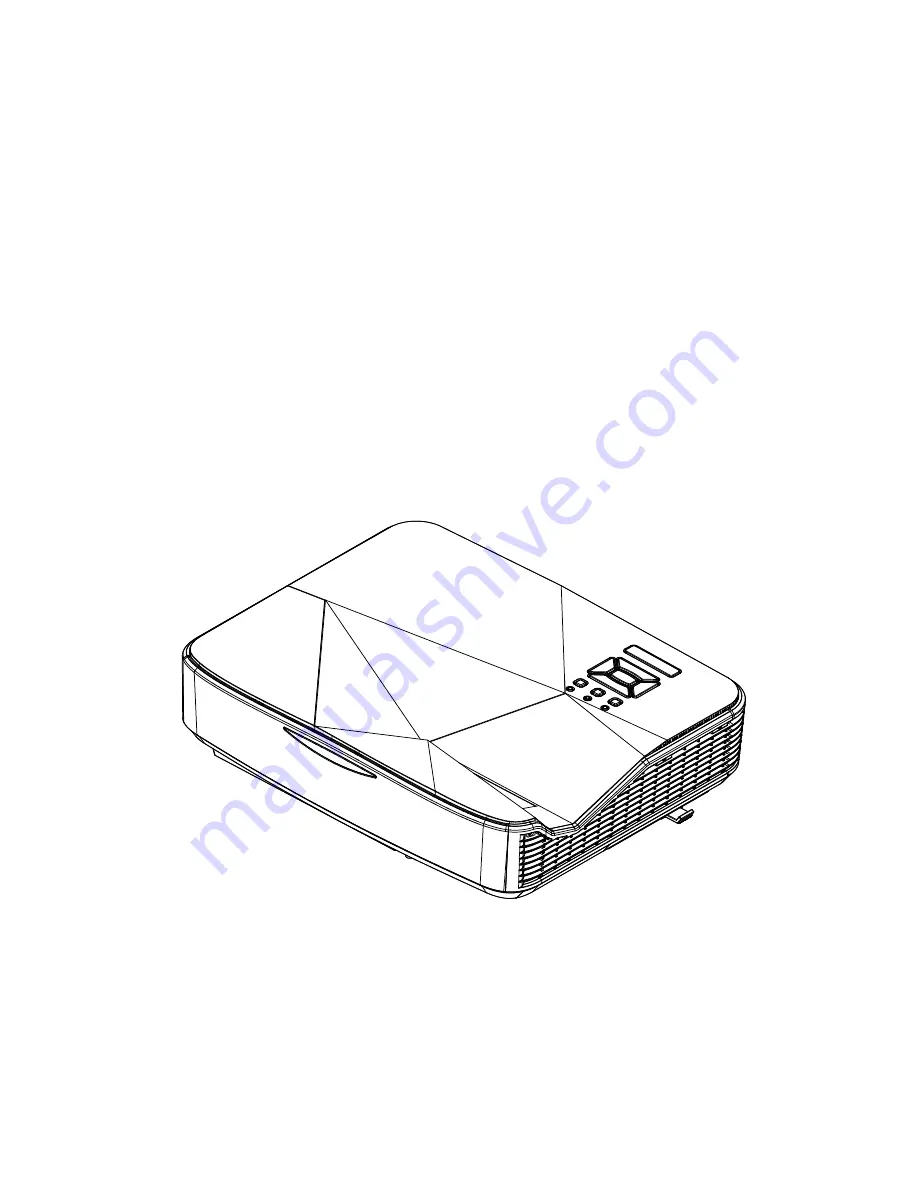
Page 7: ...Overview Main Unit 1 Control Panel 2 Focus Switch 3 Ventilation inlet 4 IR Receiver 5 Ventilation outlet 6 Speaker 7 Power Socket 8 Input Output Connections 9 Lens The interface is subject to model s specifications 6 7 8 4 2 5 3 1 9 ...
Page 8: ...8 English Introduction Control Panel 1 Power LED 2 Enter 3 Temp LED 4 Lamp LED 5 Menu 6 Input 7 Four Directional Select Keys 8 Power button 9 IR Receiver 3 6 9 8 7 2 1 4 5 ...
Page 9: ...5 connector Optional 5 USB Type A Connector Optional 6 Power Socket 7 VGA Out VGA2 In Connector 8 RS 232 Connector 9 pin DIN Type 9 Composite Video Input Connector 10 Composite Audio Input right Connector 11 Composite Audio Input left Connector 12 Audio Output Connector 3 5mm mini jack 13 Audio Input Connector 3 5mm mini jack 14 Audio Input Connector microphone 15 Kensington 16 TM Lock Port The in...
Page 10: ...our Directional Select Keys 6 Menu 7 Exit 8 Zoom in 9 Reset 10 Auto 11 Input 12 Zoom out 13 Volume 14 Keystone 15 Image 16 Blank 17 Aspect ratio 18 VGA1 19 HDMI1 20 VGA2 21 HDMI2 22 Video 23 Screen freeze 24 Numbered keypad for password input 1 17 22 23 20 18 16 9 15 13 21 24 2 11 14 10 7 12 6 5 3 4 8 19 ...
Page 11: ...y have different accessories Optional accessory Connect to Computer Notebook E62405SP R 9 MOLEX 5 10 1 Audio Output Microphone External Display Router Network Switch 1 RS232 Cable 2 VGA Cable 3 HDMI Cable 4 USB Cable 5 Audio Cable RCA 6 RJ45 Cable 7 Power Cord 8 VGA Output Cable 9 Audio Output Cable 10 Audio Input Cable ...
Page 12: ... HDMI Cable 3 Audio Cable 4 Audio Cable RCA 5 Power Cord 6 Composite Video Cable 7 Audio Cable RCA 8 Audio Input Cable Due to the difference in applications for each country some regions may have different accessories Optional accessory Composite Video Output DVD Player Set top Box HDTV receiver Microphone Audio Output ...
Page 13: ...he projector you will be asked to select the preferred language and power saving mode 3 Turn on and connect the source that you want to display on the screen computer notebook video player etc The projector will detect the source automatically If not push menu button and go to OPTIONS Make sure that the Auto Source has been set to Off If you connect multiple sources at the same time press the INPU...
Page 14: ... standby mode If you wish to turn the projector back on you must wait until the projector has completed the cooling cycle and has entered standby mode Once in standby mode simply press button to restart the projector 3 Disconnect the power cord from the electrical outlet and the projector Warning Indicator When the warning indicators see below come on the projector will automatically shutdown LAMP...
Page 15: ...ed with elevator feet for adjusting the image height 1 Locate the adjustable foot you wish to modify on the underside of the projector 2 Rotate the adjustable ring clockwise to raise the projector or counter clockwise to lower it Repeat with the remaining feet as needed Tilt Adjustment Feet Tilt Adjustment Ring ...
Page 16: ...ide the focus switch to left right until the image is clear 1080p series The projector will focus at distances lens to wall from 1 59 1 87 feet 0 49 0 57 meters Ultra Wide series The projector will focus at distances lens to wall from 2 36 2 75 feet 0 72 0 84 meters Focus switch ...
Page 17: ...n Screen Screen W Screen H Offset Hd Projection Distance D 1080p Diagonal length inch size of 16 9 Screen Screen Size W x H Projection Distance D Offset Hd cm inch cm inch Width Height Width Height wide tele wide tele cm inch 87 192 6 108 3 75 8 42 6 23 3 NA 9 2 NA 28 9 11 4 90 199 2 112 1 78 4 44 1 24 9 NA 9 8 NA 29 6 11 7 95 210 3 118 3 82 8 46 6 27 7 NA 10 9 NA 30 9 12 2 100 221 4 124 5 87 2 49...
Page 18: ...eight Width Height wide tele wide tele cm inch 120 285 4 107 0 112 4 42 1 46 7 NA 18 4 NA 36 9 14 5 125 297 3 111 5 117 0 43 9 49 7 NA 19 6 NA 38 2 15 0 130 309 2 115 9 121 7 45 6 52 6 NA 20 7 NA 39 5 15 6 135 321 1 120 4 126 4 47 4 55 6 NA 21 9 NA 40 8 16 1 140 333 0 124 9 131 1 49 2 58 6 NA 23 1 NA 42 0 16 5 This table is for user s reference only ...
Page 19: ...ess INPUT to select an input signal MENU Press MENU to launch the on screen display OSD menu To exit OSD press MENU again Four Directional Select Keys Use to select items or make adjustments to your selection LAMP LED Refer to the LED indicator of the projector light source status TEMP LED Refer to the LED indicator of the projector temperature status POWER LED Refer to the LED indicator of the pr...
Page 20: ...ept for lamp counter Zoom out Zoom out the projector display Enter Confirm your item selection Input Press Input to select an input signal Auto Automatically synchronizes the projector to the input source Four Directional Select Keys Use to select items or make adjustments to your selection Keystone Adjust image distortion caused by tilting the projector Volume Adjust to increase decrease the volu...
Page 21: ...eo HDMI1 Press HDMI1 to choose HDMI IN 1 connector HDMI2 Press HDMI2 to choose HDMI IN 2 connector VGA2 Press VGA2 to choose VGA IN 2 connector Video Press Video to choose Composite video source Screen freeze Pause the screen image Press again to resume the screen image Image Select the display mode from Bright Standard Movie Dark FPS and User ...
Page 22: ...e keys to select any item in the main menu While making a selection on a particular page press the or Enter key to enter sub menu 3 Use the keys to select the desired item and adjust the settings using the key 4 Select the next item to be adjusted in the sub menu and adjust as described above 5 Press Enter to confirm and the screen will return to the main menu 6 To exit press Menu again The OSD me...
Page 23: ...se this function to obtain an optimized screen image according to the wall color You can select from White Light Yellow Light Blue Pink and Dark Green Brightness Adjust the brightness of the image Press the button to darken image Press the button to darken image Contrast The Contrast controls the difference between the lightest and dark est parts of the picture Adjusting the contrast changes the a...
Page 24: ...ance of red and green Press the button to increase the amount of green in the im age Press the button to increase the amount of red in the image Gamma This allows you to adjust the gamma value to obtain the better im age contrast for the input Color Temp This allows you to adjust the color temperature At higher tempera ture the screen looks colder at lower temperature the screen looks warmer Color...
Page 25: ...creen and the height adjusted to display the image using a 16 10 ratio only for SSI 1080p UWHD The image will be scaled to fit the width of the screen and the height adjusted to display the image using a 16 6 ratio only for Ultrawide Phase Synchronize the signal timing of the display with the graphic card If the image appears to be unstable or flickers use this function to correct it Clock Adjust ...
Page 26: ...en V Keystone Press the or button to adjust image distortion vertically If the image looks trapezoidal this option can help make the image rectangular Orientation Front The image is projected straight on the screen Front Ceiling This is the default selection When selected the image will turn upside down Rear When selected the image will appear reversed Rear Ceiling When selected the image will app...
Page 27: ...n to select your preferred language Press on the remote control to finalize the selection Menu Location Choose the menu location on the display screen Closed Caption Use this function to enable close caption menu Select an appropri ate closed captions option Off CC1 CC2 CC3 and CC4 VGA Output Standby Choose On to enable VGA OUT connection ...
Page 28: ...onnection VGA 2 Function Input Choose Input to let the VGA port works as a VGA input function Output Choose Output to enable the VGA Out function once the projector is powered on Test Pattern Display a test pattern Reset Choose Yes to return the parameters on all menus to the factory default settings ...
Page 29: ...able the line out function Microphone Choose On to enable the microphone Choose Off to disable the microphone Mute Choose On to turn mute on Choose Off to turn mute off Volume Press the button to decrease the volume Press the button to increase the volume Microphone Volume Press the button to decrease the microphone volume Press the button to increase the microphone volume ...
Page 30: ... on screen Auto Source On The projector will search for other signals if the current input signal is lost Off The projector will only search current input connection Input Press button to enable disable input sources The projector will not search for inputs that are not selected For successful screen capture please ensure that the on screen image does not ex ceed the projector s native resolution ...
Page 31: ...at high speed Select this option when using the projector at altitudes above 2500 feet 762 meters or higher Off The built in fans automatically run at a variable speed ac cording to the internal temperature Filters Remind Hour Filters Remind Hour Set the filter reminder time Cleaning Up Remind Select Yes to reset the dust filter hour counter after replacing or cleaning the dust filter Information ...
Page 32: ... Used Normal Display the projection time of normal mode Laser Hours Used ECO Display the projection time of ECO mode Laser Power Mode Normal Normal mode ECO Use this function to dim the projector lamp which will lower power consumption and extend the lamp life ...
Page 33: ...e correct image 3D Format Use this feature to select the 3D format Options are Frame Packing Side by Side Half Top and Bottom Frame Sequen tial and Field Sequential 1080p 24 Use this feature to select 96 or 144Hz refresh rate as using 3D glasses in the1080p 24 frame packing Frame Sequen tial is supported the DLP Link 3D input signals from VGA HDMI con nector Frame Sequen tial Field Se quential are...
Page 34: ... map the color temperature of projectors used in blending mode Blending application System Architecture Laptop Switch and Camera is for image calibration only Laptop Source Image source GB 102 Coretronic Blending Box SSI projector 2 For more details please check the GB 102 specification Calibration Camera Laptop GB102 Network Switch Laptop Source Meeting Room ...
Page 35: ...tain an IP address automatically from your network Off Choose Off to assign IP Subnet Mask Gateway and DNS configuration manually IP Address Display an IP address Subnet Mask Display the subnet mask number Gateway Display the default gateway of the network connected to the pro jector DNS Display the DNS number MAC Address Display the MAC address ...
Page 36: ...36 English User Controls Group Name Display the group name Projector Name Display the projector name Location Display the projector location Contact Display the contact information ...
Page 37: ...sed on network web page for the input string in tools tab the limitation for Input Length is in the below list space and the other punctuation key included Category Item Input Length characters Crestron Control IP Address 15 IP ID 2 Port 5 Projector Projector Name 10 Location 9 Assigned To 9 Network Configuration DHCP Enabled N A IP Address 15 Subnet Mask 15 Default Gateway 15 DNS Server 15 User P...
Page 38: ...click the Connections tab and click LAN Settings Step 7 The Local Area Network LAN Setting dialog box appears In the Proxy Server area uncheck Use a proxy server for your LAN then click OK button twice Step 8 Open your IE and type in the IP address of 192 168 0 100 in the URL then press Enter key Step 3 To open Network Connections click Start click Control Panel click Network and Internet Connecti...
Page 39: ... 2 Select Laptop to connect with projector via Wi Fi Step 3 Find the IP Address configured in multimedia page 3 Access to Web Management Page Open IE browser and type in the IP address 192 168 111 1 in the URL then press Enter key Project Information User can retrieve the Projector Information in this page and select the content display in different languages ...
Page 40: ...40 English User Controls LAN Setting User can configure LAN parameters and edit the projector information in this page ...
Page 41: ...41 English User Controls Wi Fi User can install EZView according to the requirement of different devices Projector Status and Control User can control the projector in this page Bright Orientation ...
Page 42: ...42 English User Controls E mail Alert User can assign the email address and categorize alert notice Password Setting User can set the password to get access to web management ...
Page 43: ... video document Furthermore it can also display the web browser content Features Support local photo document PDF and Office files gallery and do sketch Support local video Display Web pages and support sketch function as well Streaming image data from camera Support Web Video like Youtube Support Dropbox Screen Display via EZView APP or software Step 1 According to device OS to install the EZView...
Page 44: ... English User Controls Step 2 Execute EZView on device as below icon on PC or Laptop on tablet or smart phone EZView on PC or Laptop Step 1 Enter the IP address choose either from Wi Fi or LAN connection ...
Page 45: ...e device The selection of image position 1 Mirror Mode Display 2 Extension Mode Display 3 Link to Web management page 4 Exit 5 Display Mode Video or Graphic 6 Compatible Mode 7 On Off Audio 8 Media Streaming mode for playing video application 9 Start to play video 10 Stop playing video 11 Choosing video streaming file 12 ...
Page 46: ... English User Controls EZView on Tablet or Smart phone Step 1 Execute EZView APP Step 2 Enter connection password shown on the screen Step 3 Select the way to stream out the screen to projector via EZView ...
Page 47: ...tors each projector including projector s online status system power lamp life network setting and hardware faults plus any custom attribute as defined by the Administrator The Administrator can add delete or edit room information contact information and events which are logged automatically by the software for all users Operation UI as following image 1 Main Screen 2 Edit Room Crestron Room View ...
Page 48: ...48 English User Controls 3 Edit Attribute 4 Edit Event For further information please visit http www crestron com www crestron com getroomview ...
Page 49: ...ed on your mobile phone tablet PC notebook or desktop b via USB flash drive directly access the media files stored in the device How to access Multimedia mode 1 Plug a wireless dongle or a USB flash drive into the USB connector at the back of projector E62405SP R 2 Press INPUT on the remote control or on the control panel to turn on the projector When the Input menu appears press the keys to selec...
Page 50: ...tion App Store iOS or Play Store Android 3 Enable your mobile device or tablet PC WiFi function and search the AP name listed in the Wi Fi network list 4 On the initial connection you will be prompted to enter a password Enter the password 5 Launch EZview application and enter the PCTOOL password 6 Wait until the connection is established The media files on your mobile device or tablet PC can be a...
Page 51: ...d search the AP name listed in the Wi Fi network list 3 On the initial connection you will be prompted to enter a password Enter the password 4 Open your web browser and enter the IP address Then select Wifi on the left side of the screen and install application required by the operation system 5 Launch EZview application and enter the control code shown on the right bottom side of the screen ...
Page 52: ...an be accessed using the projector Desktop Display To access the media files stored on your desktop do the folllowing 1 On Multimedia menu select Desktop 2 Open your web browser and enter the IP address Then select Wifi on the left side of the screen and install application required by the operation system ...
Page 53: ... be accessed using the projector USB Storage Display To access the media files stored on your USB flash drive do the folllowing Supported File Format Multimedia Category File Format Photo BMP JPG PNG Music MP3 WMA Video AVI MOV MP4 RM RMVB DAT MPG ISO TS MKV VOB and WMV Document WORD EXCEL PPT PDF 1 On Multimedia menu select USB Disk 2 Use the keys to select the file category and press the Enter k...
Page 54: ...lish Multimedia 3 Use the keys to select the file to view play and press the Enter key to confirm Configuring Multimedia Settings To change the settings do the folllowing 1 On Multimedia menu select Settings ...
Page 55: ...ate firmware Video Select this option to change the display ratio and set the repeat mode Photo Select this option to change the display ratio slideshow pattern and slideshow duration Music Select this option to set the repeat mode WiFi Select this option to configure the Wi Fi connection 3 Use the keys to select the adjust select the setting and press the Enter key to confirm ...
Page 56: ...talled a proper maintenance will prevent overheat ing and projector malfunction The dust filter is optional The specific inter faces are selected in terms of the specifications of types Air Filter Cleaning Procedure 1 Switch off the power to the projector by pressing the button 2 Disconnect the power cord 3 Pull out the dust filter as shown in the illustration 1 4 Carefully remove the dust filter ...
Page 57: ...BM 720x400 70 31 5 SVGA 800x600 56 35 1 800x600 60 37 9 800x600 72 48 1 800x600 75 46 9 800x600 85 53 7 Apple MAC II 832x624 75 49 1 XGA 1024x768 60 48 4 1024x768 70 56 5 1024x768 75 60 0 1024x768 85 68 7 1024x768 120 99 0 Apple MAC II 1152x870 75 68 7 SXGA 1280x1024 60 64 0 1280x1024 72 77 0 1280x1024 75 80 0 QuadVGA 1280x960 60 60 0 1280x960 75 75 2 SXGA 1400x1050 60 65 3 UXGA 1600x1200 60 75 0 ...
Page 58: ...9 9 WSXGA 1680x1050 60 65 3 c Component signal Modes Resolution V Frequency Hz H Frequency Hz 480i 720x480 1440x480 59 94 29 97 15 7 576i 720x576 1440x576 50 25 15 6 480p 720x480 59 94 31 5 576p 720x576 50 31 3 720p 1280x720 60 45 0 1280x720 50 37 5 1080i 1920x1080 60 30 33 8 1920x1080 50 25 28 1 1080p 1920x1080 23 98 24 27 0 1920x1080 60 67 5 1920x1080 50 56 3 ...
Page 59: ...0 70 31 5 SVGA 800x600 56 35 1 800x600 60 37 9 800x600 72 48 1 800x600 75 46 9 800x600 85 53 7 Apple MAC II 832x624 75 49 1 XGA 1024x768 60 48 4 1024x768 70 56 5 1024x768 75 60 0 1024x768 85 68 7 1024x768 120 99 0 Apple MAC II 1152x870 75 68 7 SXGA 1280x1024 60 64 0 1280x1024 72 77 0 1280x1024 75 80 0 QuadVGA 1280x960 60 60 0 1280x960 75 75 2 SXGA 1400x1050 60 65 3 UXGA 1600x1200 60 75 0 ...
Page 60: ... 15 7 576i 720x576 1440x576 50 25 15 6 480p 720x480 59 94 31 5 576p 720x576 50 31 3 720p 1280x720 60 45 0 1280x720 50 37 5 1080i 1920x1080 60 30 33 8 1920x1080 50 25 28 1 1080p 1920x1080 23 98 24 27 0 1920x1080 60 67 5 1920x1080 50 56 3 d HDMI 1 4a mandatory 3D timing Video Signal Modes Resolution V Frequency Hz H Frequency Hz Frame Packing 720p 50 31 5 720p 59 94 60 15 7 1080p 23 98 24 15 6 Side ...
Page 61: ...f this device does cause harmful interference to radio or television reception which can be determined by turning the device off and on the user is encouraged to try to correct the interference by one or more of the following measures Reorient or relocate the receiving antenna Increase the separation between the device and receiver Connect the device into an outlet on a circuit different from that...
Page 62: ...ice may not cause harmful interference and 2 This device must accept any interference received including interference that may cause undesired operation Notice Canadian users This Class B digital apparatus complies with Canadian ICES 003 Remarque à l intention des utilisateurs canadiens Cet appareil numerique de la classe B est conforme a la norme NMB 003 du Canada Declaration of Conformity for EU...
Page 63: ...ED AVOID EYE OR SKIN EXPOSURE TO DIRECT OR SCATTERED RADIATION IEC60825 1 2014 ŽŵƉůŝĞƐ ǁŝƚŚ ϲϮϰϳϭ Žǁ ZŝƐŬ ƌŽƵƉ ϭ CLASS 1 LASER PRODUCT IEC 60825 1 2014 ŽŵƉůŝĞƐ ǁŝƚŚ ϲϮϰϳϭ Žǁ ZŝƐŬ ƌŽƵƉ ϭ 6DIHW Qotice This projector is a Class 2 laser device that conforms with IEC 60825 1 2007 and CFR 1040 10 and 1040 11 Class 2 laser product Do Not Stare Into Beam This projector has built in Class 4 laser module Di...
Page 64: ... to attach a mount to the projector meet the following specifications Screw type M4 4 Minimum screw length 10mm Warning 1 If you buy a ceiling mount from another company please be sure to use the correct screw size Screw size will vary depending on the thickness of the mounting plate 2 Be sure to keep at least 10 cm gap between the ceiling and the bottom of the projector 3 Avoid installing the pro...