background image

Prepared by SI :

 ________________________________________

Prepared by TSE : 

________________________________________

Check by :

 ________________________________________

Approved by : 

________________________________________

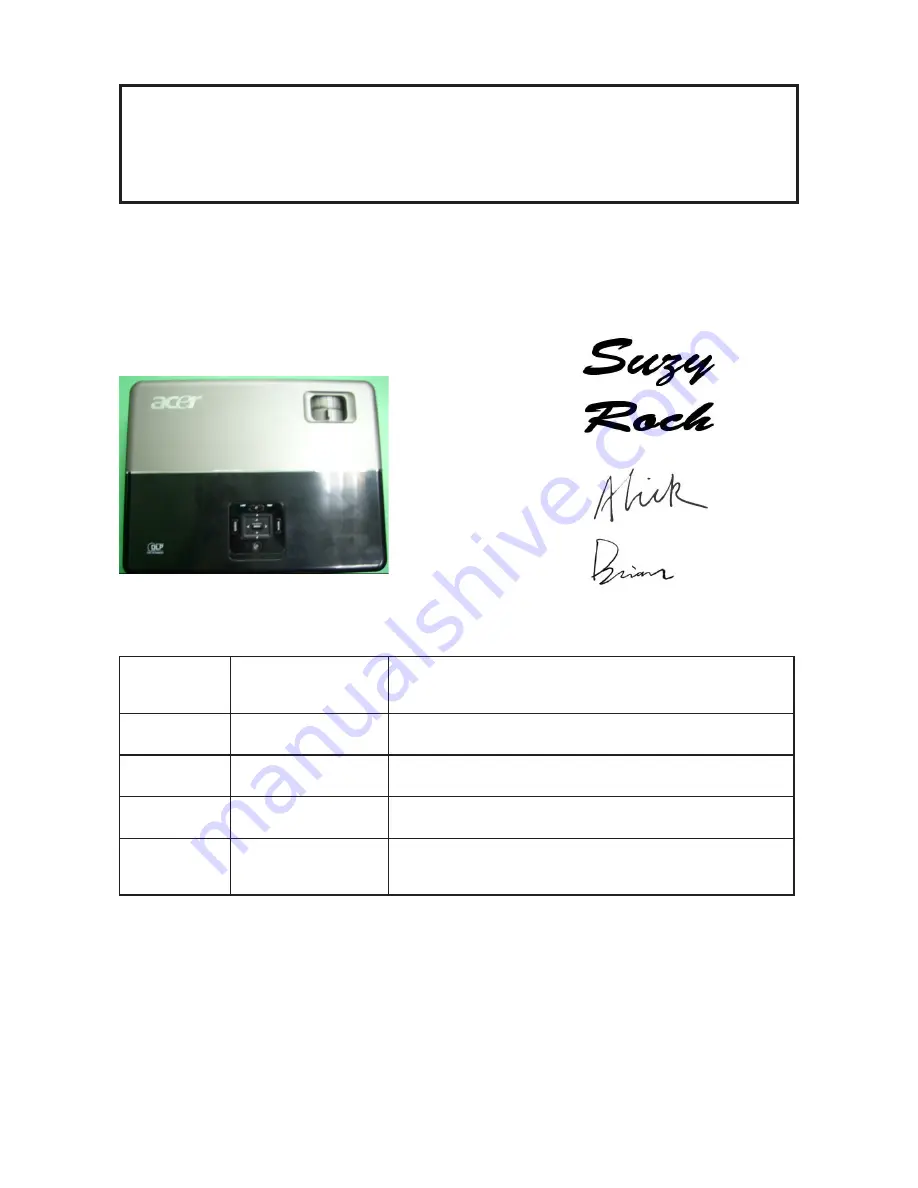
Model Name : P5270/P5270 Refresh

SERVICE MANUAL

Date

Revise Version

Description

2007/07/17

V1.0

                                  Initial Issue

2007/08/08

V2.0

Modify Chapter 5

2008/08/15

V3.0

Add P5270 Refresh,Modify CH1

2008/10/10

V4.0

     Add Waveform Download in Chapter5, modify    

             Chapter4,  Chapter6 and AppendixB

Copyright Oct, 2008.   All Rights Reserved    P/N: 36.87W10G001

Summary of Contents for P5270 - XGA DLP Projector

Page 1: ...by ________________________________________ Model Name P5270 P5270 Refresh SERVICE MANUAL Date Revise Version Description 2007 07 17 V1 0 Initial Issue 2007 08 08 V2 0 Modify Chapter 5 2008 08 15 V3 0 Add P5270 Refresh Modify CH1 2008 10 10 V4 0 Add Waveform Download in Chapter5 modify Chapter4 Chapter6 and AppendixB Copyright Oct 2008 All Rights Reserved P N 36 87W10G001 ...

Page 2: ...I RSPL Comparison Parts P5270 P5270 Refresh MAIN BOARD 70 87W12GR01 70 87W44GR01 KEYPAD BOARD 80 87H03G001 80 87U03G003 P5270 P5270 Refresh Confidential ...

Page 3: ...that you offer them This manual is for technicians and people who have an electronic background Please send the product back to the distributor for repairing and do not attempt to do anything that is complex or is not mentioned in the troubleshooting Notice The information found in this manual is subject to change without prior notice Any subsequent changes made to the data herein will be incorpor...

Page 4: ...odule Right Cover Module 2 10 Disassemble Speaker 2 11 Disassemble Lamp Module 2 12 Disassemble Main Board Module 2 13 Disassemble Fan Module 2 14 Disassemble LVPS Bracket Mylar LVPS Module 2 15 Disassemble Engine Module 2 17 Disassemble ROD Module 2 19 Disassemble Color Wheel Module 2 21 Disassemble DMD Board DMD Chip Module 2 22 Disassemble Mask 2 23 Disassemble Interrupt Switch Module 2 24 Disa...

Page 5: ...ade Mode 5 1 Installation Procedure 5 2 Firmware Upgrade Procedure 5 6 Waveform Download 5 8 Chapter 6 EDID Key in Procedure 6 1 Equipment Needed 6 1 Setup Procedure VGA1 VGA2 DVI 6 4 EDID Key In Procedure 6 5 Setup Procedure HDMI 6 9 Default Language Reset 6 12 Appendix A P5270 P5270 Refresh Exploaded Overview 7 1 Appendix B Serial Number System Definition 7 15 PCBA Code Definition 7 17 Appendix ...

Page 6: ... Maximum touch temperature follow UL60950 1 4 Cabinet Provides space for PCB boards fans optical engine power supply and lamp 5 Lamp Housing Lamp Assembly could be changed by customer himself but should read the user manual for instruction in ad vance Lamp Assembly should be provided by Coretronic and distributed through authorized agencies 6 Tilt Angle 7 degree with elevator mechanism 7 Materials...

Page 7: ...fresh 10 Terminals HDMI Female Terminal X 1 DVI I Female Terminal X 1 VGA input D SUB X 2 VGA output D SUB X 1 Video input RCA jack Type X 1 Mini DIN 4 pin S video X1 Audio input Phone jack Type X 2 USB Type B X 1 RS232 Mini DIN 3 pin X 1 11 Video signal Standards NTSC 3 58 4 43 PAL B D G H I M N SECAM B D G K K1 L HDTV 480p 576p 720p 1080i 12 Keystone Correction 40 degree 80 degree 13 Projection ...

Page 8: ... Typical Full power mode 18 Lamp 220 Watt Philips E20 6 Lamp 19 Safety UL cUL TüV GS CB report CCC 20 Tempera ture Operating 5 C 35 C Storage 20 C 60 C 21 Maximum Humidity Operating 5 C 35 C 80 RH Max non condensing Storage 20 C 60 C 80 RH Max non condensing 22 Acoustic Noise Level typical 34 dB A and maximum 36 dB A at 23 2 deg C for the full power mode 220W typical 31 dB A and maximum 33 dB A at...

Page 9: ...1 4 P5270 P5270 Refresh Confidential No Item Description 25 MTBF Operating more than 25 000 hrs 90 confidence level 26 Color Wheel 6 segments R90Y28G90C28W42B82 7200 rpm ...

Page 10: ...720x400 70 31 50 VGA 720x400 85 37 90 SVGA 800x600 56 35 20 SVGA 800x600 60 37 90 SVGA 800x600 72 48 10 SVGA 800x600 75 46 90 SVGA 800x600 85 53 70 SVGA 832x624 75 49 725 XGA 1024x768 60 48 40 XGA 1024x768 70 56 50 XGA 1024x768 75 60 00 XGA 1024x768 85 68 70 SXGA 1152x864 70 63 80 SXGA 1152x864 75 67 50 SXGA 1152x864 85 77 10 SXGA 1280x1024 60 63 98 SXGA 1280x1024 72 76 97 A VGA Analog ...

Page 11: ... Mac G4 800x600 60 37 90 Power Mac G4 1024x768 60 48 40 Power Mac G4 1152x870 75 68 68 Power Mac G4 1280x960 75 75 00 Power Mac G4 1280x1024 60 63 98 Power Mac G4 640x480 60 31 35 Power Mac G4 640x480 66 6 67 34 93 Power Mac G4 800x600 60 37 90 Power Mac G4 1024x768 60 48 40 Power Mac G4 1152x870 75 68 68 Power Mac G4 1280x960 75 75 00 Power Mac G4 1280x1024 60 63 98 i Mac DV G3 1024x768 75 60 00 ...

Page 12: ...1 7 P5270 P5270 Refresh Confidential Mode Resolution V Sync Hz Horiz Freq KHz WXGA 1280x720 60 45 00 WXGA 1280X800 60 49 702 WXGA 1360x768 60 47 72 WXGA 1440x900 60 55 935 ...

Page 13: ...31 50 VGA 720x400 85 37 90 SVGA 800x600 56 35 20 SVGA 800x600 60 37 90 SVGA 800x600 72 48 10 SVGA 800x600 75 46 90 SVGA 800x600 85 53 70 SVGA 832x624 75 49 725 XGA 1024x768 60 48 40 XGA 1024x768 70 56 50 XGA 1024x768 75 60 00 XGA 1024x768 85 68 70 SXGA 1152x864 70 63 80 SXGA 1152x864 75 67 50 SXGA 1152x864 85 77 10 SXGA 1280x1024 60 63 98 SXGA 1280x1024 72 76 97 B DVI Digital ...

Page 14: ...Mac G4 800x600 60 37 90 Power Mac G4 1024x768 60 48 40 Power Mac G4 1152x870 75 68 68 Power Mac G4 1280x960 75 75 00 Power Mac G4 1280x1024 60 63 98 Power Mac G4 640x480 60 31 35 Power Mac G4 640x480 66 6 67 34 93 Power Mac G4 800x600 60 37 90 Power Mac G4 1024x768 60 48 40 Power Mac G4 1152x870 75 68 68 Power Mac G4 1280x960 75 75 00 Power Mac G4 1280x1024 60 63 98 i Mac DV G3 1024x768 75 60 00 W...

Page 15: ...0x900 60 55 935 WXGA 1680x1050 60 65 290 480i NTSC 720x480 1440x480 59 94 29 97 27 00 480p NTSC 720x480 59 94 31 47 576i PAL 720x576 1440x576 50 25 27 00 576p PAL 720x576 50 31 25 720p NTSC 1280x720 60 45 00 720p PAL 1280x720 50 37 50 1080i NTSC 1920x1080 60 30 33 75 1080i PAL 1920x1080 50 25 33 75 1080p NTSC 1920x1080 60 33 75 1080p PAL 1920x1080 50 33 75 ...

Page 16: ...31 50 VGA 720x400 85 37 90 SVGA 800x600 56 35 20 SVGA 800x600 60 37 90 SVGA 800x600 72 48 10 SVGA 800x600 75 46 90 SVGA 800x600 85 53 70 SVGA 832x624 75 49 925 XGA 1024x768 60 48 40 XGA 1024x768 70 56 50 XGA 1024x768 75 60 00 XGA 1024x768 85 68 70 SXGA 1152x864 70 63 80 SXGA 1152x864 75 67 50 SXGA 1152x864 85 77 10 SXGA 1280x1024 60 63 98 SXGA 1280x1024 72 76 97 C HDMI Digital ...

Page 17: ... Mac G4 800x600 60 37 90 Power Mac G4 1024x768 60 48 40 Power Mac G4 1152x870 75 68 68 Power Mac G4 1280x960 75 75 00 Power Mac G4 1280x1024 60 63 98 PowerBook G4 640x480 60 31 35 PowerBook G4 640x480 66 6 67 34 93 PowerBook G4 800x600 60 37 90 PowerBook G4 1024x768 60 48 40 PowerBook G4 1152x870 75 68 68 PowerBook G4 1280x960 75 75 00 Power Mac G4 1280x1024 60 63 98 i Mac DV G3 1024x768 75 60 00 ...

Page 18: ...x900 60 55 935 WXGA 1680x1050 60 65 290 480i NTSC 720x480 1440x480 59 94 29 97 27 00 480p NTSC 720x480 59 94 31 47 576i PAL 720x576 1440x576 50 25 27 00 576p PAL 720x576 50 31 25 720p NTSC 1280x720 60 45 00 720p PAL 1280x720 50 37 50 1080i NTSC 1920x1080 60 30 33 75 1080i PAL W 1920x1080 50 25 33 75 1080p NTSC 1920x1080 60 33 75 1080p PAL 1920x1080 50 33 75 ...

Page 19: ... Refresh Confidential 1 3 Product Overview Front upper side Item Description Item Description 1 Zoom ring 5 Lens cap 2 Focus ring 6 Elevator button 3 Remote control receiver 7 Elevator foot 4 Zoom lens 8 Control panel ...

Page 20: ...nector 9 KensingtonTM lock port 3 USB connector 10 Power socket 4 S Video input connector Below items are for P5260 P5271 series only 5 Composite video input connec tor 11 HDMI connector 6 Monitor loop through output connector VGA Out 12 Audio input connector 2 7 PC analog signal HDTV compo nent video input connector 1 13 PC analog signal HDTV compo nent video input connector 2 ...

Page 21: ... tilting the projector 16 degrees 5 RESYNC Automatically synchronizes the projector to the input source 6 POWER See the contents in Turning the Projector On Off section 7 MENU Press MENU to launch the Onscreen display OSD menu or exit the OSD menu Confirm your selection of items 8 SOURCE Press SOURCE to choose RGB Component S Video Com posite DVI HDTV and HDMI sources 9 Four directional select key...

Page 22: ...1 17 P5270 P5270 Refresh Confidential Remote Control Layout ...

Page 23: ... choose the desired aspect ratio Auto 4 3 16 9 9 ZOOM Zooms the projector display in or out 10 Laser button Aim the remote at the viewing screen press and hold this button to activate the laser pointer This function is not supported in Japanese market 11 Empowering key Unique Acer functions eOpening eView eTimer Management 12 KEYSTONE Adjusts the image to compensate for distortion caused by tiltin...

Page 24: ...rce to Com ponent video This connection supports YPbPr 480p 576p 720p 1080i and YCbCr 480i 576i 21 S VIDEO To change source to S Video 22 VIDEO To change source to COMPOSITE VIDEO 23 DVI Press DVI to change source to DVI This con nection supports digital RGB analog RGB YPbPr 480p 576p 720p 1080i YCbCr 480i 576i and HDCP signals 24 HDMI To change source to HDMI for the model if with HDMI connector ...

Page 25: ...1 20 P5270 P5270 Refresh Confidential Note ...

Page 26: ...1 21 P5270 P5270 Refresh Confidential Getting Started ...

Page 27: ...e 2 VGA cable 7 Audio cable jack jack 3 Composite video cable 8 Audio cable jack jack 4 USB cable 9 HDMI cable P5260 5271 series 5 VGA to component HDTV adapter Note To ensure the projector works well with your computer please make sure the timing of the display mode is compatible with the projector ...

Page 28: ...1 23 P5270 P5270 Refresh Confidential System Block Diagram ...

Page 29: ...1 24 P5270 P5270 Refresh Confidential Bottom Cover Dimension ...

Page 30: ...0 P5270 Refresh 2 1 Equipment Needed Product Overview Chapter 2 Disassembly Process Item Photo Item Photo Screw Bit 107 Hex Sleeves 5mm Hex Sleeves 8mm Tweezers Long Nose Nipper Left Angle Cutting Nipper Right Screw Bit 102 ...

Page 31: ...2 2 P5270 P5270 Refresh Confidential Item Photo Item Photo Front Side Back side Left Side Right Side Top Cover Bottom Cover ...

Page 32: ... 1 1 Press 2 latches to pull up Lamp Cover Module as yellow ellipse 2 Unscrew 6 screws on top cover as red circle 3 Unscrew 2 screws on back cover as yellow circle 4 Unplug 1 connector as yellow square 2 2 Disassemble Lamp Cover Module and Top Cover Module ...

Page 33: ...1 Disassemble Top Cover Module Lamp Cover Module 2 Disassemble Lamp Cover Module from Top Cover Module Top Cover Module Lamp Cover Module NOTE When you Disassemble the Lamp Cover Module you have to push forward it from the Top Cover Module As the picture show ...

Page 34: ...fidential P5270 P5270 Refresh No Procedure Photo 1 1 Unscrew 4 screws as red circle 2 Unplug 1 Connector as yellow square 3 Disassemble all compo nents of Keypad Module 2 3 Disassemble Keypad Module Top Cover ...

Page 35: ...2 6 P5270 P5270 Refresh Confidential No Procedure Photo 1 1 Unscrew 6 screws as red circle 2 Disassemble Top Support Shielding 2 4 Disassemble Top Support Shielding Top Support Shielding ...

Page 36: ...2 7 Confidential P5270 P5270 Refresh No Procedure Photo 1 1 Unscrew 8 hex screws as green circle 2 Unscrew 2 screws as red circle 3 Disassemble Back Cover 2 5 Disassemble Back Cover Back Cover ...

Page 37: ...70 P5270 Refresh Confidential No Procedure Photo 1 1 Unscrew 2 screws as red circle 2 Unplug 1 connector as yellow square 3 Disassemble Front Cover Module 2 6 Disassemble Front Cover Module Front Cover Module ...

Page 38: ...2 9 Confidential P5270 P5270 Refresh No Procedure Photo 2 Press 1 tenon to disassemble IR Sensor as yellow square IR Sensor ...

Page 39: ...mble Left Cover Module as red circle 2 unscrew 1 screw and un plug 1 connector on right side to disassemble Right Cover Module as yellow circle and yellow square 3 Take out 1 spring on each side to disassemble 2 latches as red square 2 7 Disassemble Left Cover Module Right Cover Module Latches Springs ...

Page 40: ...2 11 Confidential P5270 P5270 Refresh No Procedure Photo 1 1 Unscrew 2 screws on Right Cover Module as red circle 2 Disassemble Speaker 2 8 Disassemble Speaker Speaker ...

Page 41: ...2 12 P5270 P5270 Refresh Confidential No Procedure Photo 1 1 Unscrew 2 screws as red circle 2 Disassemble Lamp Module 2 9 Disassemble Lamp Module Lamp Module ...

Page 42: ...3 Confidential P5270 P5270 Refresh No Procedure Photo 1 1 Unscrew 4 screws as red circle 2 Unplug 6 connectors as yellow square 3 Disassemble Main Board Mylar 2 10 Disassemble Main Board Module Main Board ...

Page 43: ...o Procedure Photo 1 1 Unscrew 3 screws to dis assemble Fan Module as red circle 2 Unscrew 4 screws to dis asemble Fan Bracket as green circle 2 11 Disassemble Fan Module NOTE The thermal switch cable must go along the dent As the Blue circle ...

Page 44: ...dure Photo 1 1 Disassemble a Sponge as yellow square 2 Unscrew 1 ground screw as green circle 3 Unscrew 4 screws to dis assemble LVPS Bracket Mylar as red circle 4 Unplug 3 Connectors as yellow square 2 12 Disassemble LVPS Bracket Mylar LVPS Module ...

Page 45: ...2 16 P5270 P5270 Refresh Confidential No Procedure Photo 2 Disassemble LVPS Module LVPS Module ...

Page 46: ...2 17 Confidential P5270 P5270 Refresh No Procedure Photo 1 1 Unscrew 4 screws as red circle 2 Disassemble Engine Mod ule 2 13 Disassemble Engine Module Engine Module ...

Page 47: ...270 Refresh Confidential No Procedure Photo 2 1 Unscrew 1 screw as red circle 2 Disassemble thermal switch 3 Unscrew 1 screw as green circle 4 Disassemble Zoom Ring and Focus Ring Thermal Switch Zoom Ring Focus Ring ...

Page 48: ...al P5270 P5270 Refresh No Procedure Photo 1 1 Unscrew 2 screws as red circle 2 Disassemble Mylar 3 Unscrew 1 screw as green circle 4 Disassemble ROD Hide Ray Plate Mylar ROD Hide Ray Plate 2 14 Disassemble ROD Module ...

Page 49: ...2 20 P5270 P5270 Refresh Confidential No Procedure Photo 2 1 Unscrew 2 screws as red circle 2 Disassemble ROD Fix Plate and ROD Module ...

Page 50: ...Refresh No Procedure Photo 1 1 Unscrew 2 screws as red circle 2 Disassemble Color wheel Module 3 Unscrew 1 screw as green circle 4 Disassemble Color Wheel and Photo Sensor 2 15 Disassemble Color Wheel Module Photo Sensor Color Wheel ...

Page 51: ...Procedure Photo 1 1 Unscrew 2 hex screws as green circle 2 Disassemble DMD Board DMD Chip Module 2 1 Rotate the switch as yellow circle 2 Disassemble DMD Chip from DMD Board 2 16 Disassemble DMD Board DMD Chip Module DMD Board DMD Chip Module ...

Page 52: ...2 23 Confidential P5270 P5270 Refresh No Procedure Photo 1 1 Press 1 tennon to loosen the lamp driver cable as yellow square 2 Unscrew 1 screw as red circle 3 Disassemble Mask 2 17 Disassemble Mask Mask ...

Page 53: ...h Confidential No Procedure Photo 1 1 Unscrew 1 screw as red circle 2 Disassemble Interrupt Switch Module 3 Disassemble Interrupt Switch from Interrupt Switch Support 2 18 Disassemble Interrupt Switch Module Interrupt Switch ...

Page 54: ...efresh No Procedure Photo 1 1 Unscrew 1 screw to disas emble Lamp Driver Module as red circle 2 Press 4 tenons as yellow circle 3 Disassemble Lamp Driver from Lamp Driver Support 2 19 Disassemble Lamp Driver Module Lamp Driver Module ...

Page 55: ...5270 P5270 Refresh Confidential No Procedure Photo 1 1 Unscrew 3 screws to dis assemble Blower Module as red circle 2 Disassemble all compo nents of Blower Module 2 20 Disassemble Blower Module Blower Rubber ...

Page 56: ...2 27 Confidential P5270 P5270 Refresh No Procedure Photo 1 1 Unscrew 2 screws as red circle 2 Disassemble Bottom Sup port Shielding 2 21 Disassemble Bottom Support Shielding Bottom Support Shielding ...

Page 57: ...2 28 P5270 P5270 Refresh Confidential No Procedure Photo 1 Disassemble the Rubber as red square 2 22 Disassemble Elevator Module Rubber ...

Page 58: ...Confidential P5270 P5270 Refresh No Procedure Photo 2 1 Unscrew 2 screws as red circle 2 Disassemble 1 Spring as yellow square 3 Press 1 tenon to disassemble all compo nents of Elevator Module as red square ...

Page 59: ...2 30 P5270 P5270 Refresh Confidential No Procedure Photo 3 The disassembly is complet ed Bottom Cover ...

Page 60: ...e Standby power cord plugged in OFF OFF ON OFF Lamp retry OFF OFF OFF Quick Flash Turning off cooling state OFF OFF Quick Flash OFF Turning off cooling completed OFF OFF ON OFF Error thermal failure OFF OFF OFF ON Error fan lock failure OFF Quick Flash OFF ON Error lamp breakdown ON OFF OFF ON Error color Wheel fail Quick Flash OFF OFF ON ...

Page 61: ...f projector after 5 cycles Close lens cap while projector is op erating for the model with sliding lens cover only 2 x So 0 1s Off 0 1s periodically per 3 sec onds Totally 5 cycles Turn off projector after 5 cycles Power off power button pressed twice So 0 3s Fan lock So 0 1s periodically per second Overheat 2 x So 0 1s Off 0 1s periodically per sec ond Lamp error 3 x So 0 1s Off 0 1s periodically...

Page 62: ...Status a Lamp LED Light Check Lamp Check Lamp Driver Check Main Board b Temp LED Light Check Thermal Sensor Check Thermal Switch Check Fan c Color Wheel Check Color Wheel Check Photo Sensor 3 No Image Ensure the Signal Cable and Source work If you connect multiple sources at the same time use the Source button on the control panel to swtich Ensure all connectors are securely connected and aren t b...

Page 63: ...o Sensor Board Check Lamp Module Check Color Wheel Check DMD Board Check Main Board 8 Color Abnormal Do Reset of the OSD Menu Adjust Color Wheel Index Check Main Board Check DMD Board Check Color Wheel 9 Poor Uniformity Shadow Ensure the Projection Screen without dirt Ensure the Projection Lens is clean Ensure the Brightness is within spec Replace the Lamp if the Brightness is less than spec Check...

Page 64: ...dure 12 Remote Controll or Control Panel Failed Remote Control a Check Battery b Check Remote Control c IR Receiver Control Panel a Check FPC b Check Keypad c Check Main Board 13 Function Abnormal Do Reset of the OSD Menu Check Main Board Check DMD Board ...

Page 65: ...he screen adjust Screw 1 to adjust ROD position If there are shadows at TOP Bottom side of the screen adjust Screw 2 to adjust ROD position Screw 1 should be adjusted first and then Screw 2 3 Procedure adjustment Change the screen to white screen Adjust the screws by using the rod on the engine module to readjust the image adjust until the yel lowish or bluish parts disappeared Note To avoid over ...

Page 66: ...nted on the Security Card This unique password is a back door of Administrator Password which will be accepted by projec tor anytime no matter what the Administrator Password is How to get the Universal Password 1 Click the AcerSNID 2 Input SNID number SNID number is on the Security Card 3 Click Calculate Then the Universal Password will ap pear ...

Page 67: ...ector and input the signal 2 Do the following action sequentially to enter service mode menu 1 Press Power Left Left and Menu button sequentially 2 Service Mode will be shown 3 Choose Exit to leave the Service Mode after all Chapter 4 Function Test Alignment Procedure Left button Power button Menu button Change Parts Update Version Update Color Wheel Index Reset Lamp Use Time Factory Reset EDID De...

Page 68: ...P5270 P5270 Refresh the unit should be run in Refer to the table below Symptom Run in Time Normal Repair 2 Hours NFF 4 Hours Auto Shutdown 6 Hours 4 3 Reset OSD No Step 1 After final QC step we have to erase all saved change again and restore the OSD default setting The following actions will allow you to erase all end users settings and restore the original setting 1 Please enter OSD menu 2 To ex...

Page 69: ...and lamp off for 10 min for 4 cycles Screen Defects While replacing DMD Chip DMD BD and MB Press power left left menu Choose Burn In Test enter Lamp On Min Press right key to adjust the time 50 Lamp Off Min Press right key to adjust the time 10 Set burn in cycle Press right key to adjust the cycle After setting up the time choose Burn In mode and hit enter Figure Zone A B Definition ...

Page 70: ...not re adjust by the following steps 1 Select Frequency function to adjust the total pixel number of pixel clock in one line period 2 Then select Tracking function and use right or left arrow key to adjust the vgalue to minimize video flicker 2 Boundary Horz And Vert position of video should be adjustable to be the screen frame Test Signal 1024x768 60Hz Test Pattern General Adjust Resync or Freque...

Page 71: ...n Master Equipment Quantum Data 802B or CHROMA2327 Use 720P 1080i signal Master pattern to do HDTV test Color cannot discolor to pur ple and blue If the line disclors it s normal If the test result was in discoloration or flicker ing please return the unit back to the repair center 5 Color Performance Test Signal 1024x768 60Hz Test Pattern PANA ICON Pattern 64 GRAYS RGBW Please check and ensure if...

Page 72: ...in normal condition If not please return the unit to repair area Please check and see if there are dead pixels on DMD Chip The total number and distance of dead pixels should be compliant with the spec 7 Light Leak The unit can t accept the leak age is brighter than Gray 10 patterns Test Signal 1024x768 60Hz Test Pattern Gray 10 Patterns Please check and see if the light leaks Note The unit cannot...

Page 73: ...l issue Test Pattern R G B and White Color 9 Dead Pixel Bright pixel Cannot accept any bright pixel Test Pattern Full Black Dead Pixel Dark pixel The numbers of dead pixel should be small er or amount to 6 pixel Test Pattern Full White 10 Blemish Bright The bright blem ish cannot be accepted if the problem appear with Gary 30 patterns Test Pattern Full Black Gray 30 ...

Page 74: ... 8 P5270 P5270 Refresh Confidential No Step Specification Procedure Photo 11 Blemish Dark The dark blem ish can not be accepted if the problem appear with Blue 60 patterns Test Pattern Full white Blue 60 ...

Page 75: ...y file has to put in PC and set right path in 5 4 step 4 for P5270 Hardware Chapter 5 Firmware Upgrade Procedure 5 2 Firmware Upgrade Mode Item Photo Before doing firmware upgrade please get into firmware mode first How to get into firmware mode Hold on MENU button then plug in power cord MENU button must be held until Temp and Lamp LED light up 8M flash library file has to put in PC and set right...

Page 76: ...p Procedure Photo 1 Execute FW pro gram Choose DLP Composer Lite v7 1 Setup program 2 Next Click Next button 3 Next 1 Reading the License Agreement rules 2 Choose I accept and agree to be bound by all the terms and conditions of this License Agreement icon 3 Click Next button 4 Next Click Next button 2 3 ...

Page 77: ...5 3 P5270 P5270 Refresh Confidential No Step Procedure Photo 5 Next Click Next button 6 Next Click Next button 7 Process ing The program is execut ing Initializing status ...

Page 78: ...P5270 P5270 Refresh 5 4 Confidential No Step Procedure Photo 8 Finish Then press Finish to end installation 9 Restart Press Yes to restart the computer ...

Page 79: ...jector 2 Link PC USB port and projector USB port by USB Cable 2 Installa tion 1 Found new hardware wiszard will be appe arred on the screen 2 Select Install the software automatically Recommended 3 Then click Next 3 Finish Click Finish to end the installation USB Driver Installation Procedure 2 3 ...

Page 80: ...ble 2 Execute the DLP Compose TM Lite 7 1 3 Click Edit and Prefer ences 4 1 Click Library 2 Click Browse botton and and navigate to the directory where you put DLP Composer Lite V7 1 Set up in for P5270 Note For P5270 please choose Library V7 10330 For P5270 Refresh please choose 8M flash 5 1 Click Communica tions 2 Choose USB 3 Click OK 5 4 Firmware Upgrade Procedure 1 2 3 For P5270 For P5270 Ref...

Page 81: ... Bus to erase the flash memory Note If the error mes sage cannot open USB driver No projectors found appears please unplug the USB Cable and replug then check Driver Finally re do 4 Click Reset Bus to erase the flash memory 7 1 If the firmware is ready click Start Download to process the firmware upgrade 2 Click Yes to erase the flash memory 8 Proceed ing Proceeding Picture 1 2 3 4 2 1 ...

Page 82: ...ntering Service Mode please refer to Chapter 4 Function Test and Alignment Procedure 5 5 Waveform Download 1 Plug in power cord and hold on Up button then press the Power button Note After about 5s Power LED turns blue while Temp LED flashes in red for about 2s then release the Up button 2 After that please check the LED status and judge the actions as the following table LED Status Result Power b...

Page 83: ... display device and the PC graphics adapter The system uses this information for configuration purposes so the P5270 and system can work together Note 1 If a display device has digital input ports like DVI or HDMI but without EDID in its main board the display device will show no image while the input source is digital signal 2 P5270 Refresh is the same as P5270 here we take P5270 for example 3 Af...

Page 84: ...6 2 P5270 P5270 Refresh Confidential Item Photo P5270 Projector PC RS 232 Cable F to M 42 83618G001 VGA Cable 42 87305G001 ...

Page 85: ...6 3 P5270 P5270 Refresh Confidential Item Photo Power Cord 42 53506G002 DVI Cable 42 83N06G001 EDID Fixture 80 00001 001 Power Adapter 47 57803G001 Adapter HDMI M To DVI D F 42 82B13G001 ...

Page 86: ...p by RS232 Cable 2 Connect P2 of Fixture with VGA port of P5270 by VGA Cable 3 Connect P3 of Fixture with DVI port of P5270 by DVI Cable 4 Plug Power Adapter to Power CNN 5 Plug Power Cord to P5270 unit Note Confirm JP3 is Close status 6 2 Setup Procedure VGA1 VGA2 DVI VGA Port VGA1 Power Port DVI Port P1 P2 P3 Power CNN VGA2 DVI ...

Page 87: ...Program 2 Process 1 Check the COM port is COM 1 2 Click the Model button 3 Choose the source file P5270_ACER_ EDID_20070412 and then open it 3 Process 1 Key in the Serial Number into the Barcode blank space 2 In Write Source Select item select Analog Digital 3 Click Program button 3 6 3 EDID Key In Procedure 2 1 2 1 3 ...

Page 88: ...dential No Step Procedure Photo 4 Process 1 Please change the cable to Analog will be shown on the screen 2 Please press Ok button 5 Process 1 Please change the cable to Digital will be shown on the screen 2 Please press Ok button ...

Page 89: ...K will be shown on the screen 7 Process 1 Change the VGA cable to VGA2 and select Ana log In Write Source Select item 2 Key in the Se rial Number into the Barcode blank space 3 Click Program button 8 Finish 1 Please press Ok button 2 OK will be shown on the screen 1 2 3 1 2 ...

Page 90: ...ead item select Analog and Trans 2 Please press Read button 10 Read EDID informa tion 1 EDID Inform ations will show the result 2 If EDID s informa tion is correct then select Digital and Trans in the Read item 3 Click Read 11 Read EDID informa tion EDID Informations will show the result 1 2 3 1 2 ...

Page 91: ...all ports 1 Connect P1 of Fixture with COM Port of PC Laptop by RS232 Cable 2 Connect P2 of Fixture with P3 by DVI Cable 3 Plug P4 to P5270 HDMI Port 4 Plug Power Adapter to Power CNN Note Confirm JP3 is Close status 6 4 Setup Procedure HDMI HDMI Port P1 P2 Power CNN P3 P4 ...

Page 92: ... the COM port is COM 1 2 Click the Model button 3 Choose the source file P5270_ACER_ EDID_20070412 and then open it 3 Process 1 Key in the Serial Number into the Barcode blank space 2 In Write Source Select item select Digital 3 Click Program button 4 Process Press OK 3 2 1 1 2 3 ...

Page 93: ...Confidential No Step Procedure Photo 5 Finish 1 OK will be shown on the screen 6 Read EDID informa tion 1 In the Read item select Digital and Trans 2 Please press Read button 7 Finish EDID Informations will show the result 1 2 ...

Page 94: ...out 2s then release the Down button 2 After that please check the LED status and judge the actions as the following table Note if fail please do the actions as above steps item 1 2 S N General rule Use the last 1 digit code as red word for language information LED Status Result Power blue TEMP red LAMP red OK Power blue TEMP red Fail Language code F Default Language 1 English 2 Thailand 3 Japan 4 ...

Page 95: ...7 1 P5270 P5270 Refresh Appendix A Exploded Overview D C P5270 Confidential ...

Page 96: ...0 H 7 8 0 7 D 1 7 1 1 D X E L U D O M R E V O C T F E L 7 3 0 0 G 4 0 H 7 8 1 6 0 7 2 5 P G N I D L E I H S T R O P P U S P O T 8 0 8 0 G 3 2 1 A W 5 8 i N 8 3 M P A T N A P W E R C S 9 8 0 3 G G A 5 0 0 5 8 K O L Y N I N 8 L 5 3 H 0 4 4 O I X E H W E R C S 0 1 1 0 0 G 4 3 V 6 8 0 7 W 0 2 2 S P I L I H P E L U D O M P M A L Y S S A 1 1 0 6 0 G 3 2 3 A 0 5 8 K C A L B 6 3 M H C E M F P W E R C S 2 ...

Page 97: ...8 1 5 D 1 7 1 1 D X S N E L D A P Y E K 4 3 0 0 G 3 2 H 7 8 1 5 1 7 2 5 P E L U D O M Y E K N O I T C N U F 5 1 0 0 G 3 0 H 7 8 0 8 D 1 7 1 1 D X R O F D B D A P Y E K A B C P 6 1 0 0 G 3 0 3 0 0 2 4 2 5 7 P E m m 0 2 1 5 0 P P 4 2 B M O T D A P Y E K C F F 7 0 4 0 G 3 2 1 A Y 5 8 m 2 2 0 2 D A 4 3 M I N D A E H T A L F G N I P P A T W E R C S Note Please refer to RSPL for updated part numbers P52...

Page 98: ... 0 6 2 5 P K S A M T N O R F 3 1 0 0 G 9 0 H 7 8 1 5 D 1 7 1 1 D X S N E L R I T N O R F 4 2 0 0 G 0 1 H 7 8 1 5 0 6 2 5 P R O O D S N E L 5 1 0 0 G 2 2 H 7 8 1 5 D 1 7 1 1 D X T U C T H G I L T N O R F 6 1 0 0 G 5 0 M 7 8 0 8 1 6 7 P E R O F D B R O S N E S R I A B C P Note Please refer to RSPL for updated part numbers 7 4 P5270 P5270 Refresh ...

Page 99: ...1 0 0 G 1 0 K 7 8 9 4 W 2 m h o 8 R E K A E P S 3 2 0 0 G 7 0 H 7 8 1 5 0 6 2 5 P R E V O C T H G I R 4 2 0 0 G 4 1 H 7 8 1 5 1 7 2 5 P H C T A L R E V O C P M A L 5 2 0 0 G 9 0 H 7 8 1 6 0 6 2 5 P G N I R P S H C T A L 6 1 0 0 G 8 0 6 9 8 2 5 6 2 7 D P 9 5 7 P E t 2 R C E G N O P S R E K A E P S Note Please refer to RSPL for updated part numbers ...

Page 100: ... e D 1 2 0 0 G 4 0 H 7 8 1 5 0 6 2 5 P R E V O C T F E L 2 2 0 0 G 4 1 H 7 8 1 5 1 7 2 5 P H C T A L R E V O C P M A L 3 2 0 0 G 9 0 H 7 8 1 6 0 6 2 5 P G N I R P S H C T A L Note PleConfidentialase refer to RSPL for updated part numbers 7 6 P5270 P5270 Refresh ...

Page 101: ...r c s e D 1 2 0 0 G 3 1 H 7 8 1 5 0 6 2 5 P C I T S A L P T O O F R O T A V E L E 2 2 0 0 G 2 0 H 7 8 2 5 0 6 2 5 P R E B B U R T O O F R O T A V E L E ELEVATOR FOOT MODULE Note Please refer to RSPL for updated part numbers P5270 P5270 Refresh ...

Page 102: ... 9 1 7 P E 0 0 2 6 C S B A C P R E D L O H R O T A V E L E 5 1 0 0 G 3 1 9 5 8 1 6 0 1 9 P E 4 0 3 S U S G N O R P S R O T A V E L E 6 1 0 0 G 4 1 8 6 8 1 6 0 2 1 D P G N I R P S D N E T X E R O T A V E L E 7 1 0 0 G 9 0 H 7 8 0 7 D 1 7 1 1 D X E L U D O M T O O F R O T A V E L E 8 0 4 0 G 6 2 3 A 1 5 8 K C A L B 4 6 2 M H C E M N A P W E R C S 9 2 0 0 G 2 1 H 7 8 1 5 0 6 2 5 P Y E K R O T A V E L...

Page 103: ...i t p i r c s e D 1 2 0 0 G 2 0 J 7 8 9 4 N A F R E W O L B m m 5 2 0 5 Y A 5 V K P 5 0 2 1 B G N O N U S 2 1 0 0 G 6 0 3 7 8 2 5 P M 0 0 1 2 E M A R F N A F R E W O L B R E B B U R Note Please refer to RSPL for updated part numbers P5270 P5270 Refresh ...

Page 104: ... 8 0 7 M R O F E V A W H T I W R E V I R D P M A L W 0 2 2 I D I V S P I L I H P L E B A L 6 1 0 0 G 6 0 M 3 8 2 4 S P V L O T R E V I R D P M A L m m 0 8 1 0 2 P 2 A W E L B A C P M 0 0 4 2 7 1 0 0 G 1 0 F 5 8 2 4 P M A L O T R E V I R D P M A L m m 0 6 1 2 2 P 2 A W E L B A C 0 9 6 1 P E 8 0 6 0 G 3 2 1 A 1 5 8 I N 6 3 M H C E M N A P W E R C S 9 1 0 0 G 1 7 4 0 0 2 4 1 6 7 P E D R A O B N I A M...

Page 105: ...ODULE m e t I N P n o i t p i r c s e D 1 2 0 0 G 1 2 H 7 8 1 5 0 6 2 5 P R E V O C K C A B 2 2 0 0 G 1 0 W 7 8 5 3 0 7 2 5 P L E B A L E M A N L E D O M 3 1 0 0 G 2 0 U 7 8 5 3 0 6 2 5 P R A L Y M O I Note Please refer to RSPL for updated part numbers ...

Page 106: ... J 7 8 9 4 A m m 5 2 0 8 0 8 2 V T P 8 0 2 1 E D K N O N U S 2 0 8 0 G 3 2 3 A 1 5 8 N E E R G K C A L B 8 3 M H C E M N A P W E R C S 3 1 0 0 G 1 0 W 5 8 1 4 0 7 L 3 H 9 W T E K S A G I M E 4 3 0 0 G 1 0 H 7 8 1 6 1 7 2 5 P T E K C A R B 5 2 0 8 N A F Note Please refer to RSPL for updated part numbers ...

Page 107: ...7 13 Confidential P5270 P5270 Refresh BOTTOM HOUSING MODULE ...

Page 108: ...8 0 G 3 2 1 D W 5 8 i N R E H S A W W 8 3 P A T N A P W E R C S 9 2 0 0 G 2 0 H 7 8 1 6 0 6 2 5 P W 0 3 2 L A T E K C A R B S P V L 0 1 0 6 0 G 3 2 3 A 1 5 8 r P z E K C A L B 6 3 M H C E M N A P W E R C S 1 1 1 0 0 G 8 2 K 7 8 1 5 2 5 7 P E S P V L R O F R A L Y M 2 1 1 0 0 G 8 0 W 7 8 0 7 1 7 2 5 P E L U D O M 5 2 0 8 N A F Y S S A 3 1 1 0 0 G 2 0 W 7 8 0 7 D 1 8 2 1 D X A B C P B M Y S S A 4 1 ...

Page 109: ...0001 59 10 1 2 3 4 5 1 EYJ7501000 Part Number excluded dot 2 721 Week Code ex 2007 7 twenty oneweeks of the year 21 3 00001 Serial Numbers 4 59 Manufacturing Code 5 10 Projector Version EX EYJ5501000721000015910 This label represents the serial number for P5270 It is produced for China at CPC on twenty one weeks of 2007 Its serial code is 00001 ...

Page 110: ...x 2008 8 twenty one weeks of the year 21 3 00001 Serial Numbers 4 59 Manufacturing Code 5 2 Projector Version 1 Default Language Information EX EYJ7401000821000015921 This label represents the serial number for P5270 refresh It is produced for China at CPC on twenty one weeks of 2008 Its serial code is 00001 Note About the discrimination between refresh model and non refresh model please refer to ...

Page 111: ...7 17 Confidential P5270 P5270 Refresh II PCBA Code Definition PCBA Code for Projector A B XXX XXXXXXXXX CC XXX EEEE 1 2 3 4 5 6 7 1 ID 2 Vendor Code 3 Firmware Version 4 P N 5 Revision 6 Date Code 7 S N ...

Page 112: ...er Not supply 13 0 IR 014 Re Sync 14 0 IR 015 Source Analog RGB for D sub 15 0 IR 016 Source Digital RGB 16 0 IR 017 Source PbPr for D sub 17 0 IR 018 Source S Video 18 0 IR 019 Source Composite Video 19 0 IR 020 Source Component Video 20 0 IR 021 Aspect ratio 16 9 21 0 IR 022 Aspect ratio 4 3 22 0 IR 023 Volume 23 0 IR 024 Volume 24 0 IR 025 Brightness 25 0 IR 026 Contrast 26 0 IR 027 Color Tempe...

Page 113: ...36 Query Native display resolution 36 0 IR 037 Query company name 37 0 IR 040 Aspect ratioL Box Not supply 38 0 IR 041 Aspect ratio 1 1 Not supply 39 0 IR 042 Keystone Up 40 0 IR 043 Keystone Down 41 0 IR 044 Keystone Left Not supply 42 0 IR 045 Keystone Right Not supply 43 0 IR 046 Zoom 44 0 IR 047 e Key 45 0 IR 048 Color RGB 46 0 IR 049 Language 47 0 IR 050 Source HDMI P5270 P5270 Refresh 7 19 C...

Reviews: