Chapter 3
93
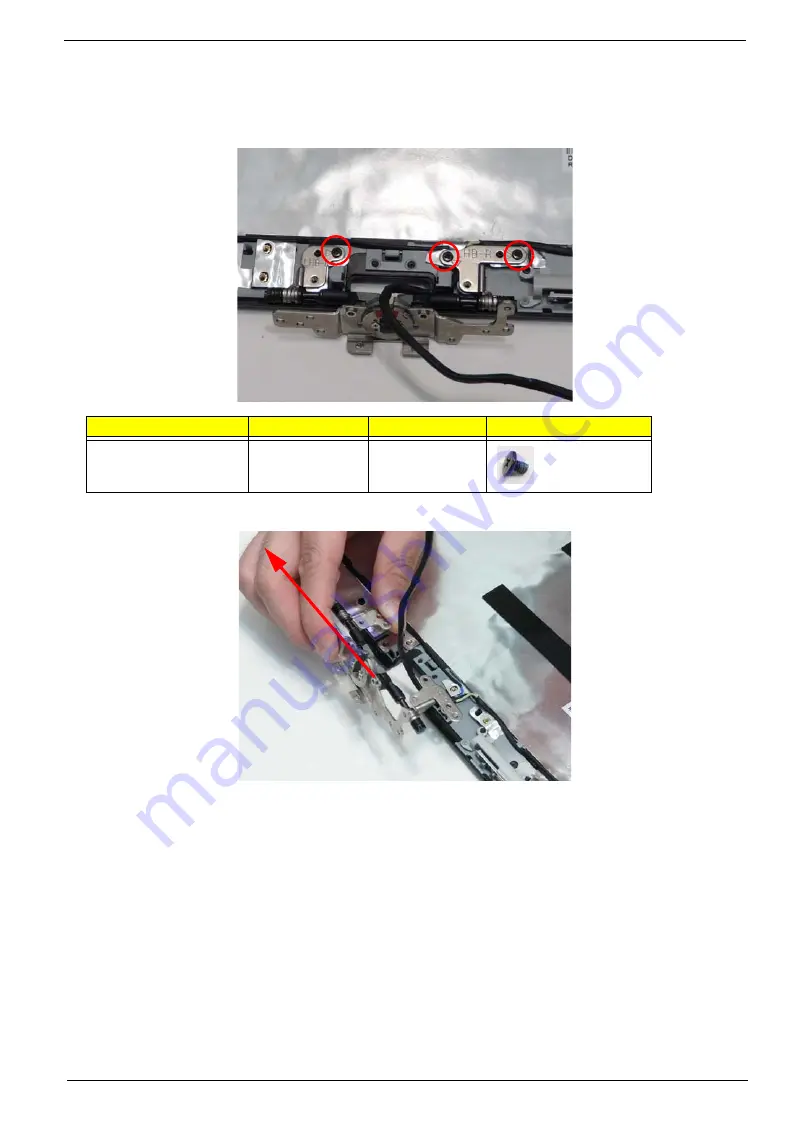
Removing the Hinge
1.
See “Removing the LCD Panel” on page 86.
2.
Remove the three (3) screws.
3.
Remove the hinge.
Step
Screw
Quantity
Screw Type.
Hinge
M2*3
3
Summary of Contents for Aspire 1820PT Series
Page 6: ...vi ...
Page 10: ...x Table of Contents ...
Page 13: ...Chapter 1 3 System Block Diagram ...
Page 32: ...22 Chapter 1 ...
Page 48: ...38 Chapter 2 ...
Page 64: ...54 Chapter 3 4 Unlock the FPC 5 Remove the FPC and keyboard ...
Page 66: ...56 Chapter 3 4 Remove the hinge cap 5 Remove the hinge bezel ...
Page 70: ...60 Chapter 3 10 Pull the upper cover away ...
Page 94: ...84 Chapter 3 7 Pry up the bezel top edge and remove ...
Page 119: ...Chapter 3 109 7 Insert the stylus ...
Page 148: ...138 Chapter 3 2 Replace the HDD in the bay 3 Adhere the black tape 4 Replace the HDD FPC ...
Page 202: ...192 Appendix A ...
Page 212: ...202 ...
Page 215: ...205 ...
Page 216: ...206 ...


