


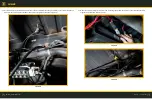


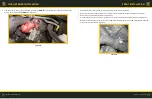


17. Slide the seamless tank back into the original location and re-tighten tank straps. (Figures 20, 21)
FIGURE 20
FIGURE 21
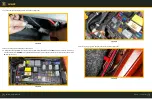
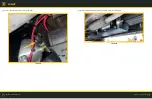
18. The bracket shown below will go over top of the cross member at the front of the tank bracket. Using the supplied
carriage bolt and flange nut through the top of the bracket, tighten to clamp bracket to the cross member. Then
insert the hex bolt and washer into the front. (Figures 22, 23)
FIGURE 22
FIGURE 13
25
26
AA-4397 Installation Manual
REV 01 | 05/25/2023
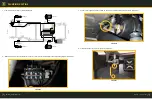
WIRING


