


Configuring the Wallbox eMH3 –
Setting up an OCPP backend |
39
2
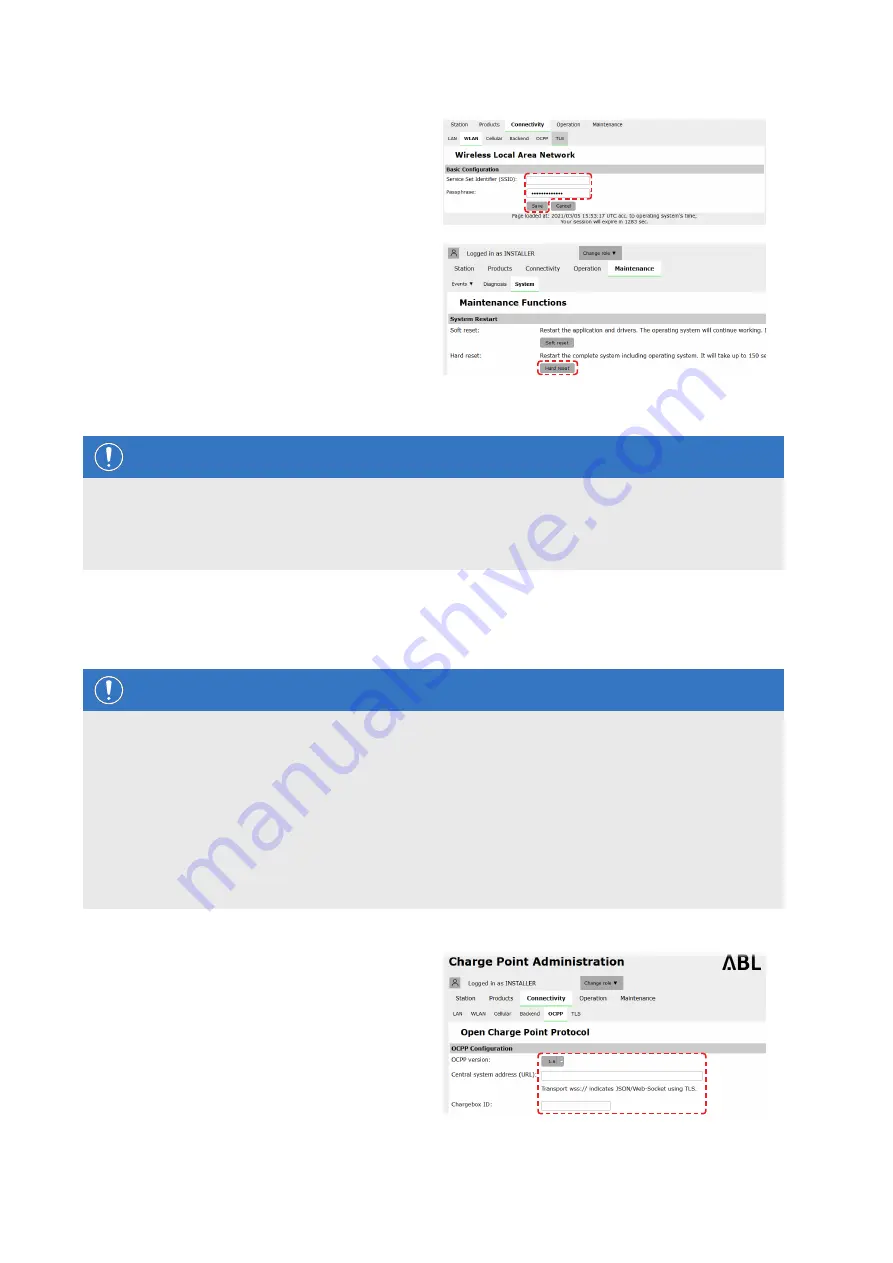
Switch to the
Connectivity > WLAN
tab and
enter the information for
Service Set Identifier
(SSID)
and the
Passphrase
for the network.
y
Confirm by clicking the
Save
button.
3
Switch to the
Maintenance > System
tab and
click the
Hard reset
button in the
System Restart
section.
y
Your Controller/Extender system will now
restart with the selected settings.
A WLAN connection can now be established between the Controller charging station and the backend via WebSocket
or WebSocketSecure.
NOTE
Communication with the backend
The router's firewall must be set up in such a way that communication is possible between the charging
station and the OCPP backend.
You can obtain all the access data from your backend operator.
Setting up an OCPP backend
The backend operator will provide all the information required for registering your Controller/Extender system, which
you then need to enter via the
Charge Point Administration
application.
NOTE
Supported network protocols
Communication between the Controller/Extender system and the backend can take place via the following net-
work protocols:
http:// (SOAP)
If communication is set up via SOAP, the local port and path for the endpoint (the Controller charging station)
must be specified.
ws:// (WebSocket) / wss:// (WebSocketSecure)
If communication is set up via WSS, you must check that the TLS certificates are correct and upload the
server certificate if necessary.
Proceed as follows to set up communication with the backend:
1
Click the
Connectivity > OCPP
tab.
y
In the
OCPP version
selection box, select the
OCPP version supported by the backend.
y
Under
Central system address (URL)
, enter
the Internet address of your backend provider.
y
In
Chargebox ID
, enter the OCPP name of the
Controller/Extender group.


