BIOS Setup
3-1
Chapter 3. BIOS Setup
The BIOS is a program located on a Flash Memory chip on the motherboard. This program will not be
lost when you turn the computer off. This program is also referred to as the boot program. It is the only
channel the hardware circuit has to communicate with the operating system. Its main function is to
manage the setup of the motherboard and interface card parameters, including simple parameters such as
time, date, hard disk drive, as well as more complex parameters such as hardware synchronization, device
operating mode,
CPU
SoftMenu
™
III
features and setup of CPU speed. The computer will operate
normally, or will operate at its best, only if all of these parameters are correctly configured through the
BIOS.
Don’t change the parameters inside the BIOS unless you fully understand their meanings and
consequences:
The parameters inside the BIOS are used to setup the hardware synchronization or the
device-operating mode. If the parameters are not correct, they will produce errors, the computer will crash,
and sometimes you will not even be able to boot the computer after it has crashed. We recommend that
you do not change the parameters inside the BIOS unless you are very familiar with them. If you are not
able to boot your computer anymore, please refer to the section “
Erase CMOS data
” in Chapter 2.
When you start the computer, the BIOS program controls it. The BIOS first operates an auto-diagnostic
test called POST (Power On Self Test) for all of the necessary hardware. It then configures the parameters
of the hardware synchronization, and detects all of the hardware. Only when these tasks are completed
does it give up control of the computer to the next level, which is the operating system (OS). Since the
BIOS is the only channel for hardware and software to communicate, it is the key factor for system
stability, and in ensuring that your system performs at its best. After the BIOS has achieved the
auto-diagnostic and auto-detection operations, it will display the following message:
PRESS DEL TO ENTER SETUP
The message will be displayed for three to five seconds, if you press the <
Del
> key, you will access the
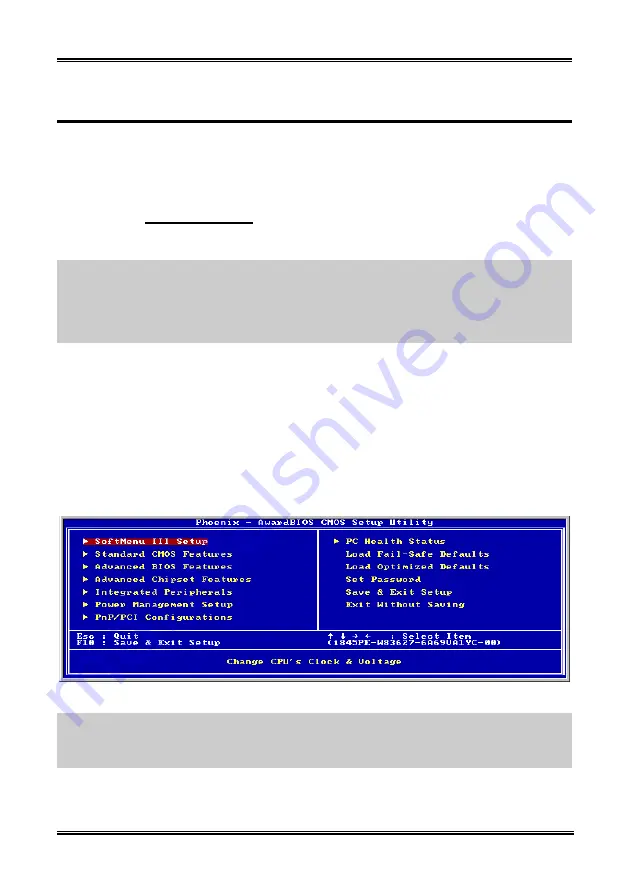
BIOS Setup menu. At that moment, the BIOS will display the following screen:
Figure 3-1. CMOS Setup Utility
NOTE:
Because the BIOS menu is being constantly improved to increase stability and performance, the
BIOS screens in this manual may not completely match your BIOS version. All the default settings in this
chapter are taken from the Load Optimized Defaults settings, which are different from those taken from
Load Fail-Safe Defaults.
In the BIOS Setup main menu of Figure 3-1, you can see several options. We will explain these options
step by step in the following pages of this chapter, but let us first see a short description of the function
keys you may use here:
User’s Manual
Summary of Contents for BE7
Page 19: ...Introduction 1 3 1 2 Layout Diagram BE7 G User s Manual ...
Page 20: ...1 4 Chapter 1 1 3 Layout Diagram BE7 S BE7 Series ...
Page 21: ...Introduction 1 5 1 4 Layout Diagram BE7 RAID User s Manual ...
Page 22: ...1 6 Chapter 1 1 5 Layout Diagram BE7 B BE7 Series ...
Page 23: ...Introduction 1 7 1 6 Layout Diagram BE7 User s Manual ...
Page 24: ...1 8 Chapter 1 1 8 Chapter 1 BE7 Series BE7 Series ...
Page 39: ...Hardware Setup 2 15 13 IDE1 IDE2 and IDE3 IDE4 Connectors User s Manual ...
Page 72: ...A 2 Appendix A A 2 Appendix A BE7 Series BE7 Series ...
Page 84: ...E 2 Appendix E BE7 Series ...
Page 86: ...F 2 Appendix F F 2 Appendix F BE7 Series BE7 Series ...
Page 112: ...L 6 Appendix L Thank You ABIT Computer Corporation http www abit com tw BE7 Series ...


