
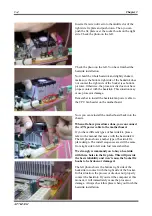
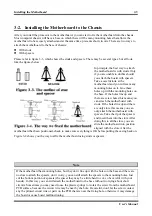


Installing the Motherboard
User’s Manual
3-13
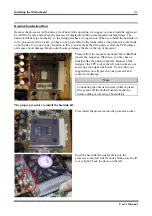
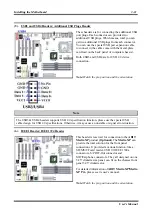
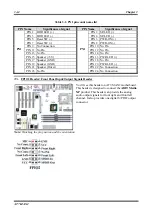
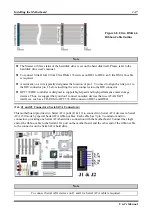
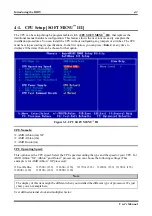
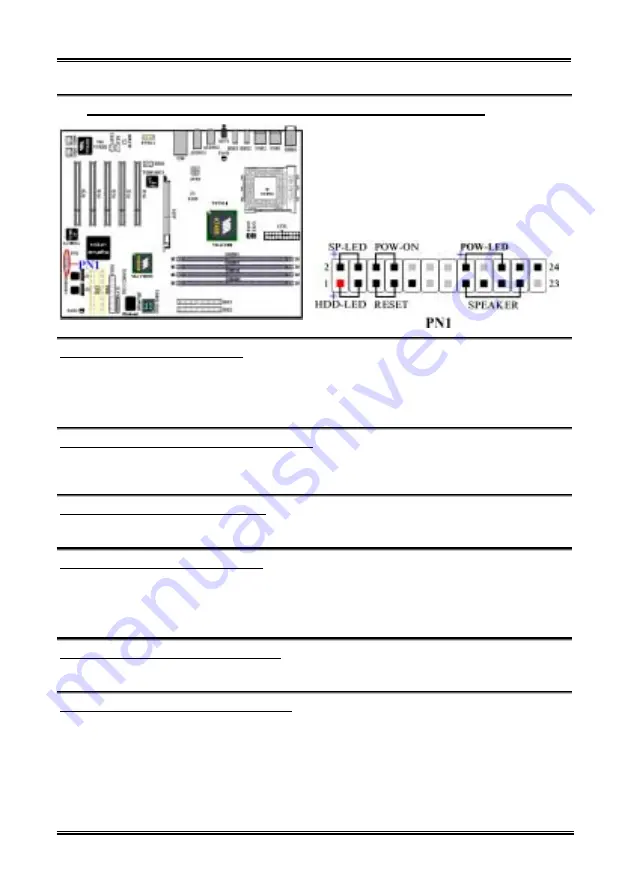
(8). PN1 Headers: The Headers for Chassis’s Front Panel Indicators and Switches
PN1 are for switches and indicators for the chassis’s
front panel, there are several functions that come
from this header. You have to watch the pin position
and the orientation, or you may cause LED do not
light up. Figure below shows you the PN1 functions
of the pins.
PN1 (Pin 1 & 3): HDD LED Header
Attach the cable from the case’s front panel HDD LED to this header. If you install it in the wrong
direction, the LED light will not illuminate correctly.
Note:
Watch the HDD LED pin position and the orientation.
PN 1 (Pin 5 & 7): Hardware Reset Switch Header
Attach the cable from the case’s front panel Reset switch to this header. Press and hold the reset button
for at least one second to reset the system.
PN 1 (Pin 15-17-19-21): Speaker Header
Attach the cable from the system speaker to this header.
PN 1 (Pin 2 & 4): Suspend LED Header
Insert the two-threaded suspend LED cable into this header. If you install it in the wrong direction, the
LED light will not illuminate correctly.
Note:
Watch the Suspend LED pin position and the orientation.
PN 1 (Pin 6 & 8): Power On Switch Header
Attach the cable from the case’s front panel power on switch to this header.
PN 1 (Pin 16-18-20): Power On LED Headers
There is a specific orientation for pins 1 through 3. Insert the three-threaded power on LED cable to this
header. Check to make sure the correct pins go to the correct connectors on the motherboard. If you
install them in the wrong direction, the power LED light will not illuminate correctly.
Note:
Watch the power LED pin position and orientation.
For the PN1 pin’s count-name list, please refer to table 3-2.
Summary of Contents for AB-AT7-MAX2
Page 2: ......
Page 34: ...Chapter 2 AT7 MAX2 2 6 ...
Page 54: ...Chapter 3 AT7 MAX2 3 20 ...
Page 94: ...Chapter 5 AT7 MAX2 5 6 ...
Page 98: ...Chapter 6 AT7 MAX2 6 4 ...
Page 102: ...7 4 Chapter 7 AT7 MAX2 ...
Page 106: ...A 4 Appendix A AT7 MAX2 ...
Page 110: ...Appendix B AT7 MAX2 B 4 ...
Page 118: ...Appendix D AT7 MAX2 D 4 ...
Page 122: ...Appendix E AT7 MAX2 E 4 ...
Page 136: ...H 4 Appendix H AT7 MAX2 ...