
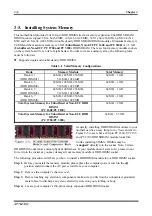

Installing the Motherboard
User’s Manual
3-3
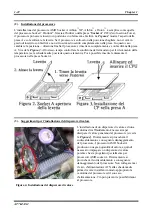
Heatsink Installation Hints
Because the processor will produce a lot of heat while operating, we suggest you use a heatsink approved
by AMD to be safe and to keep the processor temperature within normal operation temperatures. The
heatsink will be large and heavy, so the fixing plate has a strong tension. When you install the heatsink on
to the processor and its socket, you have to very carefully fix the fixing plate to the processor socket hook
on both sides. If you do not pay attention to this, you may make the fixing plate scratch the PCB surface
and cause circuit damage, break socket hooks or damage the die on the top of processor.
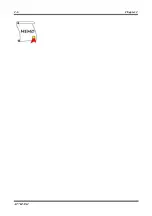
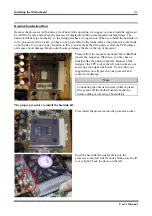
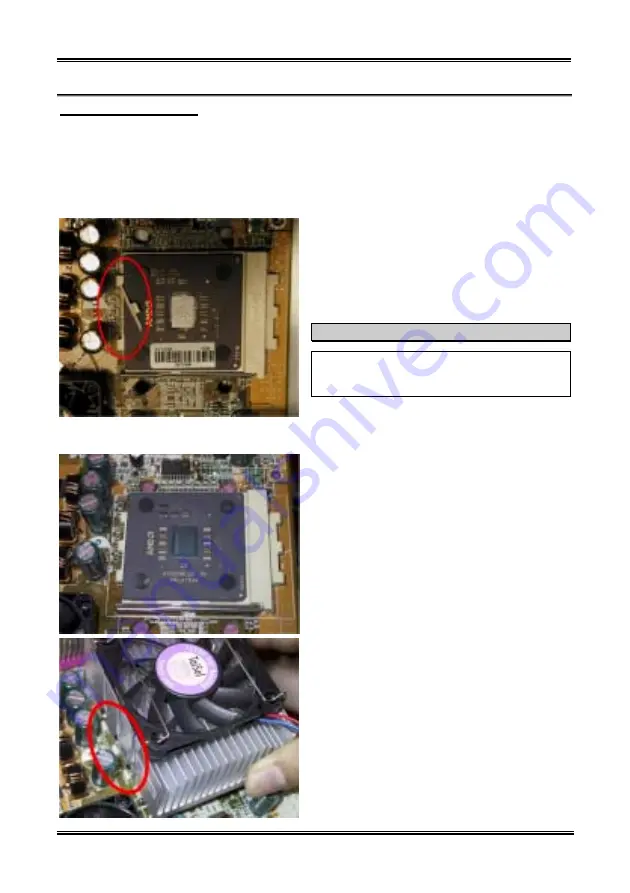
Please follow the sequence metioned below,
Do Not
inverse the sequence. Otherwise, you may have a
situation like the photo on the left. Because of the
design of the CPU socket, the left side hooks are not
as strong as the right side hooks. If you follow our
suggestions you will prevent your processor and
socket from damage.
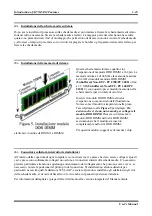
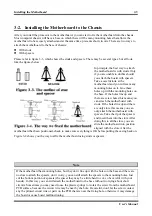
Note
Considering the chassis structure problem, please
always take off the motherboard from chassis,
before adding or removing a heatsink kit.
The proper procedure to install the heatsink kit:
First, install the processor into the processor socket.
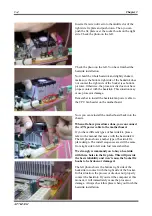
Insert the heatsink left side fix plate into the
processor socket left side fix hooks. Make sure the fit
is very tight. Check the photo on the left.
Summary of Contents for AB-AT7-MAX2
Page 2: ......
Page 34: ...Chapter 2 AT7 MAX2 2 6 ...
Page 54: ...Chapter 3 AT7 MAX2 3 20 ...
Page 94: ...Chapter 5 AT7 MAX2 5 6 ...
Page 98: ...Chapter 6 AT7 MAX2 6 4 ...
Page 102: ...7 4 Chapter 7 AT7 MAX2 ...
Page 106: ...A 4 Appendix A AT7 MAX2 ...
Page 110: ...Appendix B AT7 MAX2 B 4 ...
Page 118: ...Appendix D AT7 MAX2 D 4 ...
Page 122: ...Appendix E AT7 MAX2 E 4 ...
Page 136: ...H 4 Appendix H AT7 MAX2 ...