4 Repair
4.6.3. Replacement of motor, axis 3
315
3HAC020993-001 Revision: G
©
Co
py
rig
h
t 200
4-
200
8 ABB. All righ
ts reser
v
ed.
Removal, motor
The procedure below details how to remove motor, axis 3.
Other tools and
procedures may be
required. See
references to these
procedures in the
step-by-step
instructions below.
These procedures include
references to the tools
required.
Circuit Diagram
See chapter
Circuit diagram
in
the
Product manual,
reference information
.
Equipment, etc. Spare part no.
Art. no.
Note
Action
Note/Illustration
1.
DANGER!
Turn off all electric power, hydraulic and pneumatic
pressure supplies to the robot!
For Foundry Prime robots: Do not turn off the air
pressure to motors and SMB.
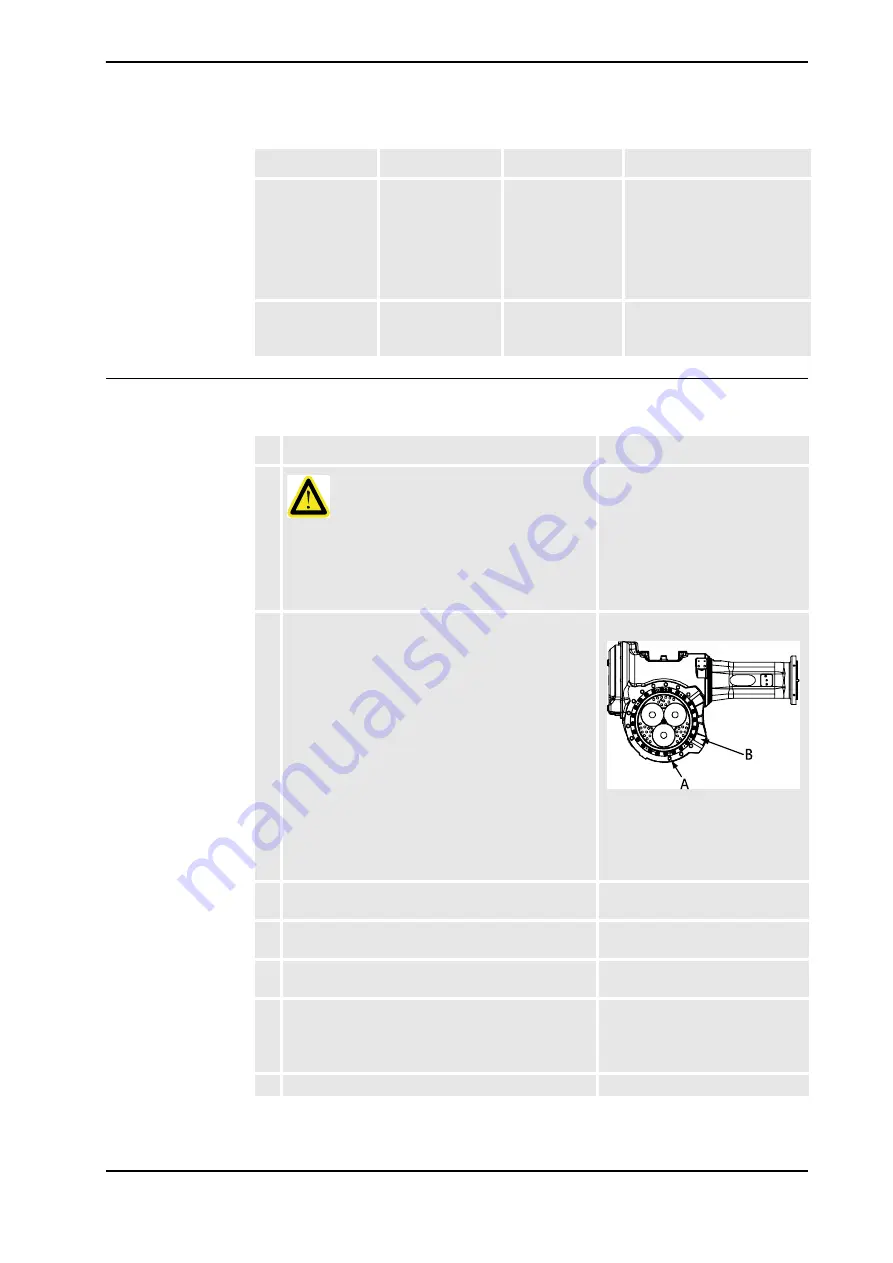
2. Unload the upper arm of the robot by either:
•
Use a fork lift to rest the upper arm onto.
•
Use lifting slings and an overhead crane to
rest the upper arm.
•
Use a mechanical stop to rest the upper arm.
Fit the mechanical stop in the attachment
hole (A) with tightening torque: 115 Nm.
The upper arm must be positioned as horizontal as
possible!
xx0300000051
Fit the mechanical stop to the third
and final attachment hole (A),
below the fixed stop (B) in the
upper arm. See the figure above!
3. Drain the oil from gearbox axis 3.
Detailed in section
.
4. Remove any equipment hindering access to motor
axis 3.
5. Remove the cover on top of the motor by
unscrewing its four attachment screws.
6. Remove the
cable gland cover
at the cable exit by
unscrewing its two securing screws.
Shown in the figure
!
Make sure the gasket is not
damaged!
7. Disconnect all connectors beneath the motor cover.
Continued
Continues on next page


